SalesPlay - Help Center
Top Searches:
Product
Stock
Invoice
Payment
SalesPlay Back Office
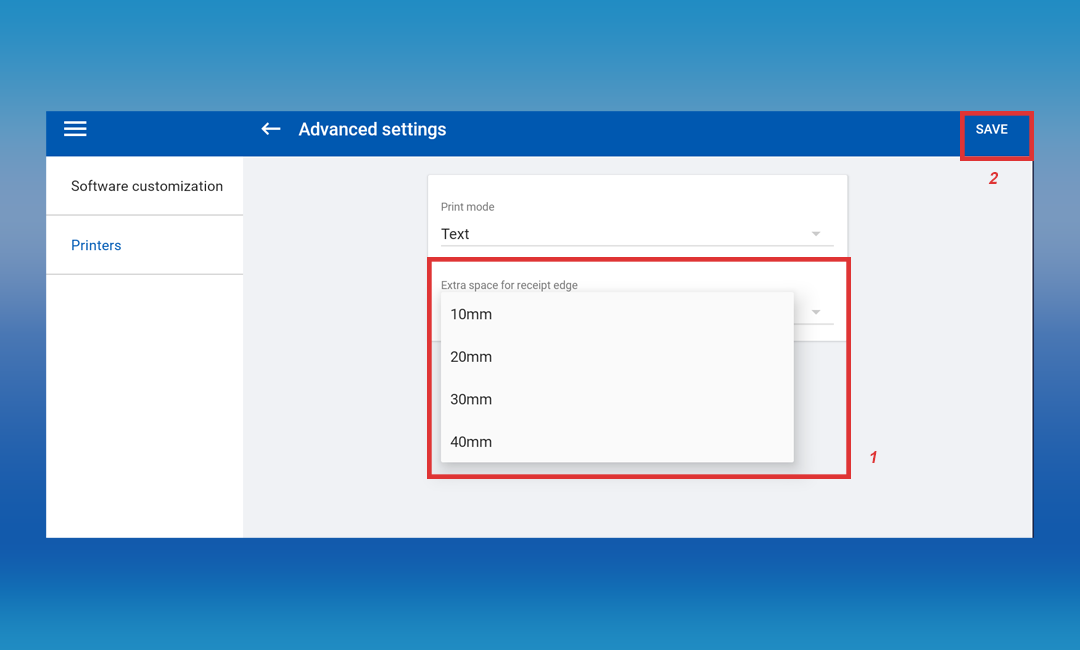
1. Customizable Gap Sizes:
Users now have the flexibility to choose from various gap sizes - 10mm, 20mm, 30mm, and 40mm. This empowers businesses to tailor the setting based on the specific requirements and characteristics of their printers, accommodating different models and brands seamlessly.
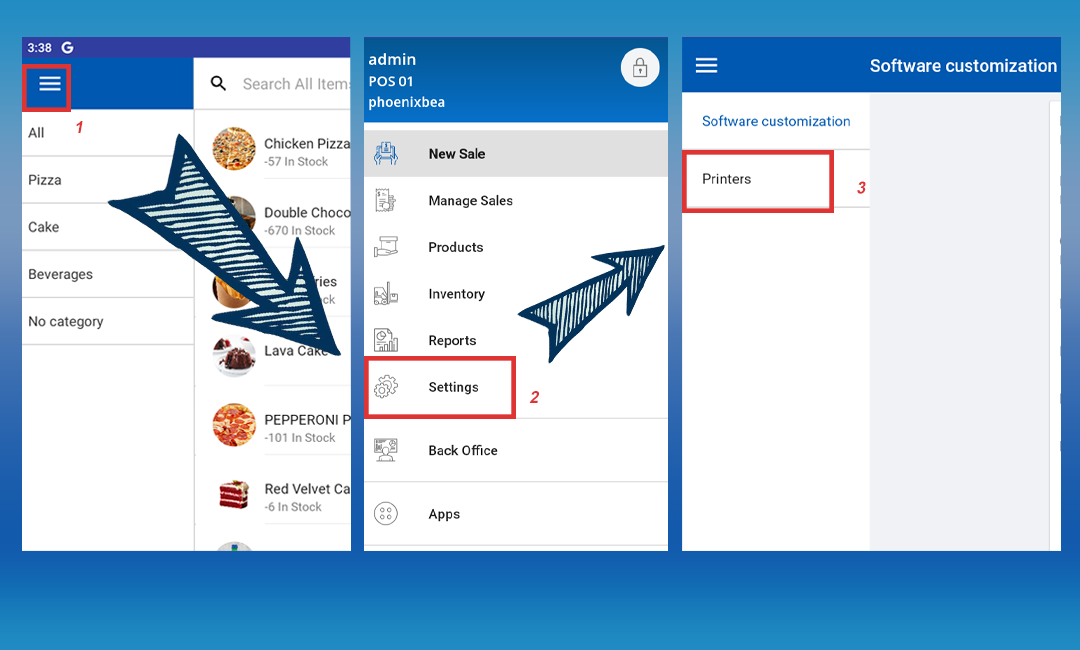
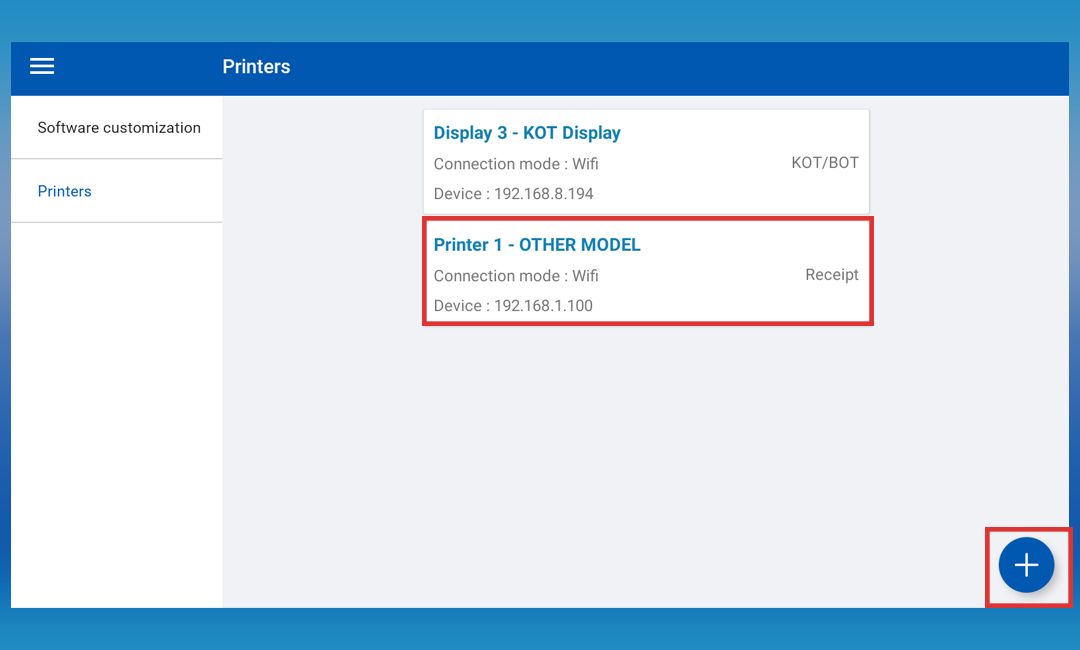
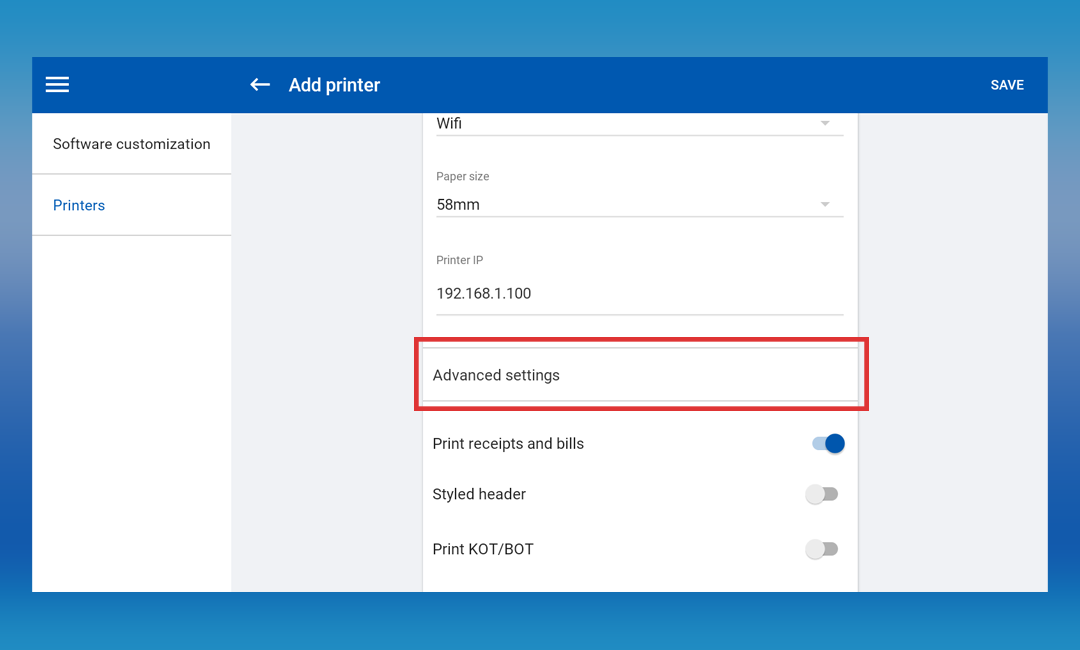
2. Activation through POS App:
The feature can be easily activated within the POS App settings, specifically under the Printer Creation page. Users will find the option labeled "Extra Space for Receipt Edge," where they can select their preferred gap size. Once selected, a simple click on the 'SAVE' button ensures that the chosen setting is applied to the receipt printing process.
Was this helpful?