Help | SalesPlay Help Center
Customize Sale Screen in SalesPlay POS

Step-by-step

Was this helpful?


How to Arrange the Sales Screen Using the Customize Sale Screen Feature

SalesPlay POS now allows you to create a more personalized and efficient sales screen using the Customize Sale Screen feature. This enables you to arrange your products in a way that best suits your business needs—improving staff productivity and reducing the time required for each sale.

You can group items such as fast-moving products, complementary items, or organize products by time slots (e.g., Breakfast, Lunch, Dinner). This customization makes your POS interface more intuitive and user-friendly.


Why the Customize Sale Screen Is Useful


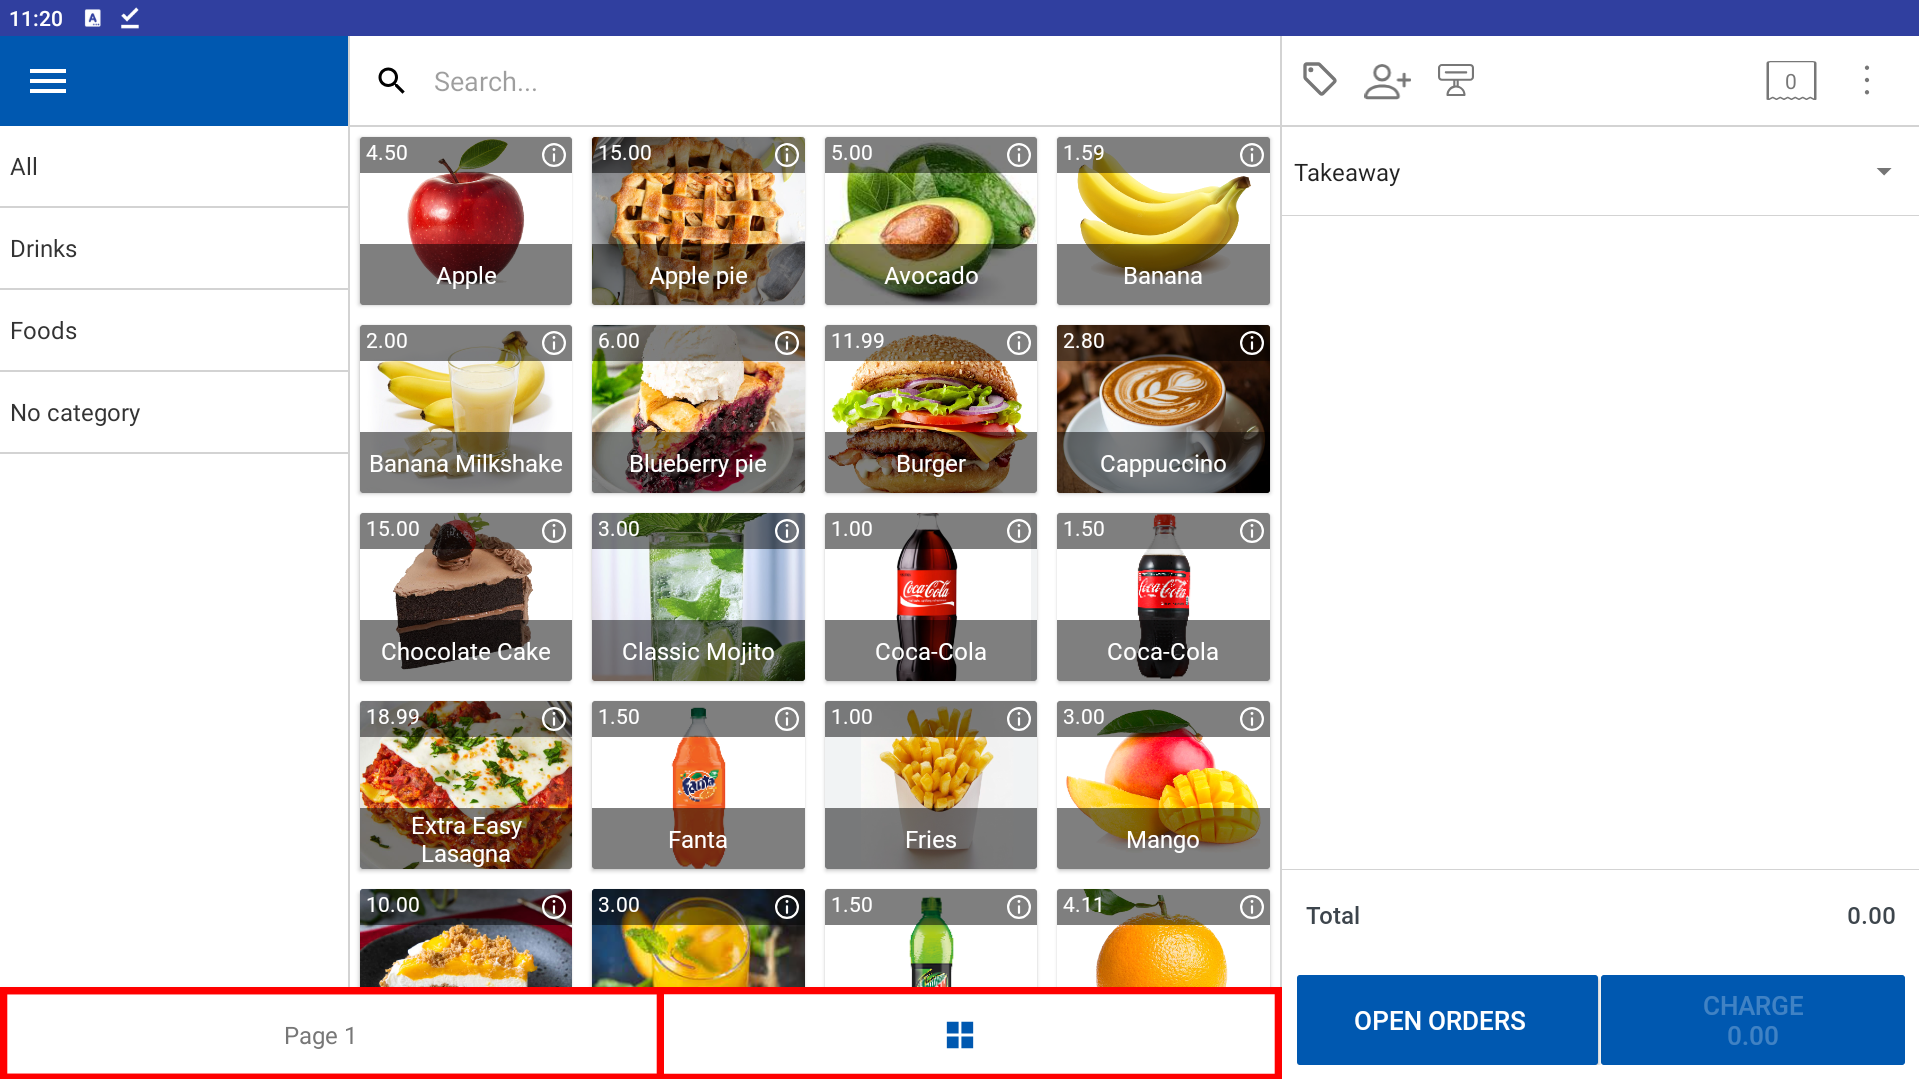
By default, SalesPlay POS includes:

  • Page 1: A customize sale screen with no products.
  • Default Screen / Grid Icon Page: Displays products in alphabetical order (fixed and cannot be edited).


The Customize Sale Screen feature is ideal for businesses looking to streamline their product display. It helps you:

  • Highlight fast-selling products – Keep top-selling items front and center.
  • Group complementary items – For example, group tyres with tubes, or printers with ink.
  • Categorize by time or usage – Arrange products by time (Breakfast/Lunch/Dinner) or business-specific needs like “Fast Movers” or “Best Sellers.”

This feature enables your staff to locate products quickly, speeding up transactions and improving overall customer experience.

The "Customize Sale Screen" feature in SalesPlay POS is currently available only in landscape mode.
If you're using portrait mode, you can use the "Favourite Products" option instead.


Add Products to a Custom Sale Screen


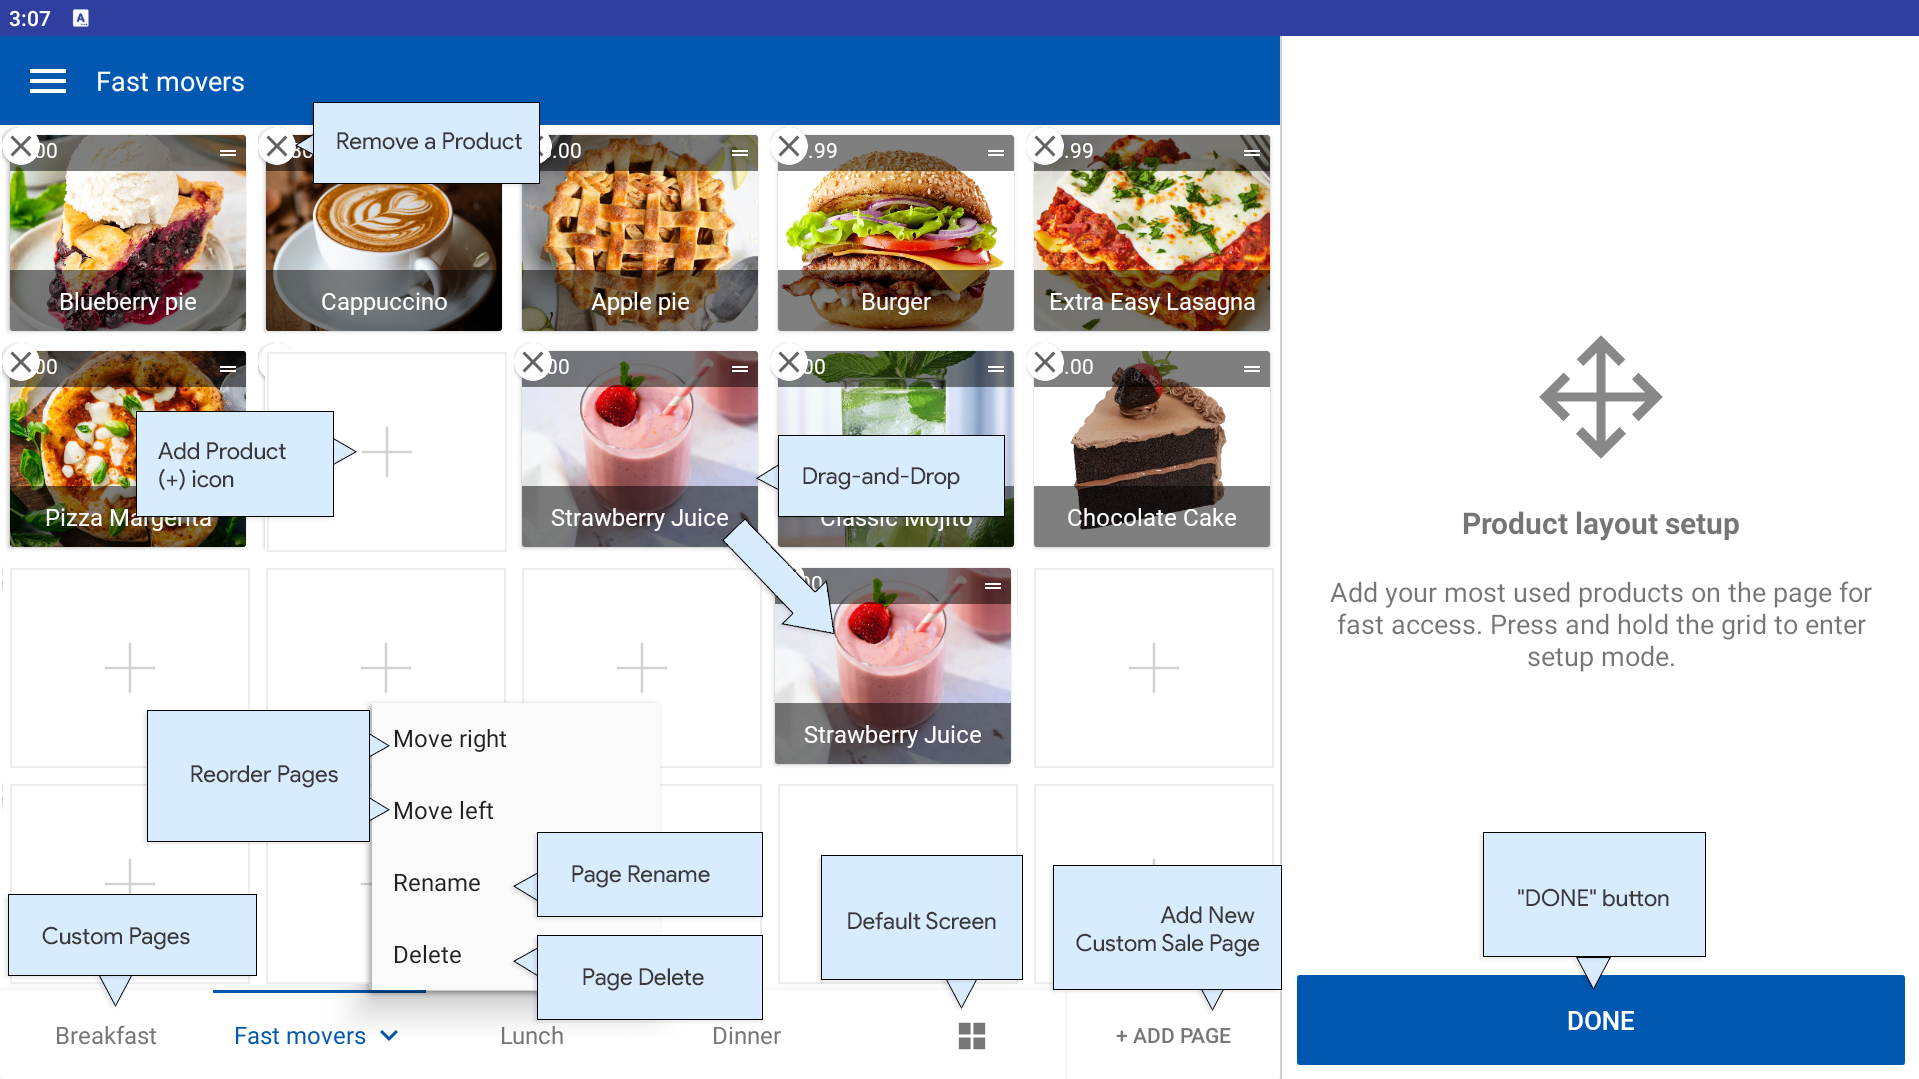
How to Use the Customize Sale Screen

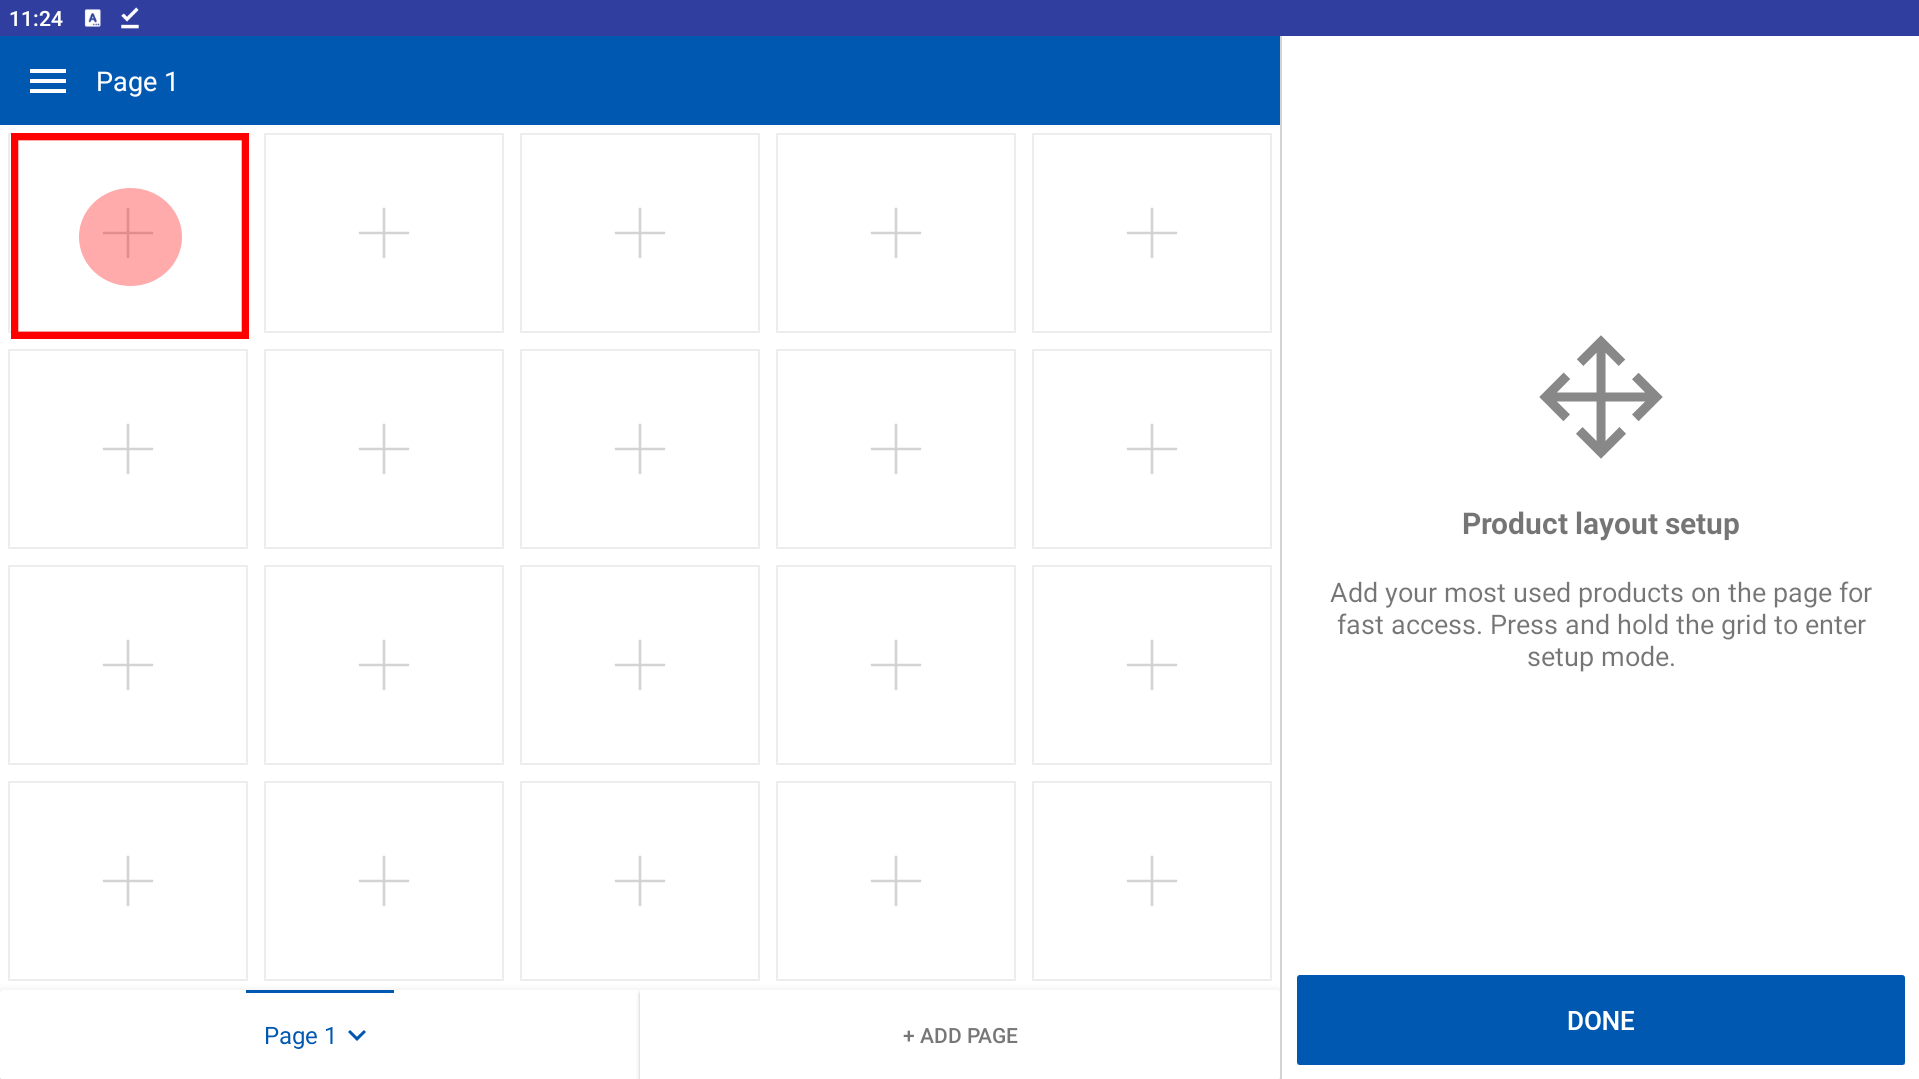
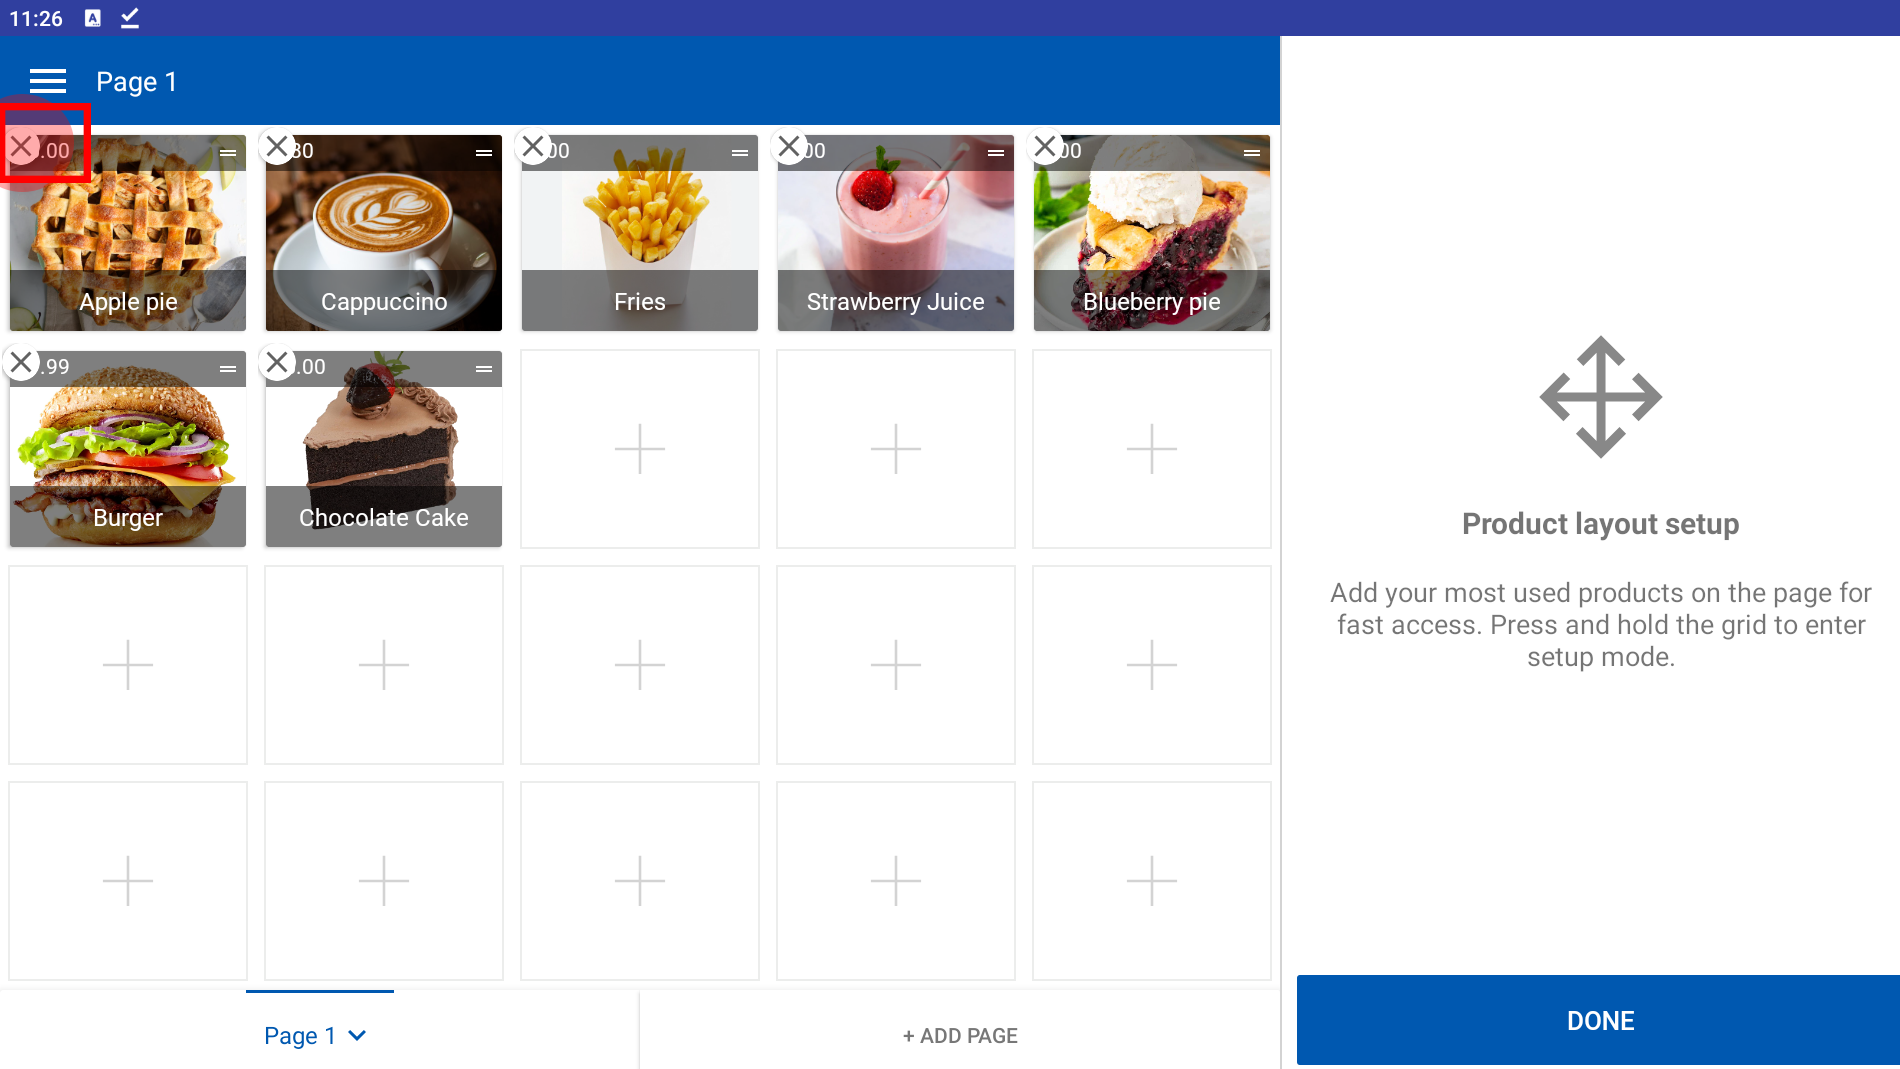
This section explains how to add frequently used products to a custom page for quick access. Create dedicated pages by product type, time, or popularity.

Steps:

  1. Open the POS App
  2. Go to the main screen (New Sale)
  3. Tap on Page 1 or any custom page
  4. Long press anywhere on the page until the Add Product (+) icon appears
  5. Tap the + icon, then select a product from the list
  6. Repeat for additional products
  7. Tap DONE to save your changes

Rearrange Products on a Page


Adjusting the order of products helps prioritize items for quicker sales. This drag-and-drop feature makes customization easy.

Steps:

  1. Open the POS App
  2. Go to the New Sale screen
  3. Select the page to edit
  4. Long press to enter setup mode until the + icon appears
  5. Tap and hold a product
  6. Drag it to the desired location
  7. Tap DONE to save changes

Remove a Product from a Page


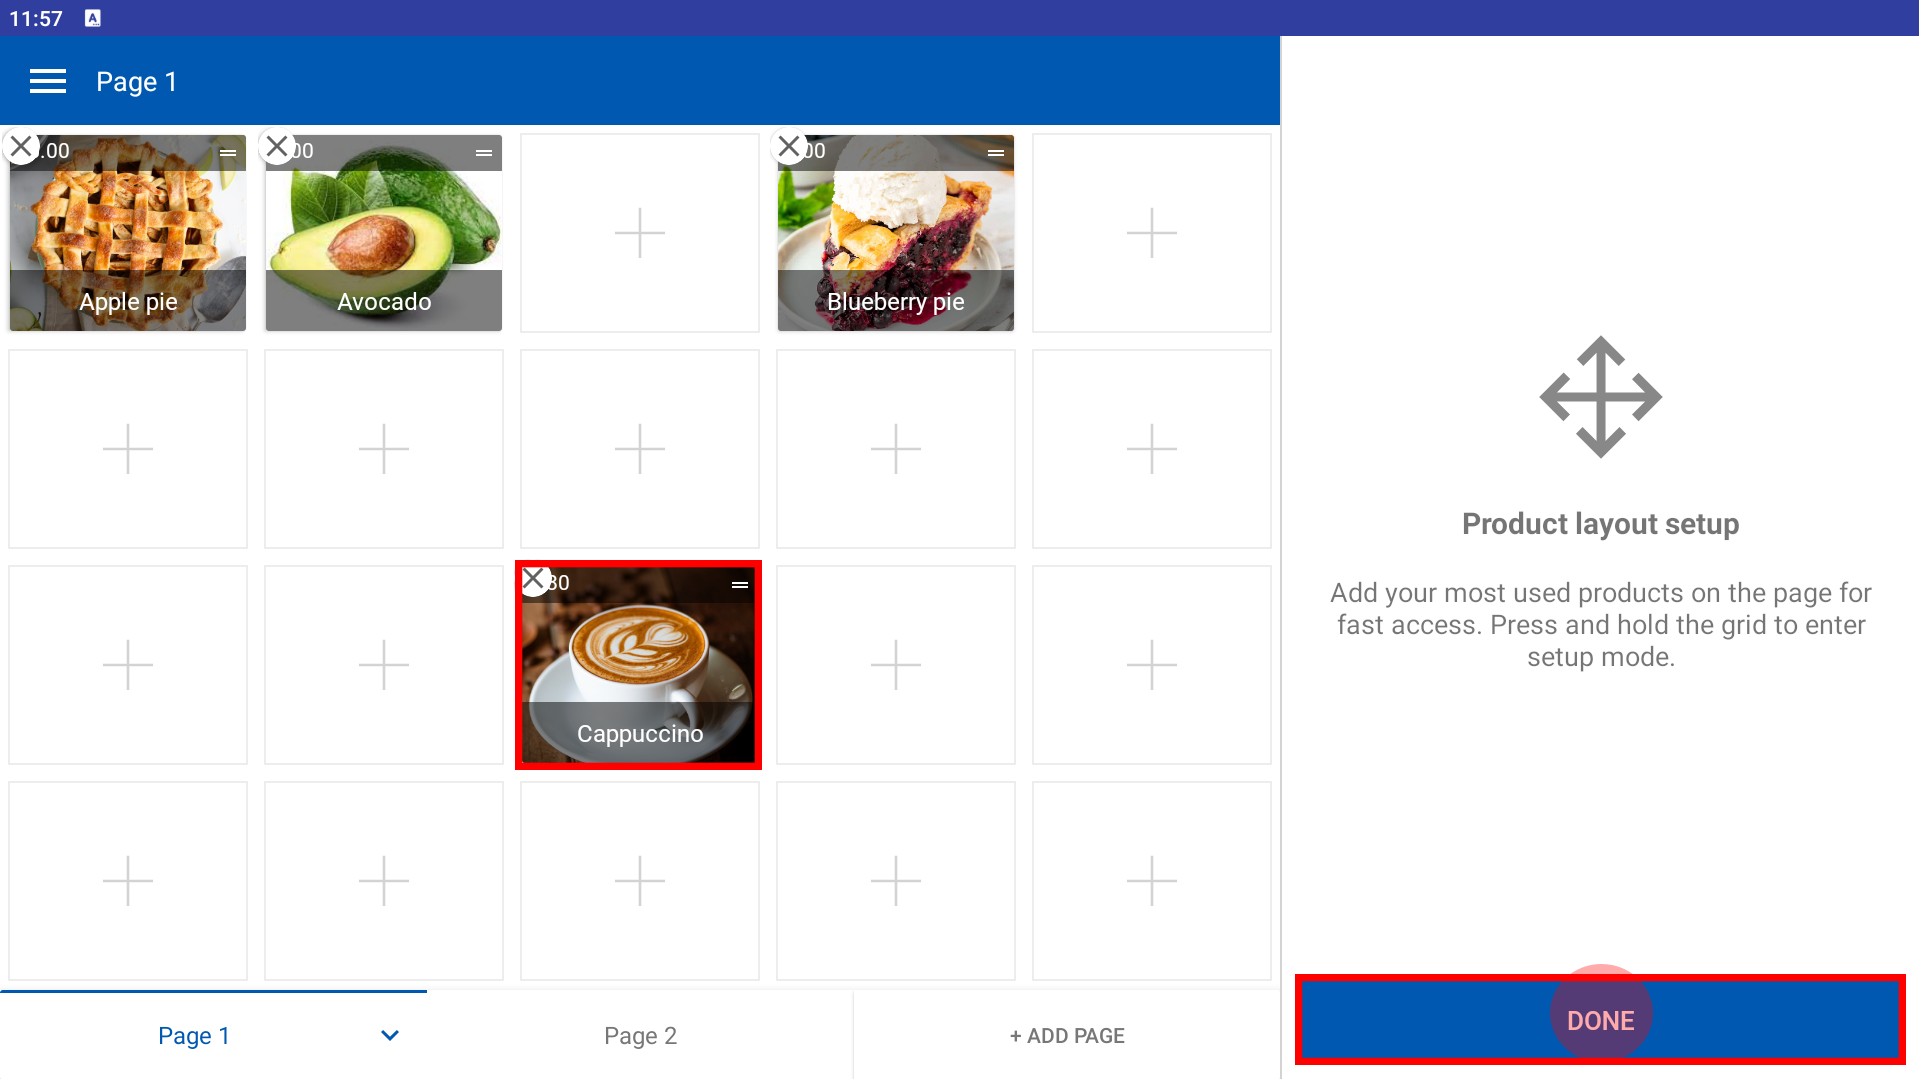
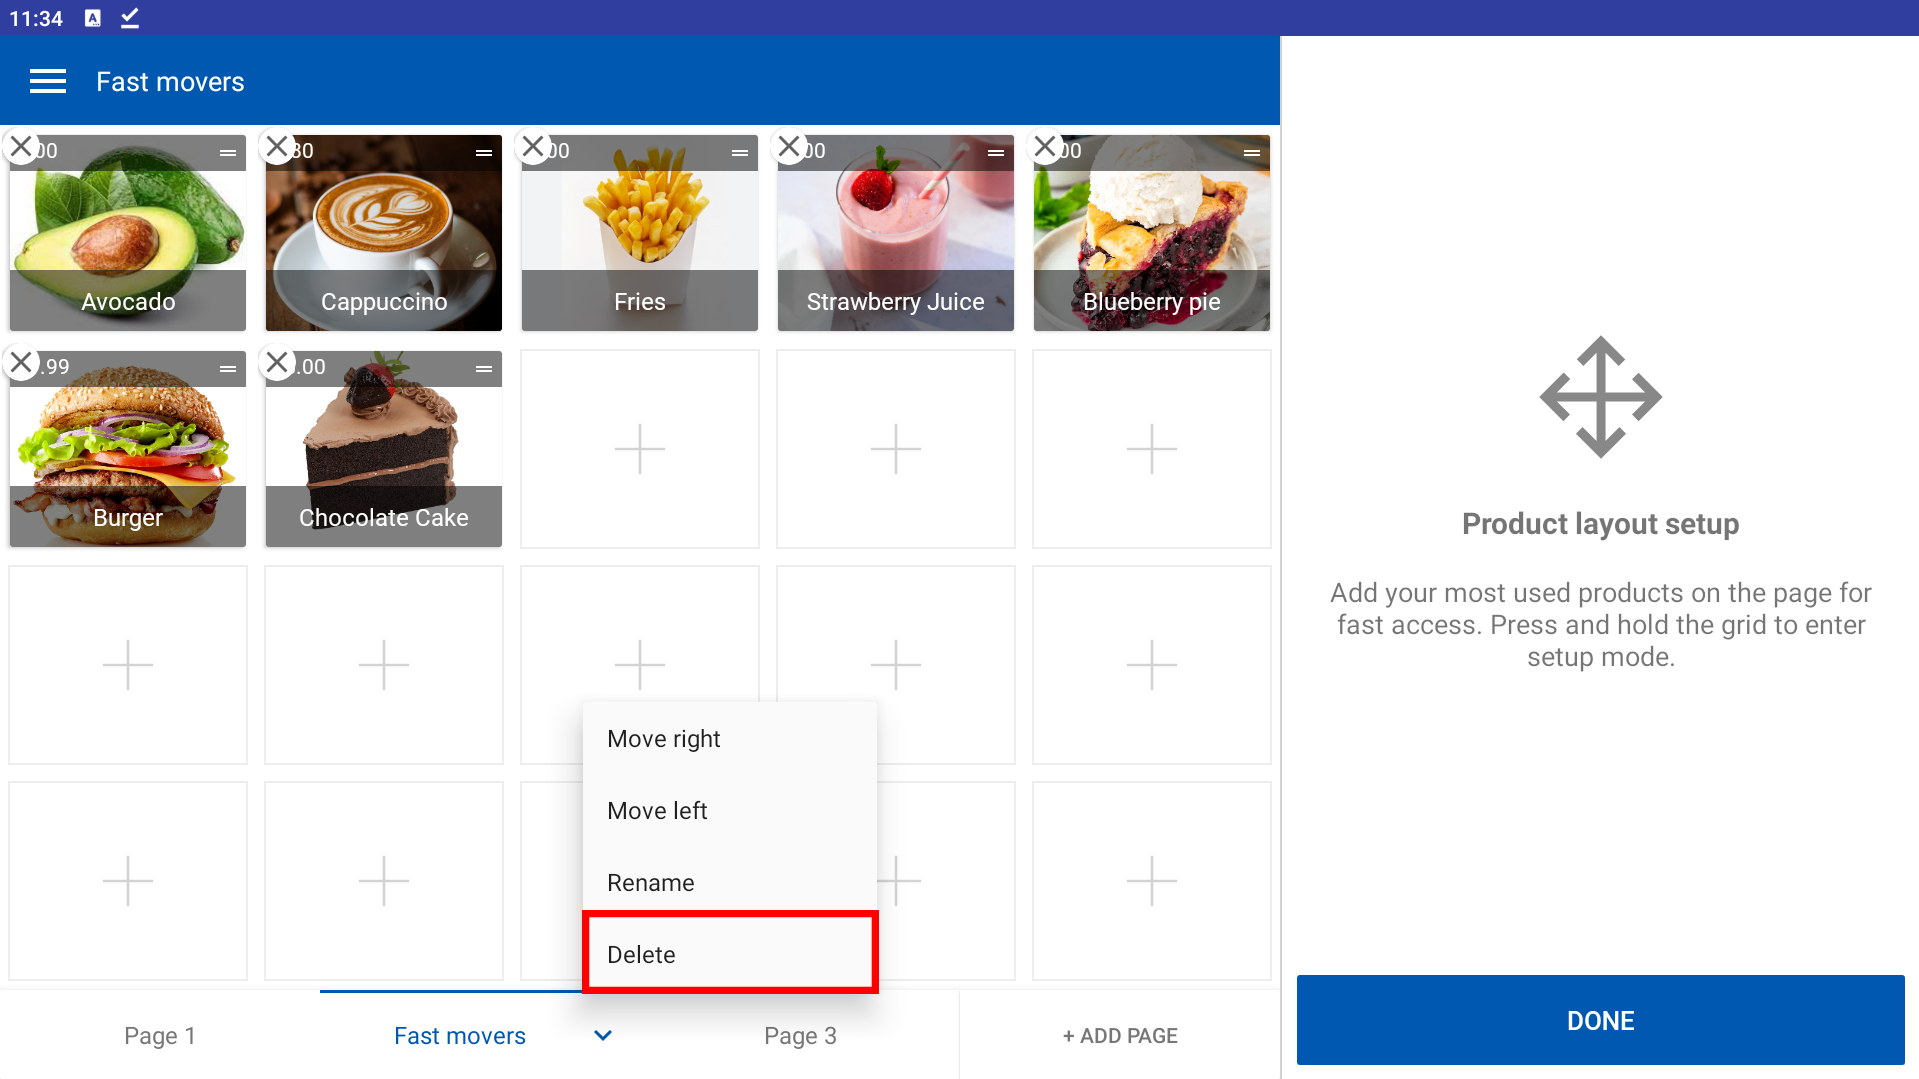
To keep your custom pages clean and up to date, you can easily remove unused items.

Steps:

  1. Open the POS App
  2. Go to the New Sale screen
  3. Select the page
  4. Long press to enter setup mode
  5. Tap the small X icon on the product to remove it
  6. Tap DONE to finish

Create a New Custom Sale Page


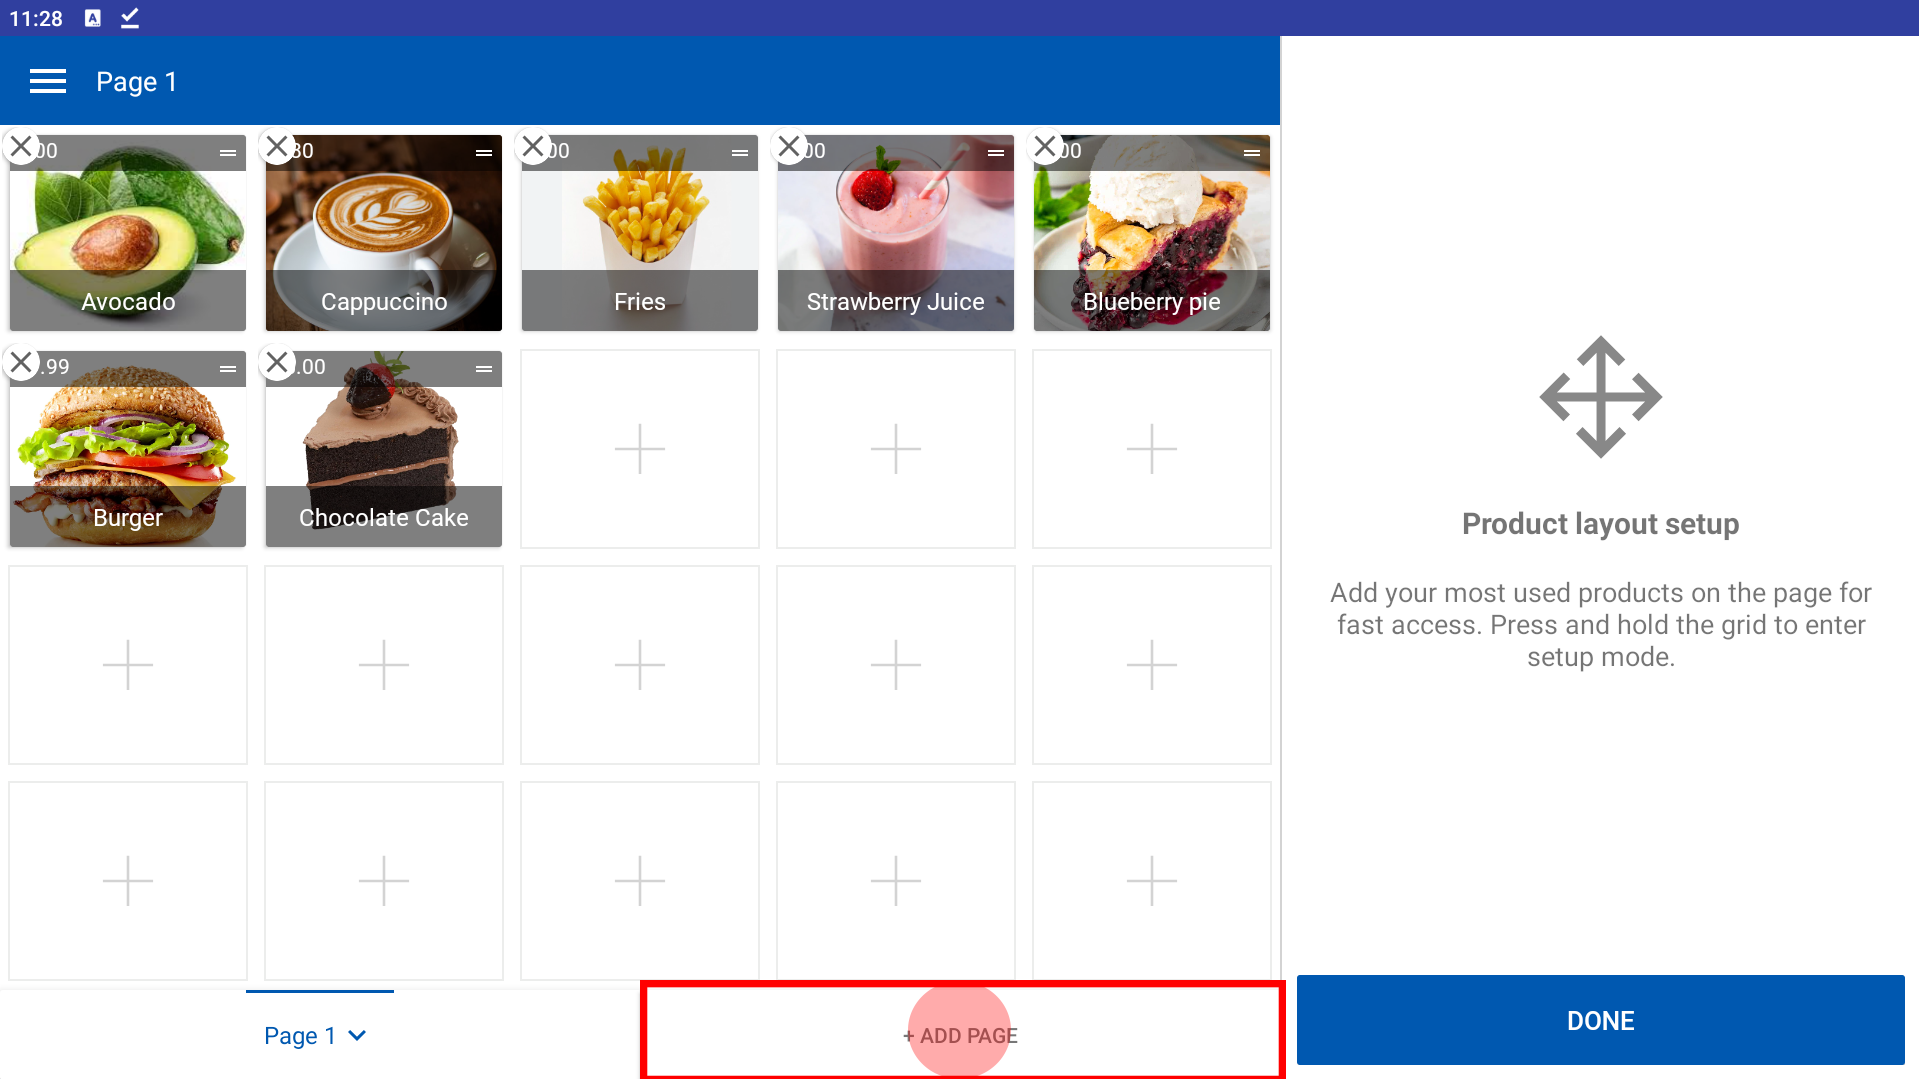
You can add more pages based on category, time slots, or custom themes.

Steps:

  1. Open the POS App
  2. On the New Sale screen, long press to enter setup mode
  3. Tap the Add Page icon
  4. A new page (e.g., Page 2, Page 3) will be created

Rename a Custom Sale Page


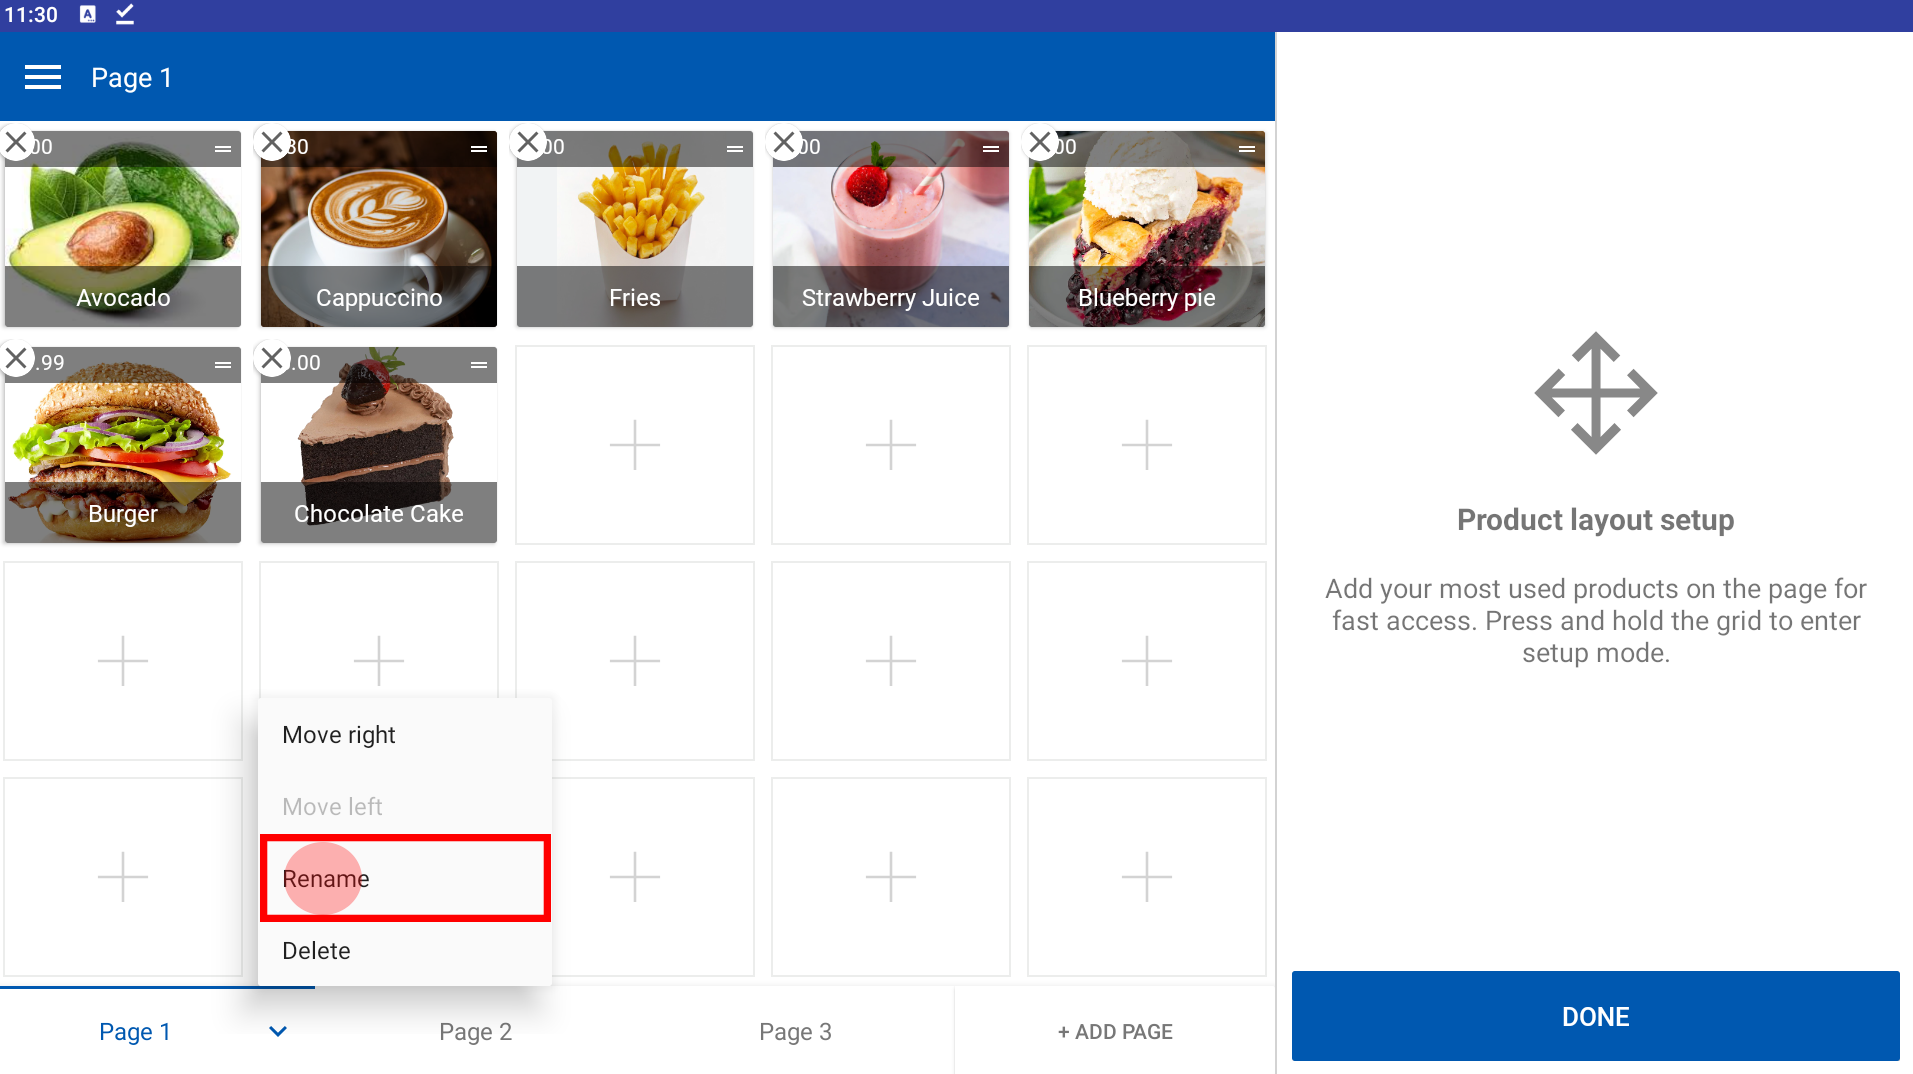
Renaming helps organize pages logically—like “Lunch,” “Beverages,” or “Fast Movers”—for easier navigation.

Steps:

  1. Open the POS App
  2. Go to the New Sale screen
  3. Select the page you want to rename
  4. Long press to enter setup mode
  5. Tap the dropdown arrow next to the page name
  6. Select Rename
  7. Enter a new name and save it

Reorder Pages (Move Left/Right)


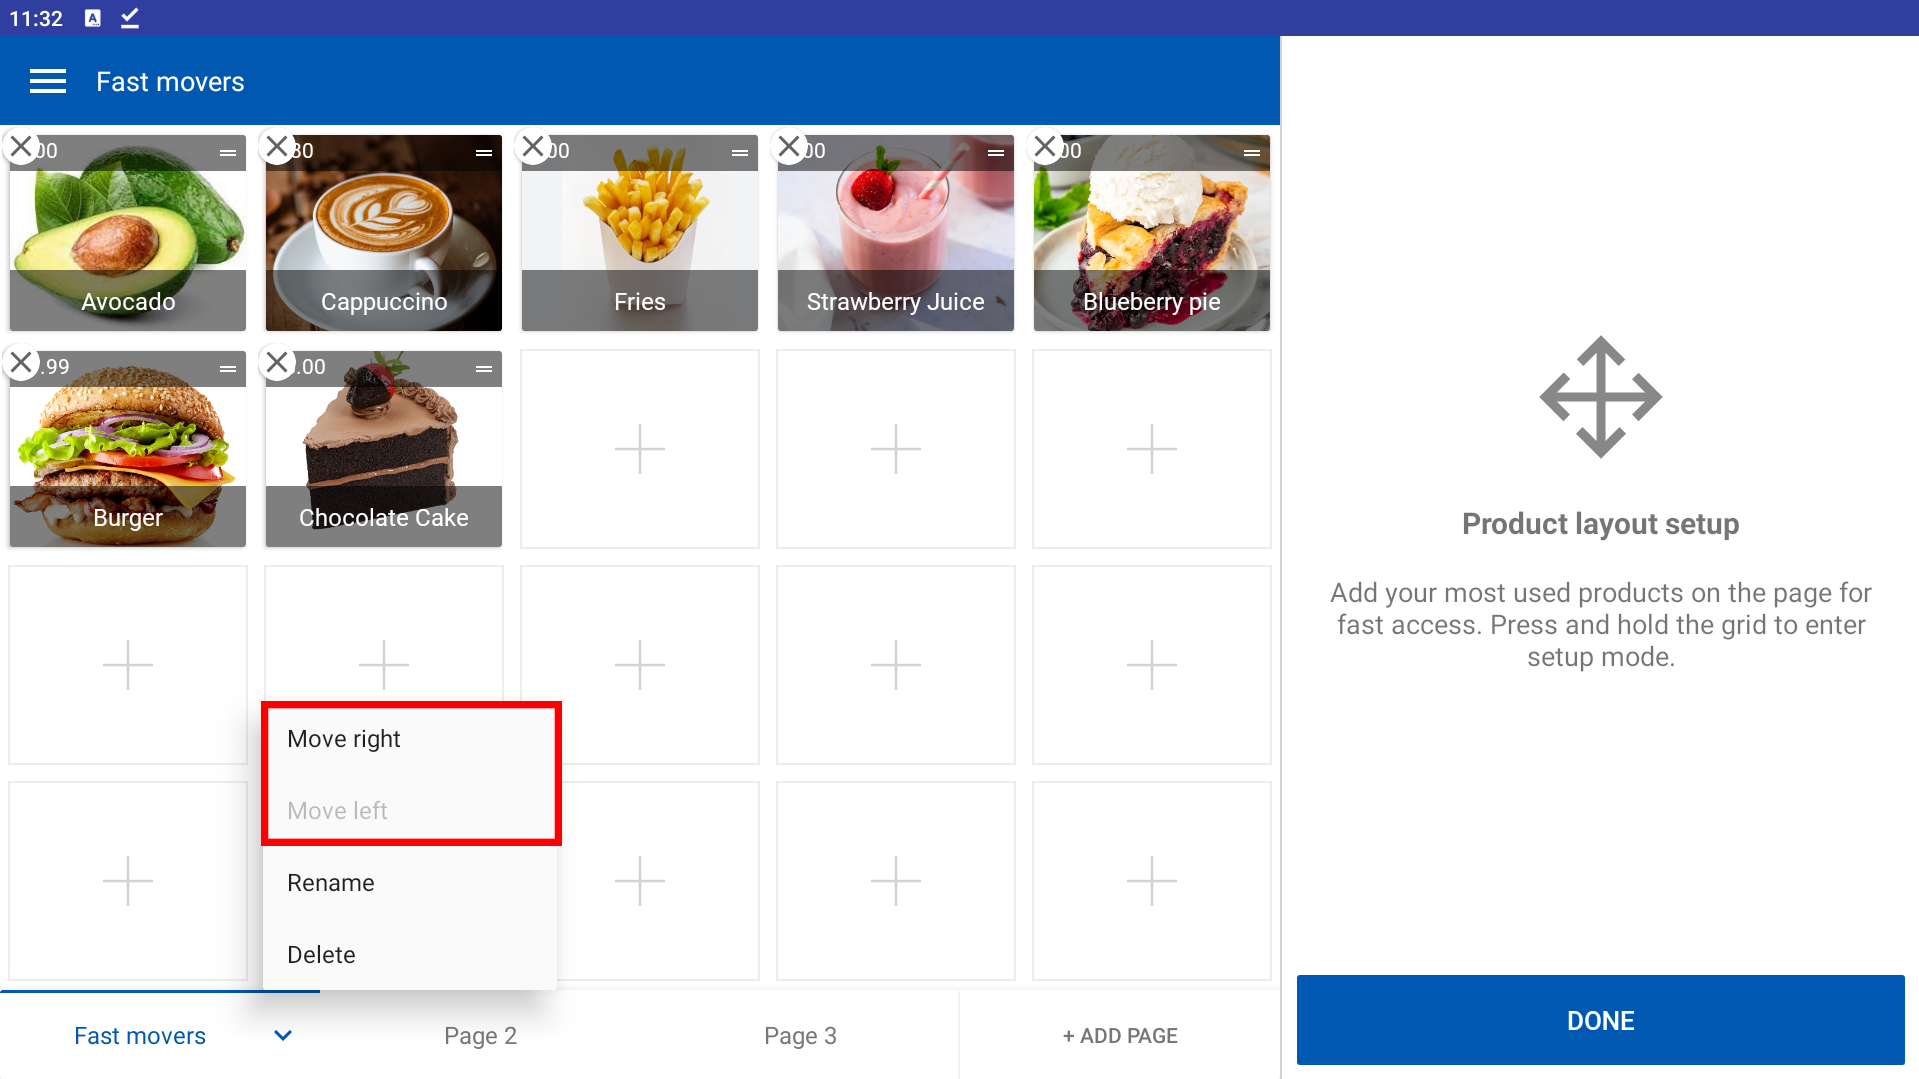
You can rearrange the order of your pages to reflect priority or convenience.

Steps:

  1. Open the POS App
  2. Go to the New Sale screen
  3. Select the page
  4. Long press to enter setup mode
  5. Tap the dropdown arrow next to the page name
  6. Choose Move Left or Move Right
  7. Tap DONE to save

Delete a Custom Sale Page


If a page becomes unnecessary, you can delete it to keep your POS clean and relevant.

Steps:

  1. Open the POS App
  2. Go to the New Sale screen
  3. Select the page
  4. Long press to enter setup mode
  5. Tap the dropdown arrow next to the page name
  6. Select Delete and confirm

Special Notes

  • You can create up to 6 custom sale pages
  • Each page can hold up to 20 products
  • If you REPLACE or switch devices, your custom pages will be deleted and need to be recreated
  • The "Customize Sale Screen" feature in SalesPlay POS is currently available only in landscape mode.
    If you're using portrait mode, you can use the "Favourite Products" option instead.
    For more details on the Favourite Products feature, click here: [link]

This guide should help you get the most out of the Customize Sale Screen feature in SalesPlay POS. Personalizing your sales interface will enhance team efficiency and provide a smoother customer experience.


Was this helpful?