Help | SalesPlay Help Center
How to Use Xero Accounting Software with SalesPlay POS

SalesPlay Back Office

Was this helpful?


Integration of Xero Accounting Software with SalesPlay POS Software


  • Integrating Xero accounting software with POS system offers businesses a comprehensive and streamlined solution for managing their financial operations.

Login to POS Back Office


  1. Select “Settings” from the main menu
  2. Go to the “Feature”
  3. Tick ON “Xero Integration”
  4. Click “Save”


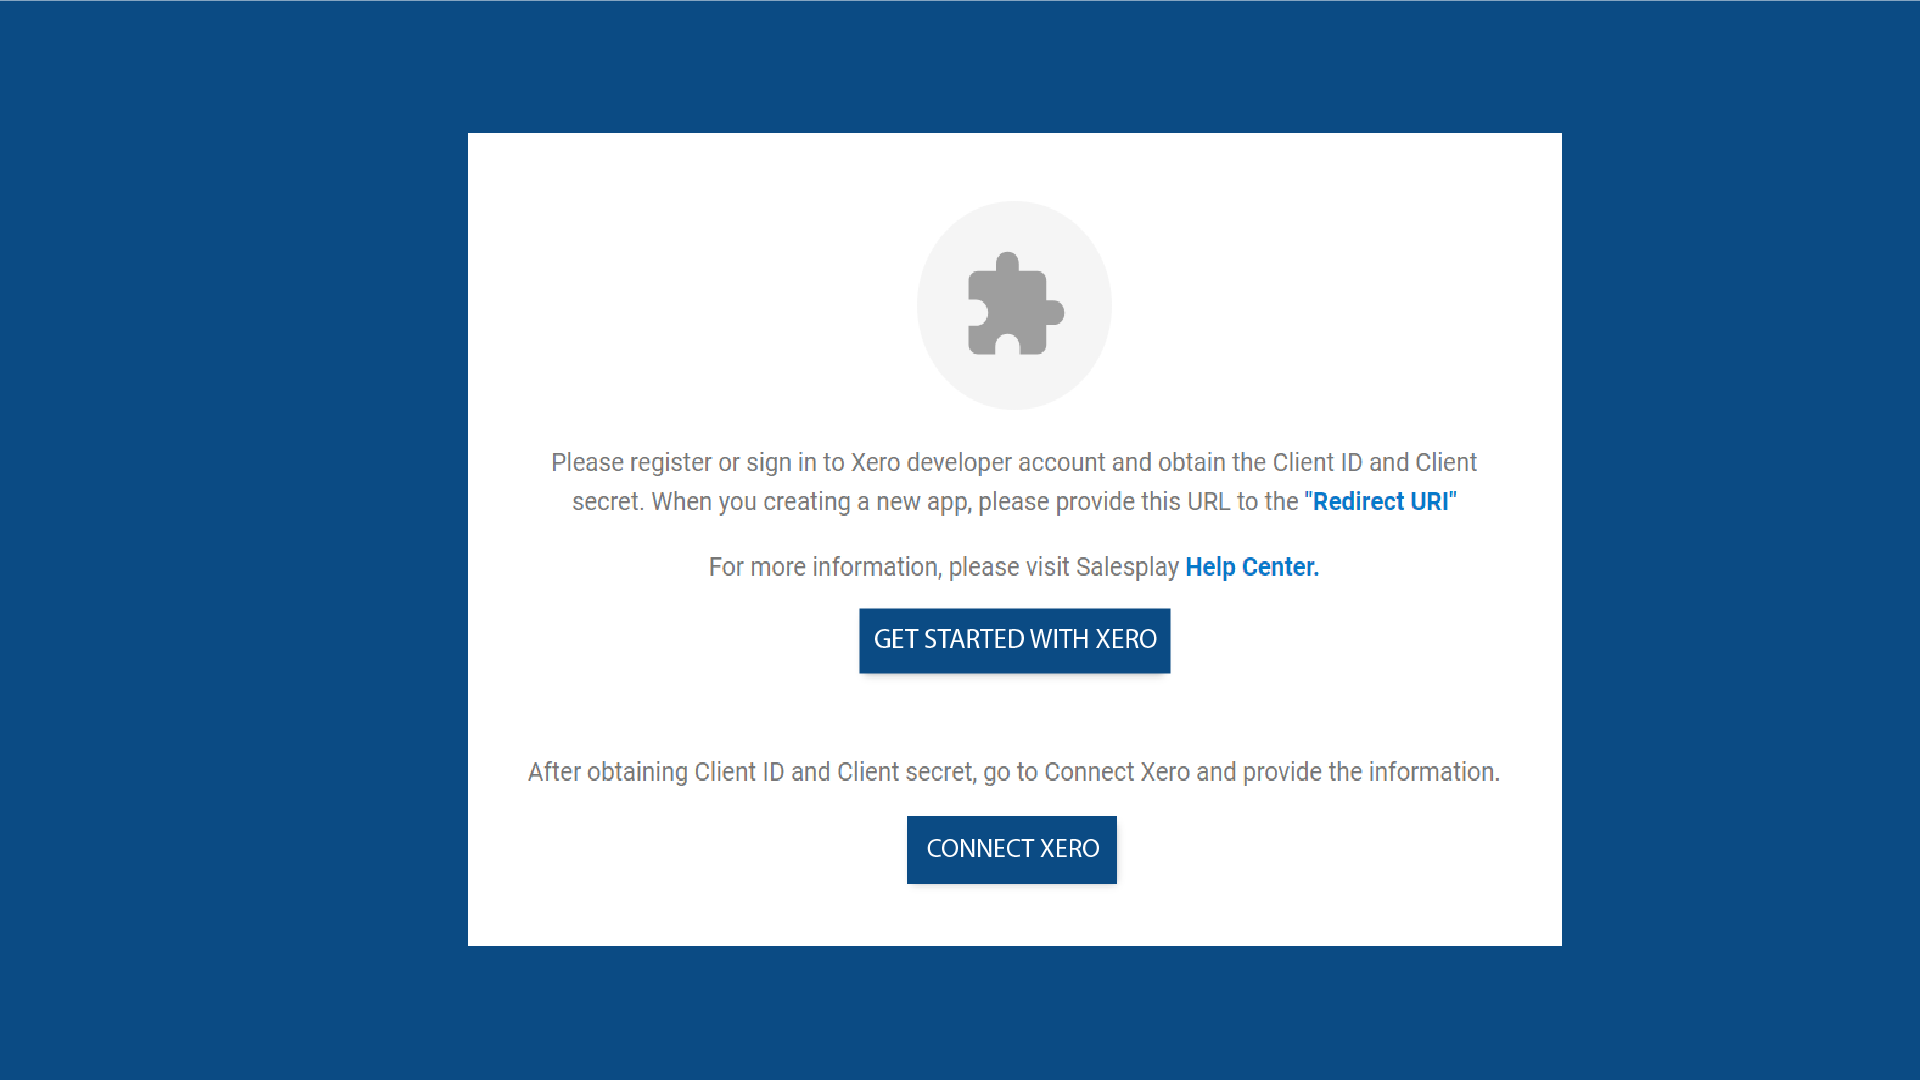
(Once you ON “Xero Integration”, it will appear as a sub-menu in the Settings section)


Select XERO from settings and click the “GET STARTED WITH XERO” button


Register or sign in to your Xero account


  1. Click https://developer.xero.com/
  2. Click “Login In” and log in to developer.xero account.
  3. Click “New App”

Provide quired details


  1. Enter the Shop Name
  2. Select “Web App” as the Integration type
  3. Add company website
  4. Add Redirect URI (This needs to copy from backoffice XERO Section)
  5. Tick on T&C and click “Create App”

Configuration


  1. Click the “Configuration” tab in developer.xero
  2. Copy “Client id” and keep it pasted in a separate document
  3. Click “Generate a secret”
  4. Copy the client secret 1 and keep it pasted in a separate document

Click “CONNECT XERO” in Back Office


  1. Enter “Client ID” (You can copy this from the pasted document)
  2. Enter ‘Client Secret” (You can copy this from the pasted document)
  3. Enter the Transaction scheduled time
  4. Keep Is enable “Tick On”
  5. Click “Save”
  6. Click ‘Allow Access”

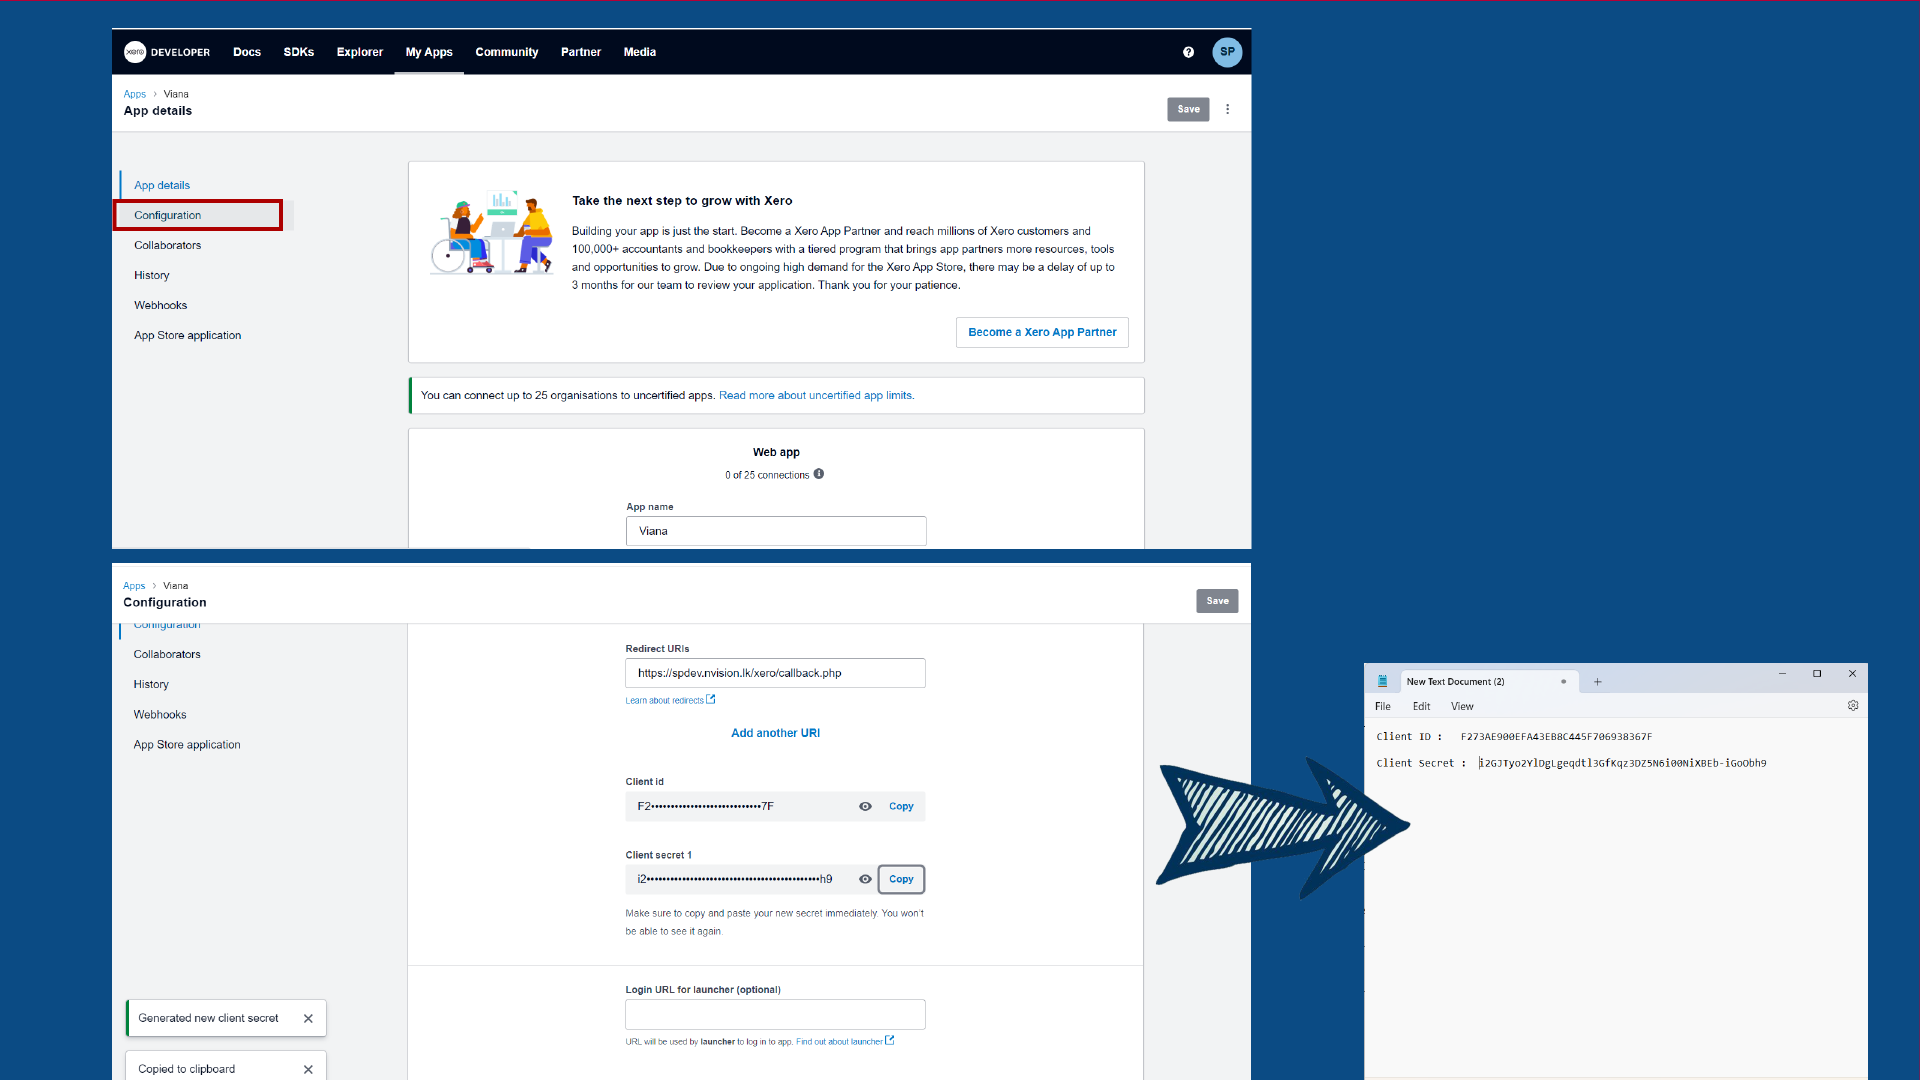
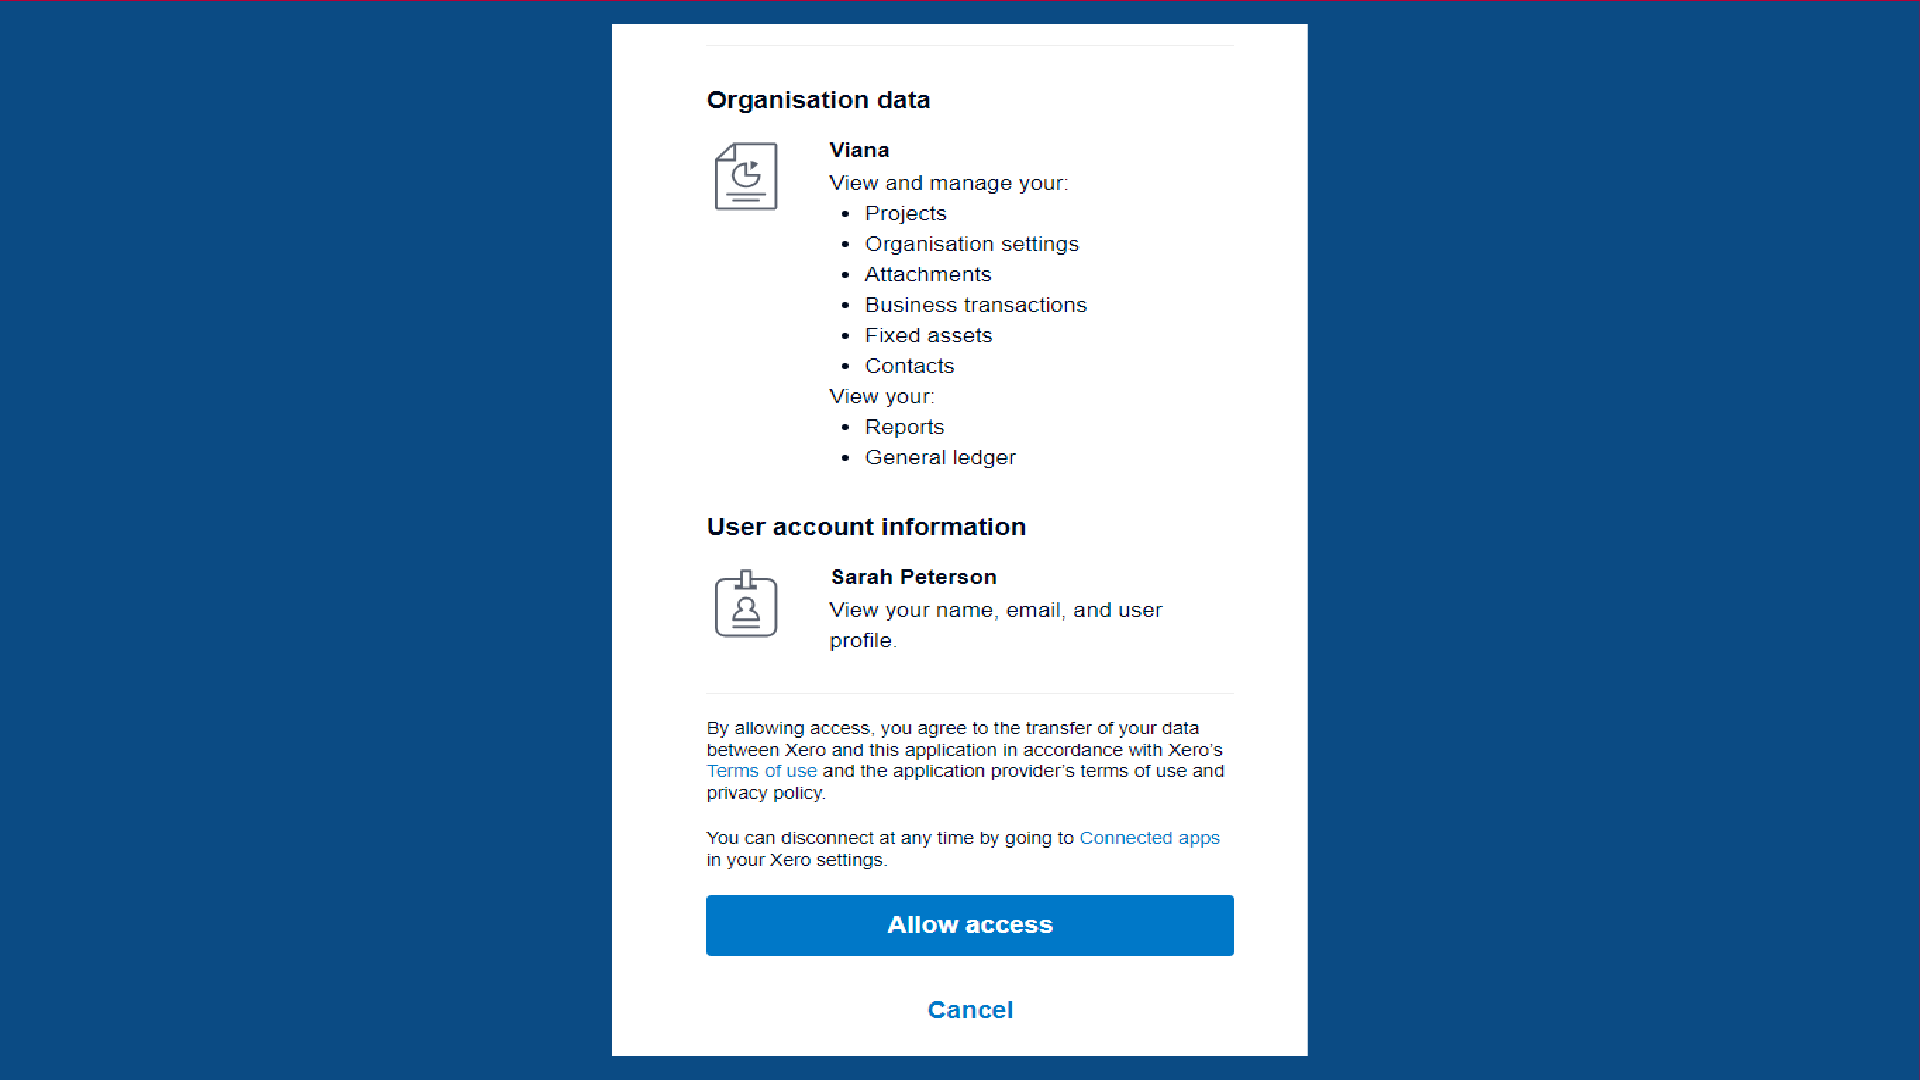
You will receive a message saying “Integration setup completed”

Was this helpful?