Help | SalesPlay Help Center
How to Reserve Tables or Rooms & Assign Staff

SalesPlay Back Office


1. How to Reserve Tables or Rooms & Assign Staff

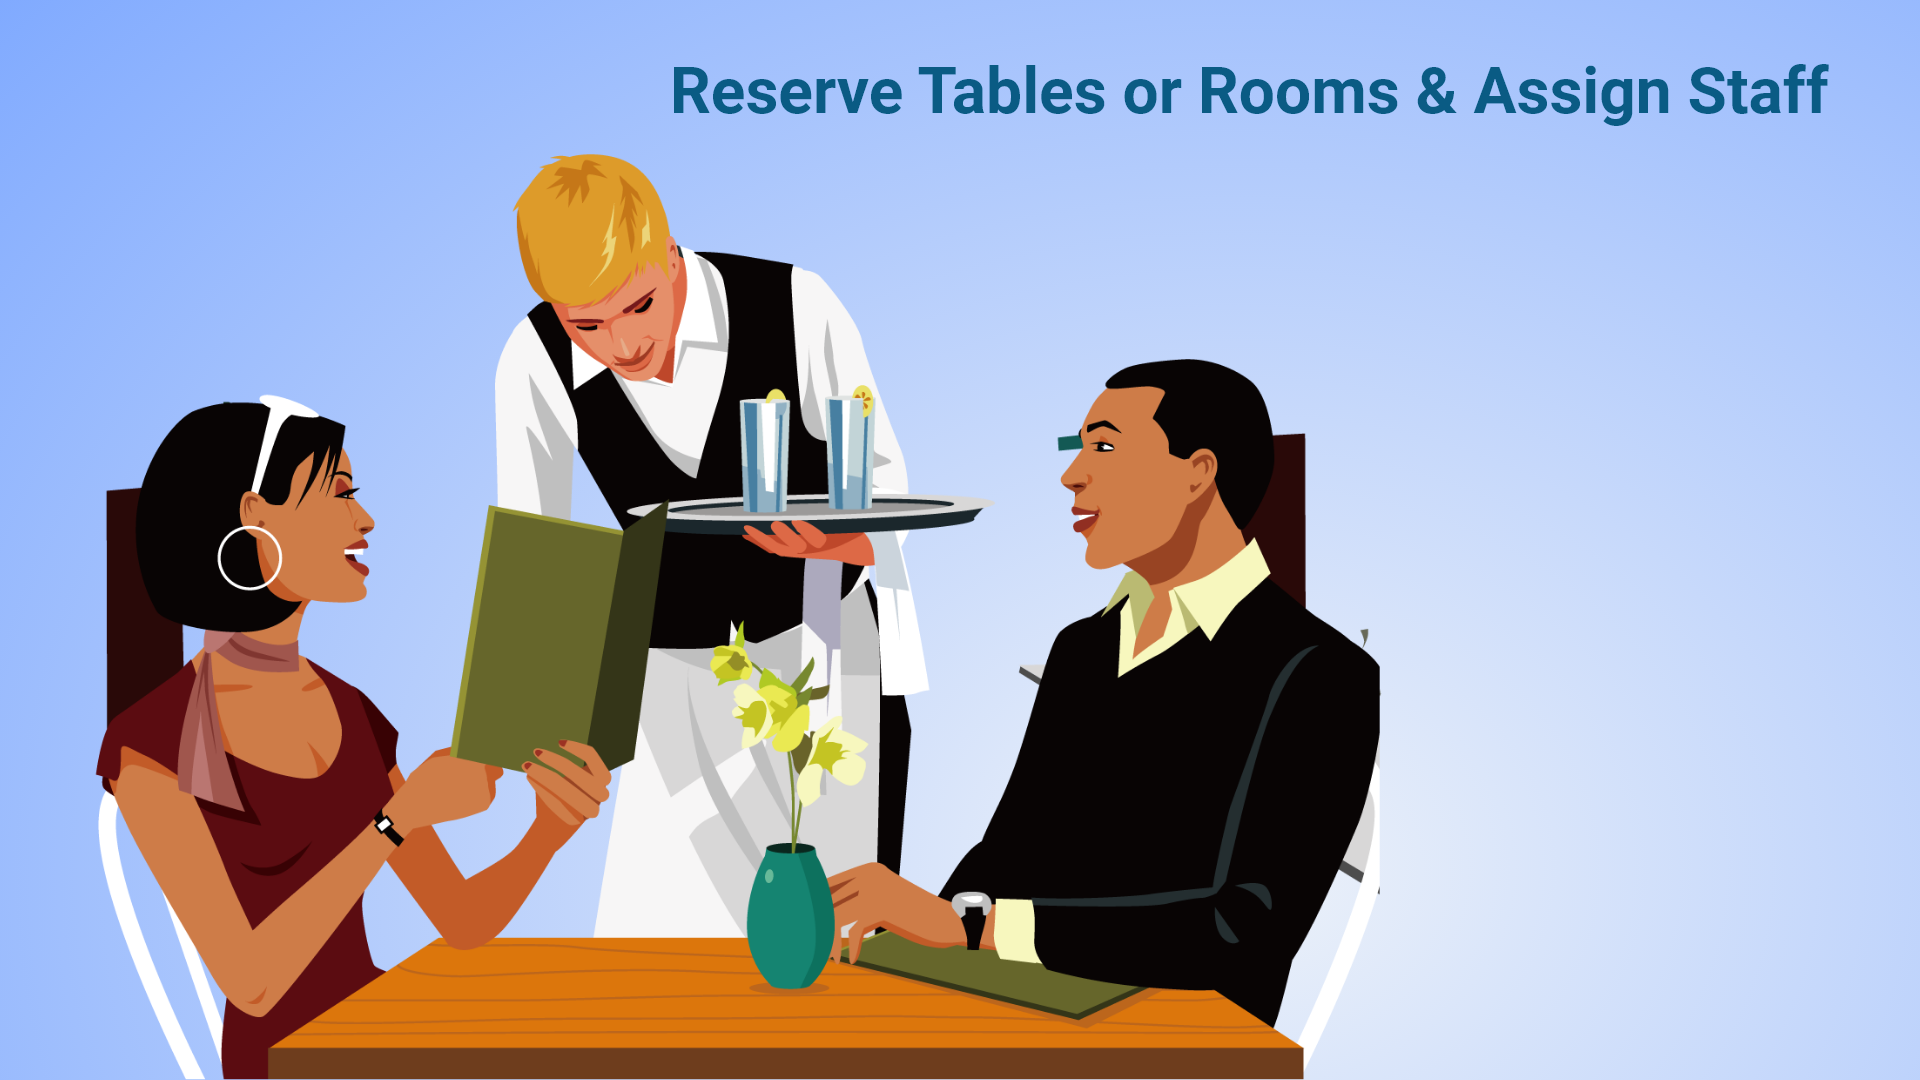
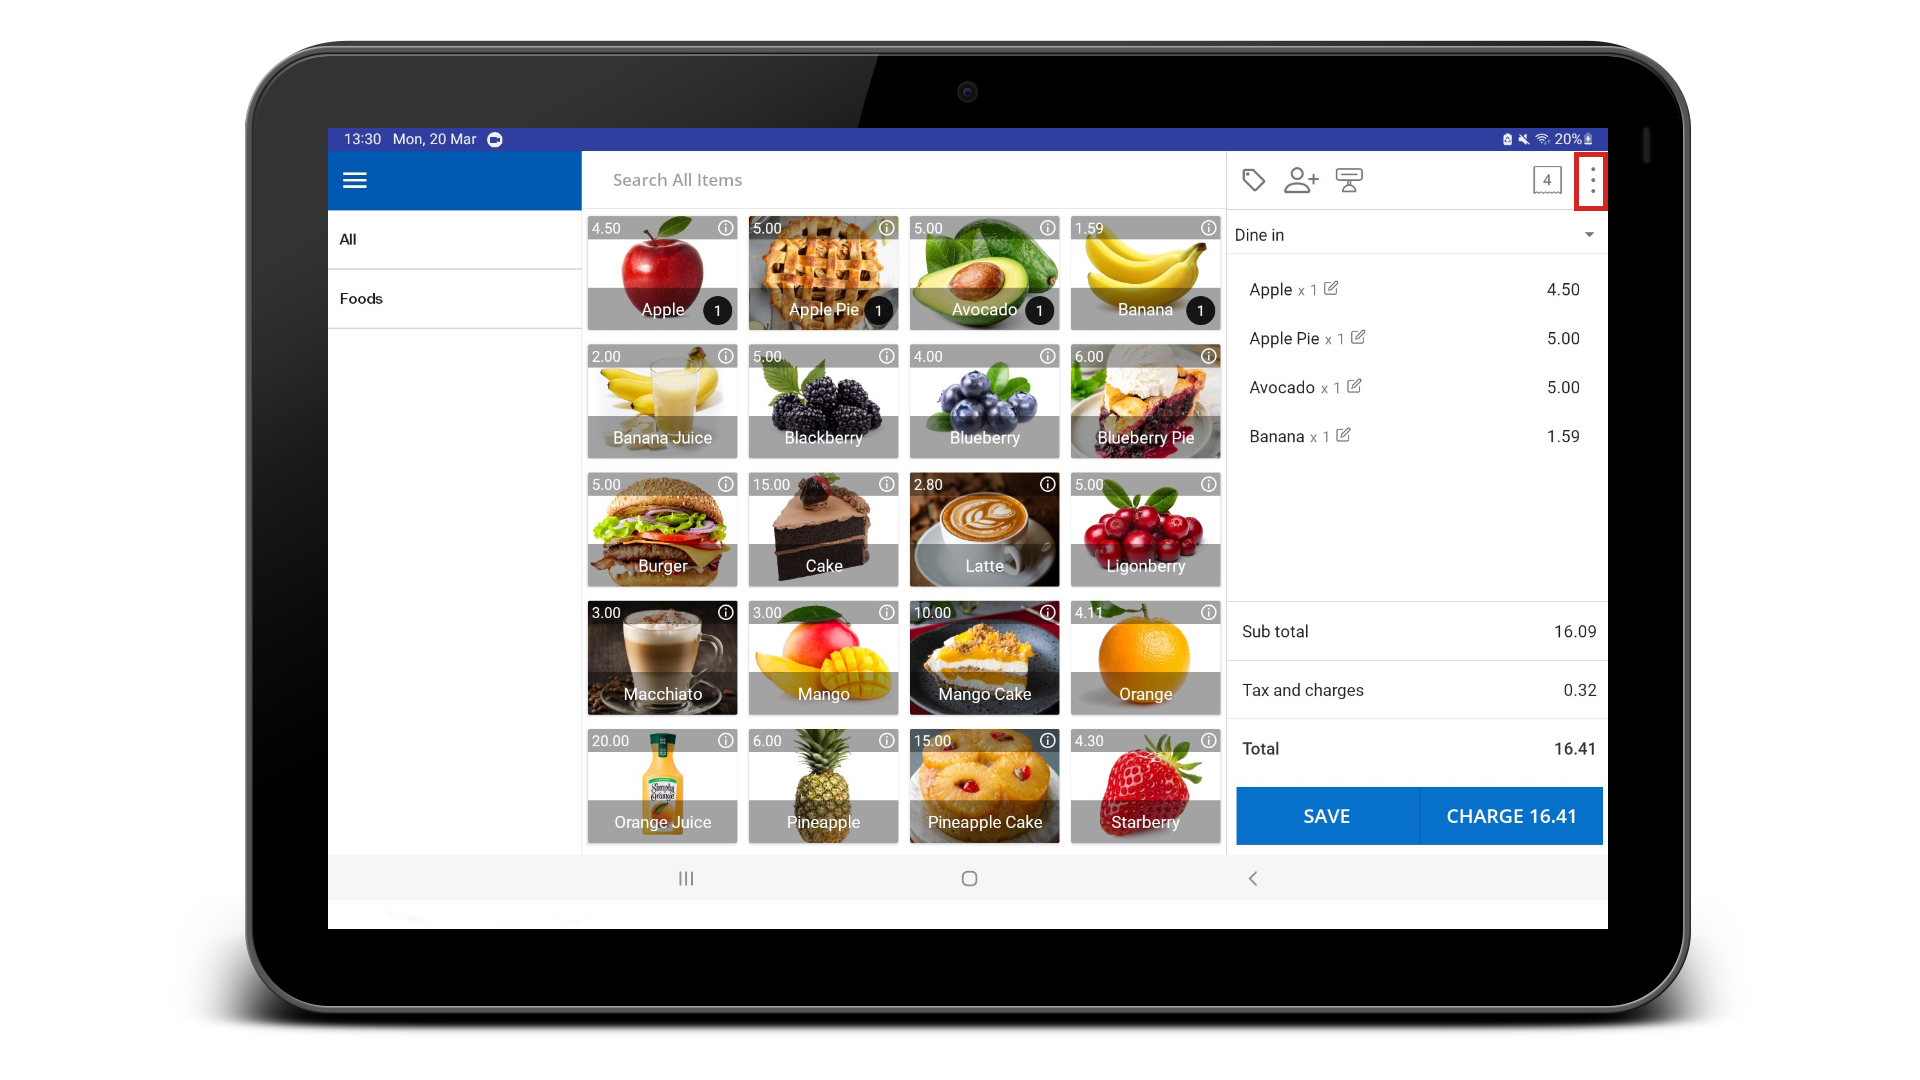
The "Table" function refers to the feature that allows staff to assign orders to specific tables or rooms. 

This function is particularly useful for businesses that offer table or room service, as it enables staff to keep track of which table or room ordered which items, and helps ensure that orders are delivered to the correct table or room. 

Now users can start a bill via the new Table Layout.  

For example, in a restaurant, customers are dining at a table. So users can start the billing process by selecting a new table layout and keep updating it via Table Layout once they order new items. 


2. How to Reserve Tables or Rooms & Assign Staff


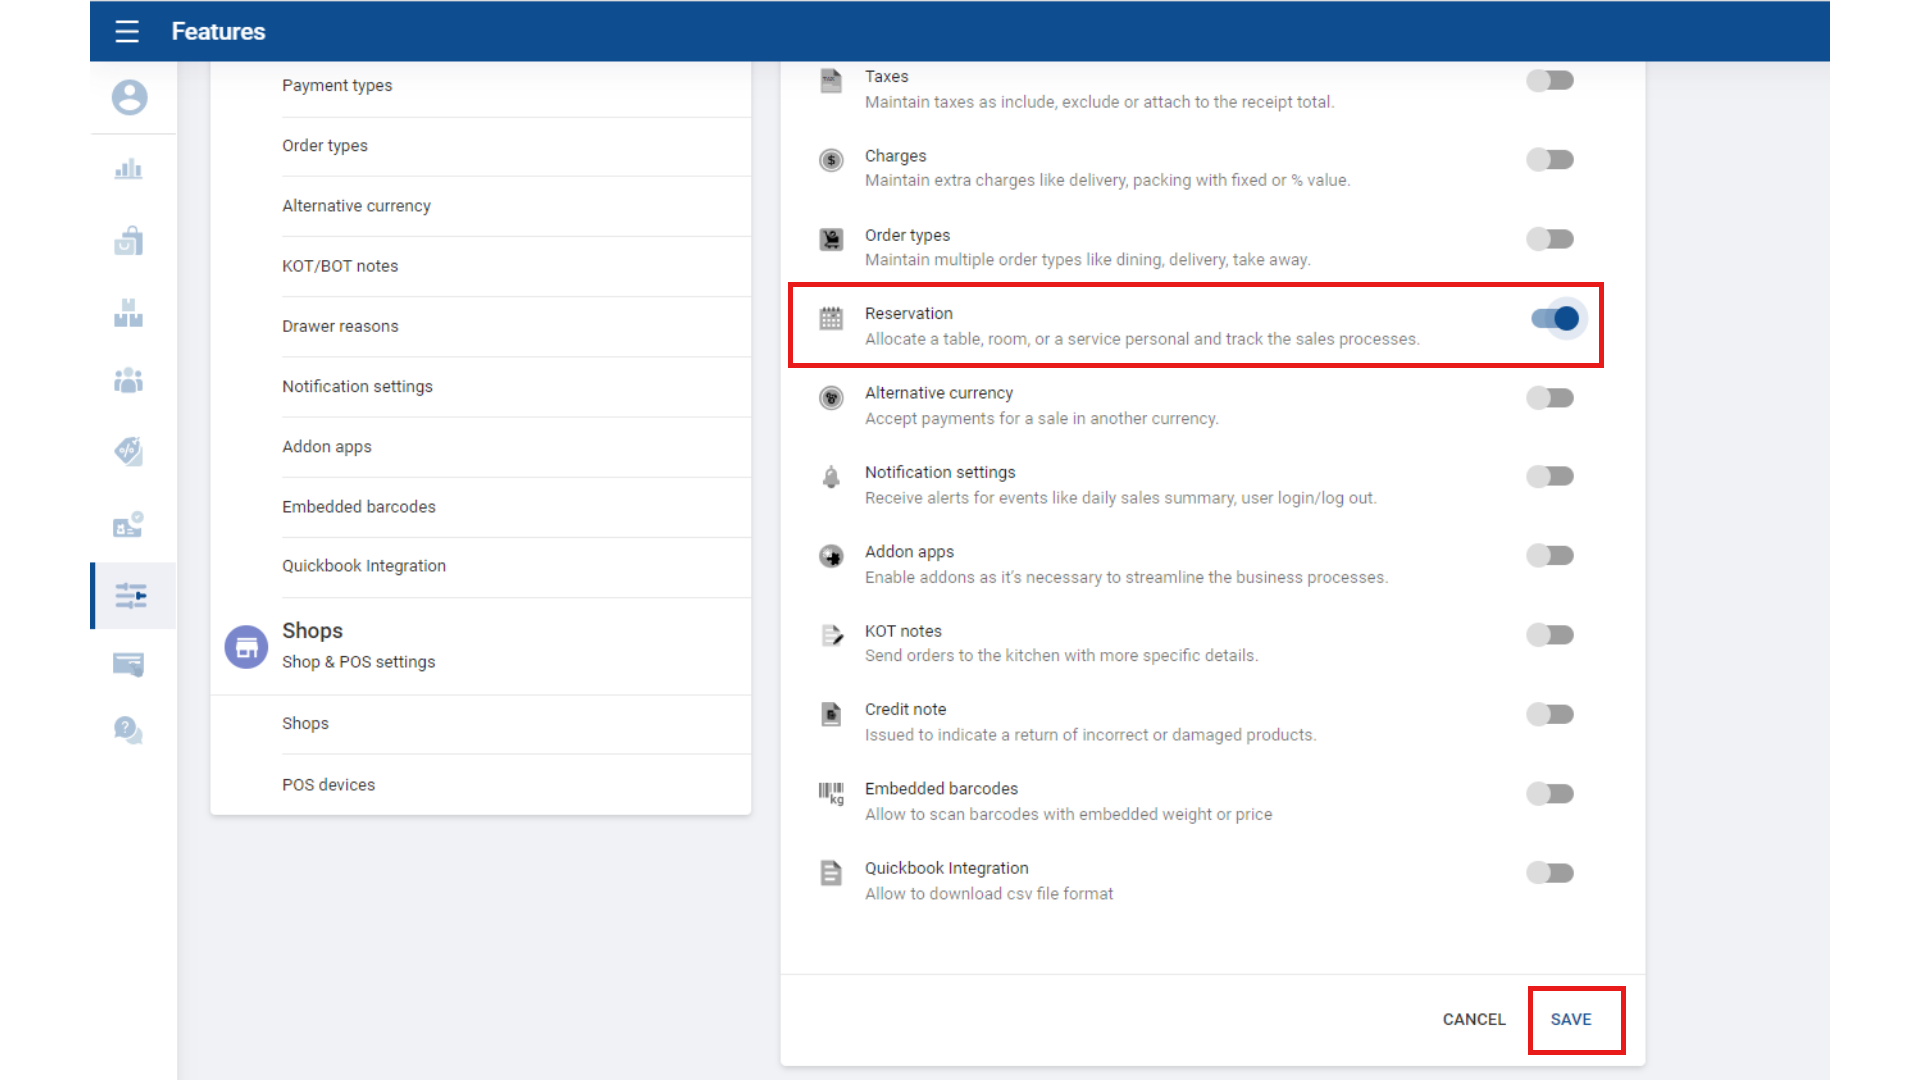
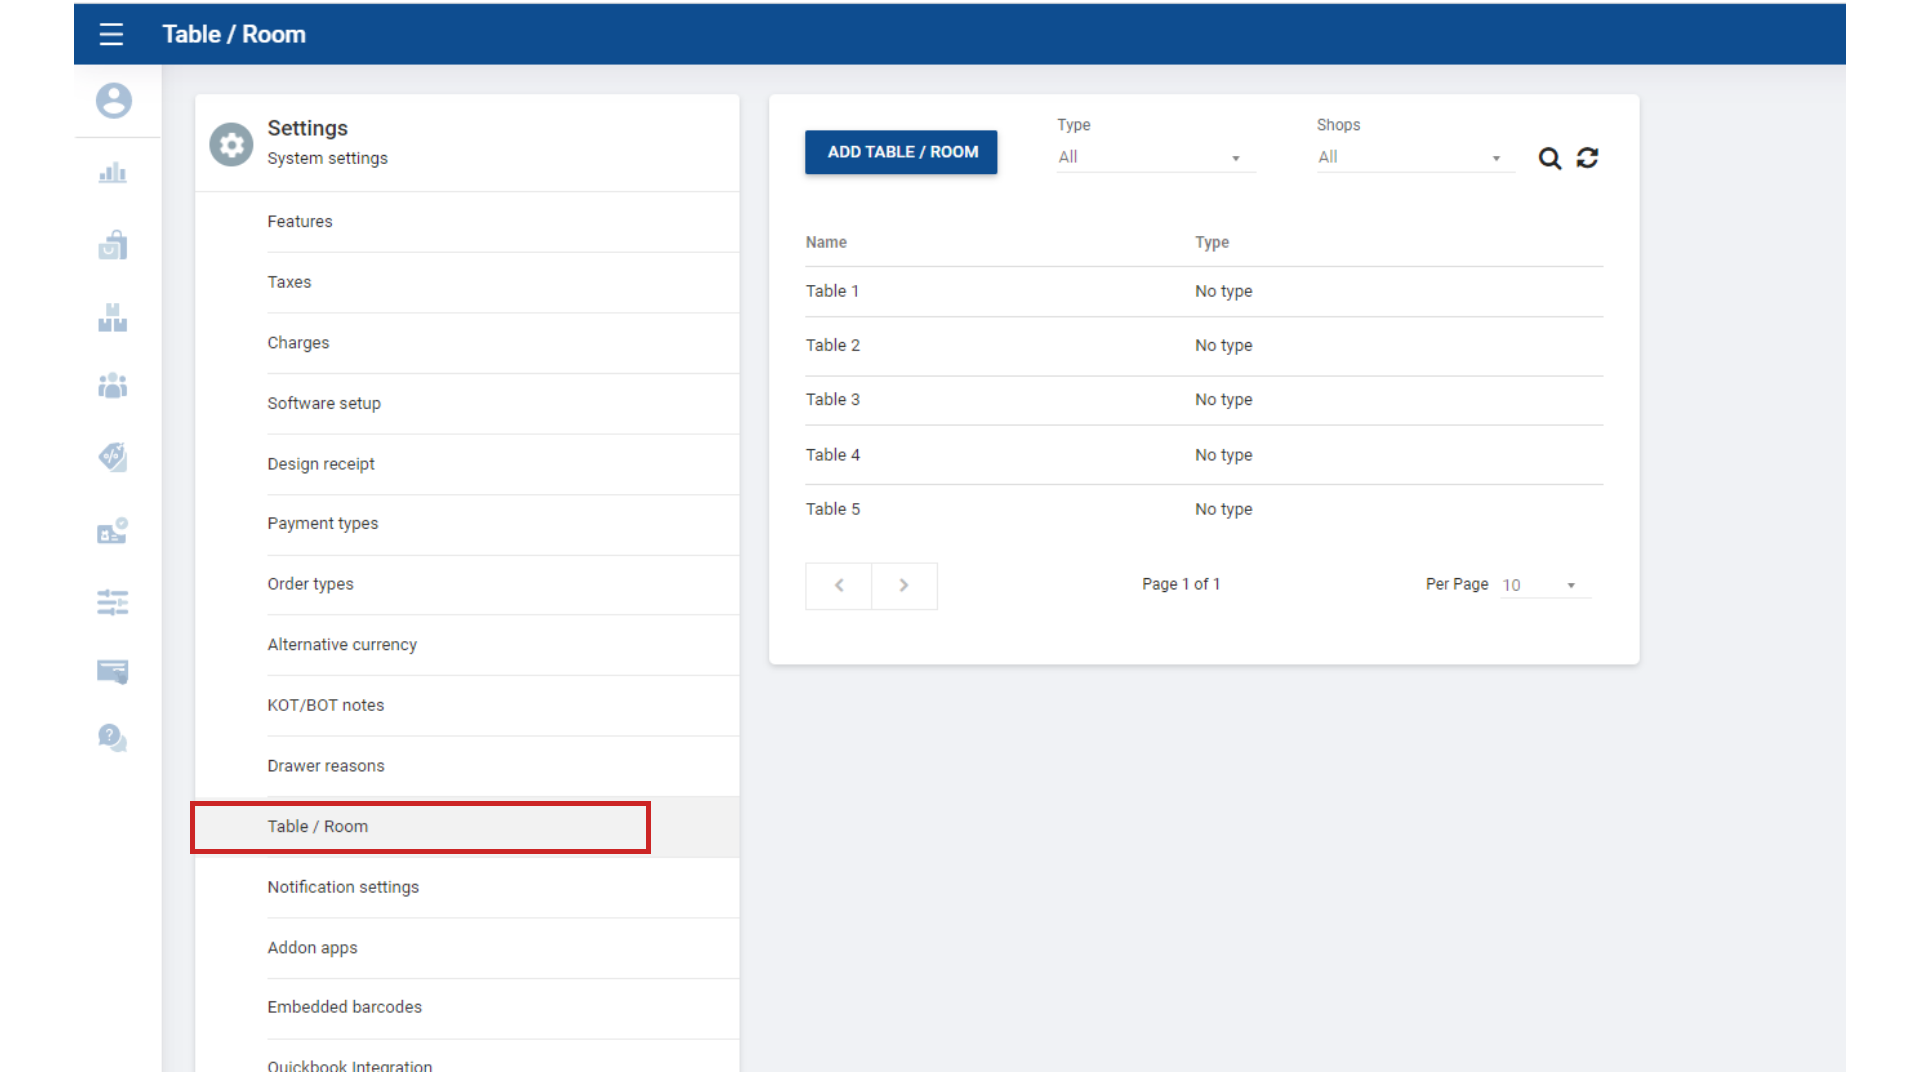
Users can create a new table via the backoffice web portal.  

  1. Login to POS Back Office Webportal 
  2. Select “ Settings ” from the main menu 
  3. Go to the “ Feature” 
  4. Tick ON “Reservations” button 
  5. Click “ Save”  

(Once you ON “Reservations”, it will appear as a sub-menu on the settings section as “Table / Room”)  


3. How to Reserve Tables or Rooms & Assign Staff


  1. Select “Table / Room” 
  2. Click “Add Table / Room” 

4. How to Reserve Tables or Rooms & Assign Staff


  1. Enter name and type  
  2. Click ‘Save” 

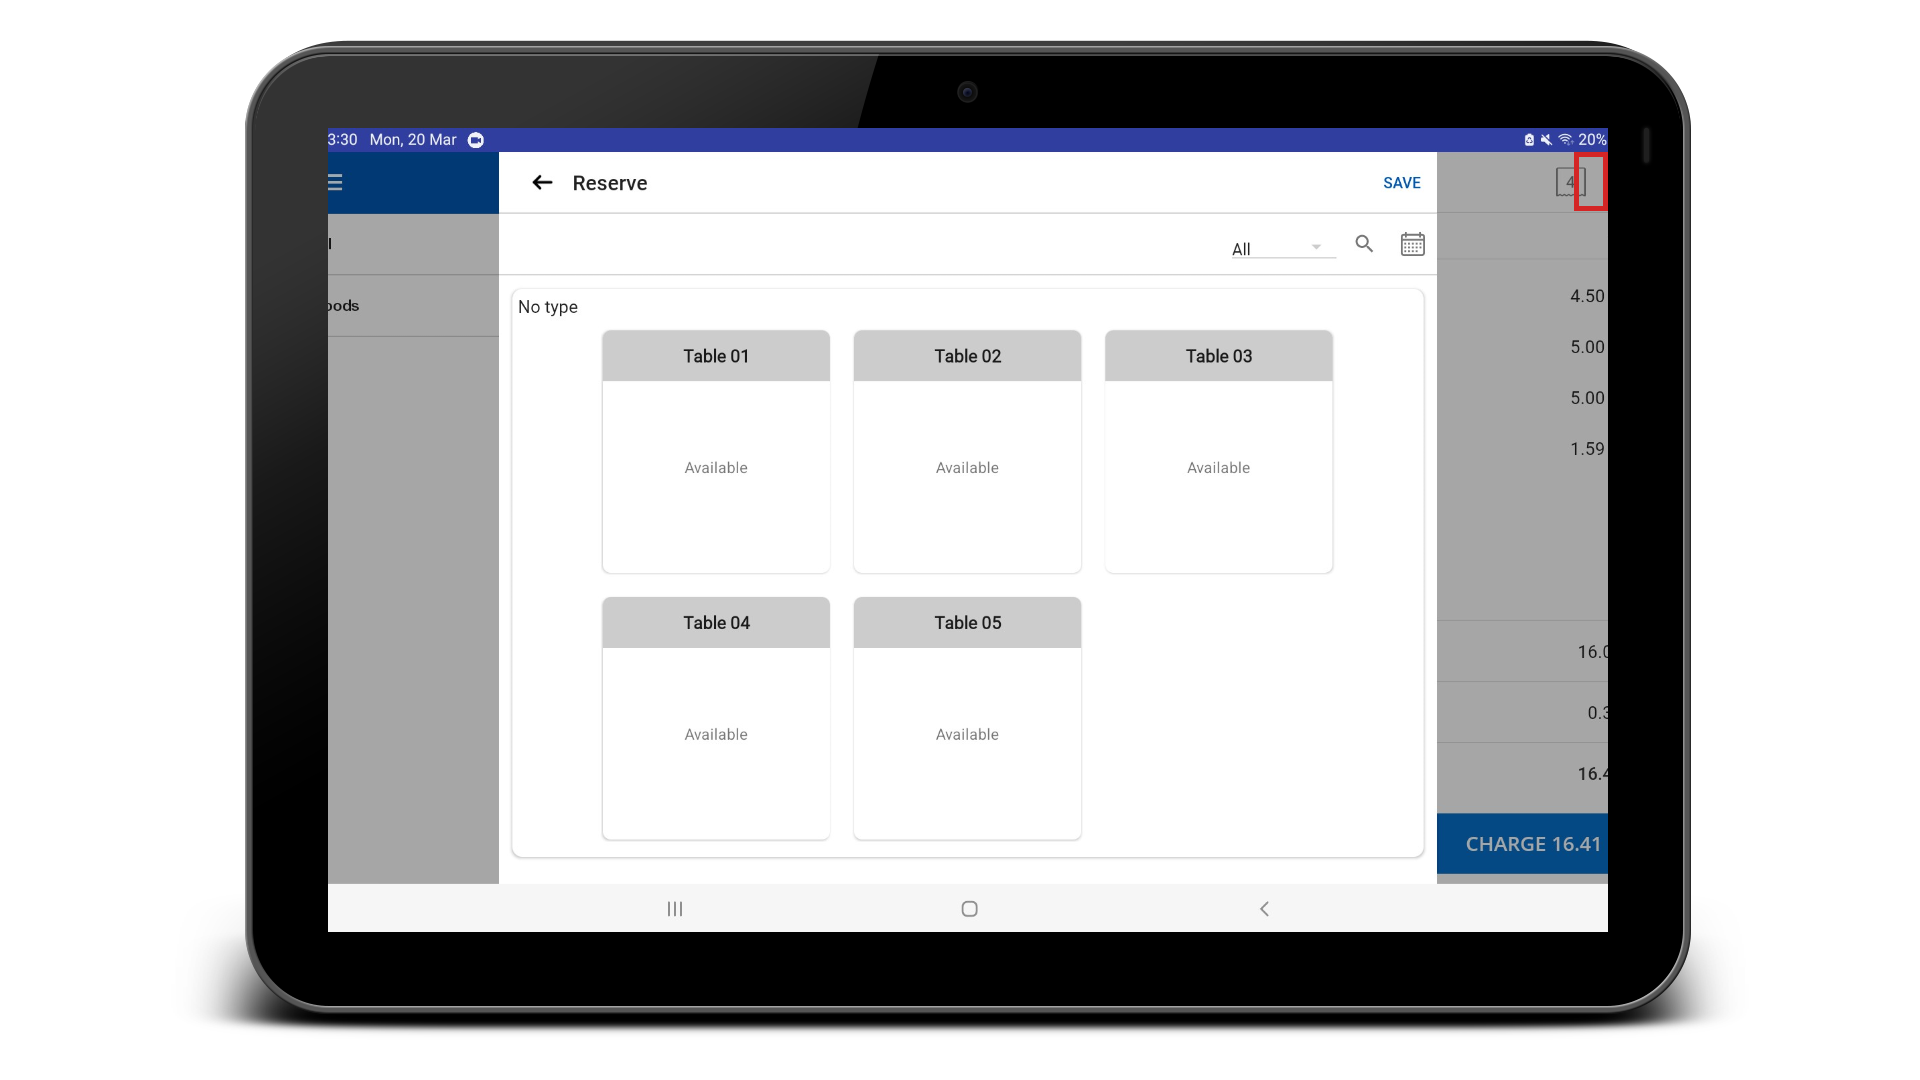
(Once you saved the tables, it will be in POS App side “Table” icon. 


5. How to Reserve Tables or Rooms & Assign Staff


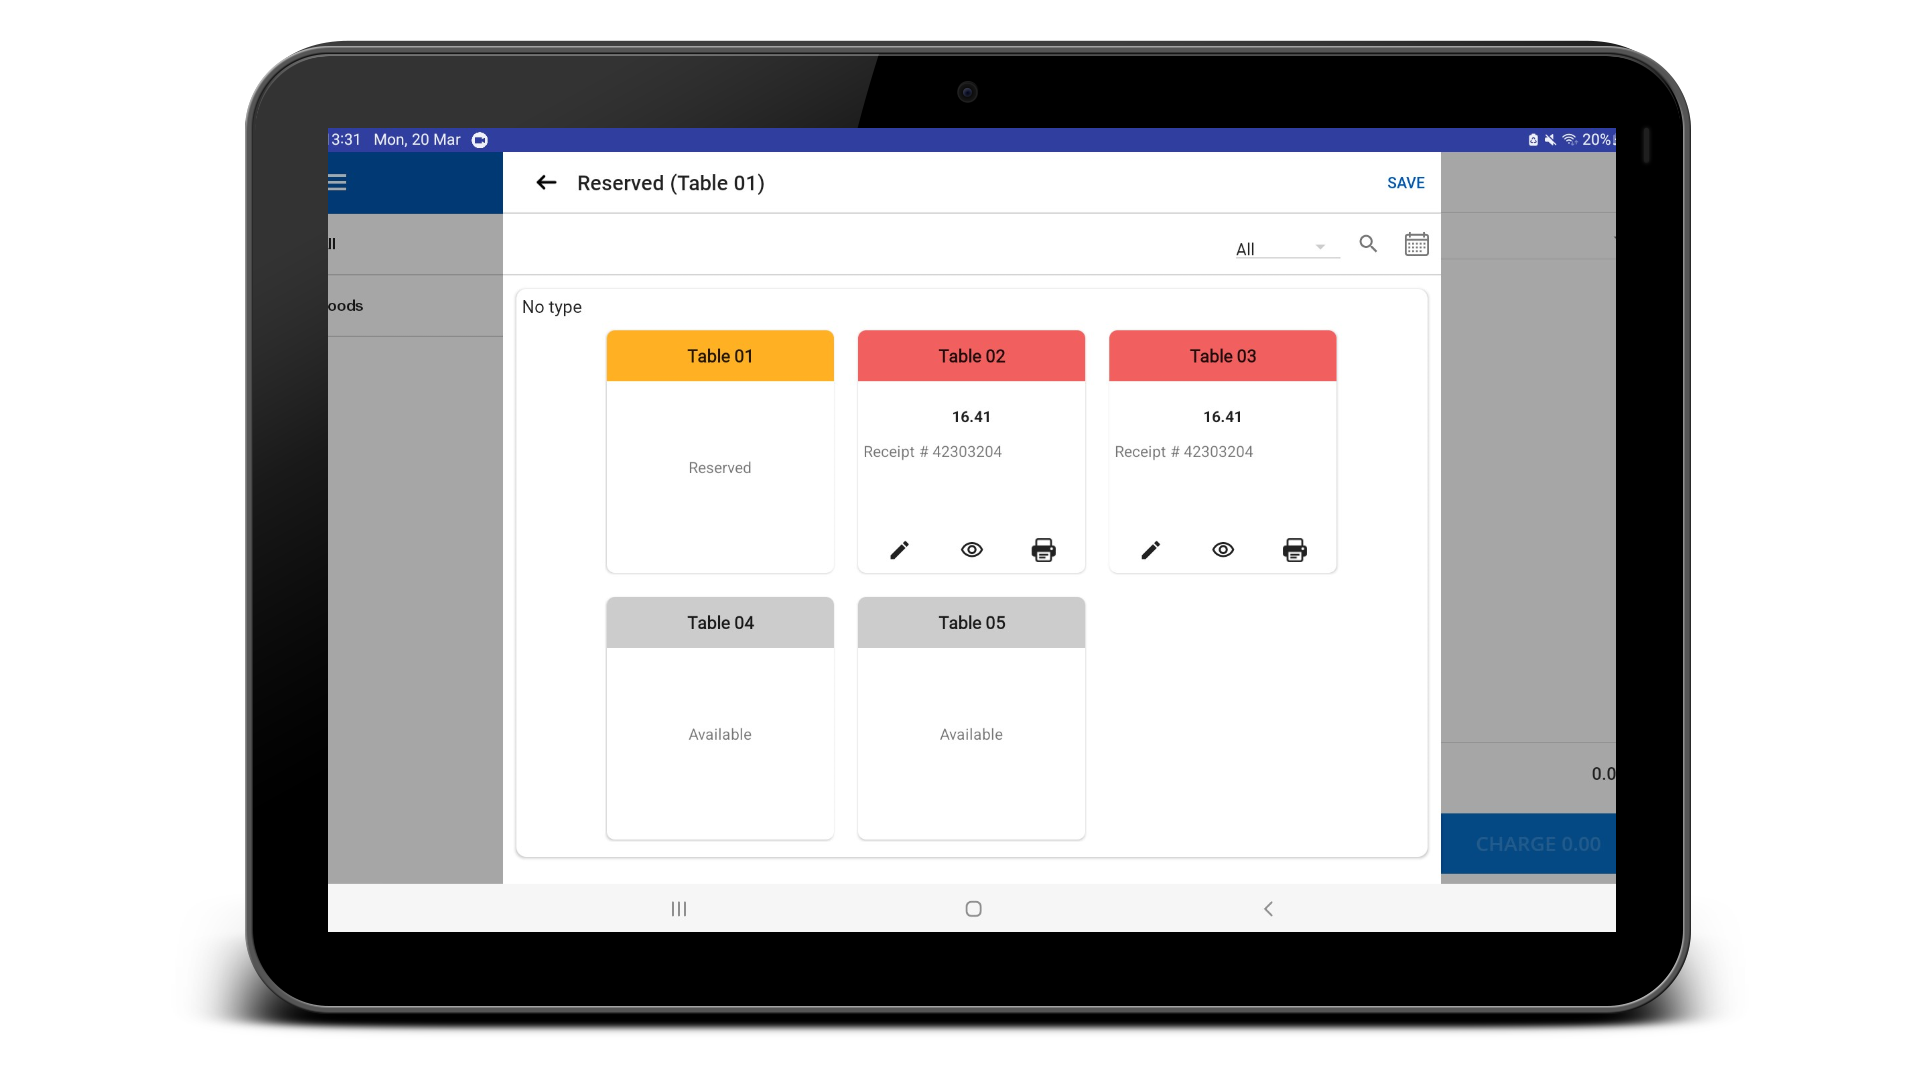
The status of the tables is shown with different colors: 

  • White – available 
  • Red- Occupied  
  • Yellow – Reserved  

The new table layout allows users to add more than one table when billing. 


Users can assign orders to the table by selecting the table number/name from by clicking on the table on a new table layout. 

View orders by table: As orders are assigned to tables, the POS system will keep track of which items were ordered for each table, and display this information on the order screen.  

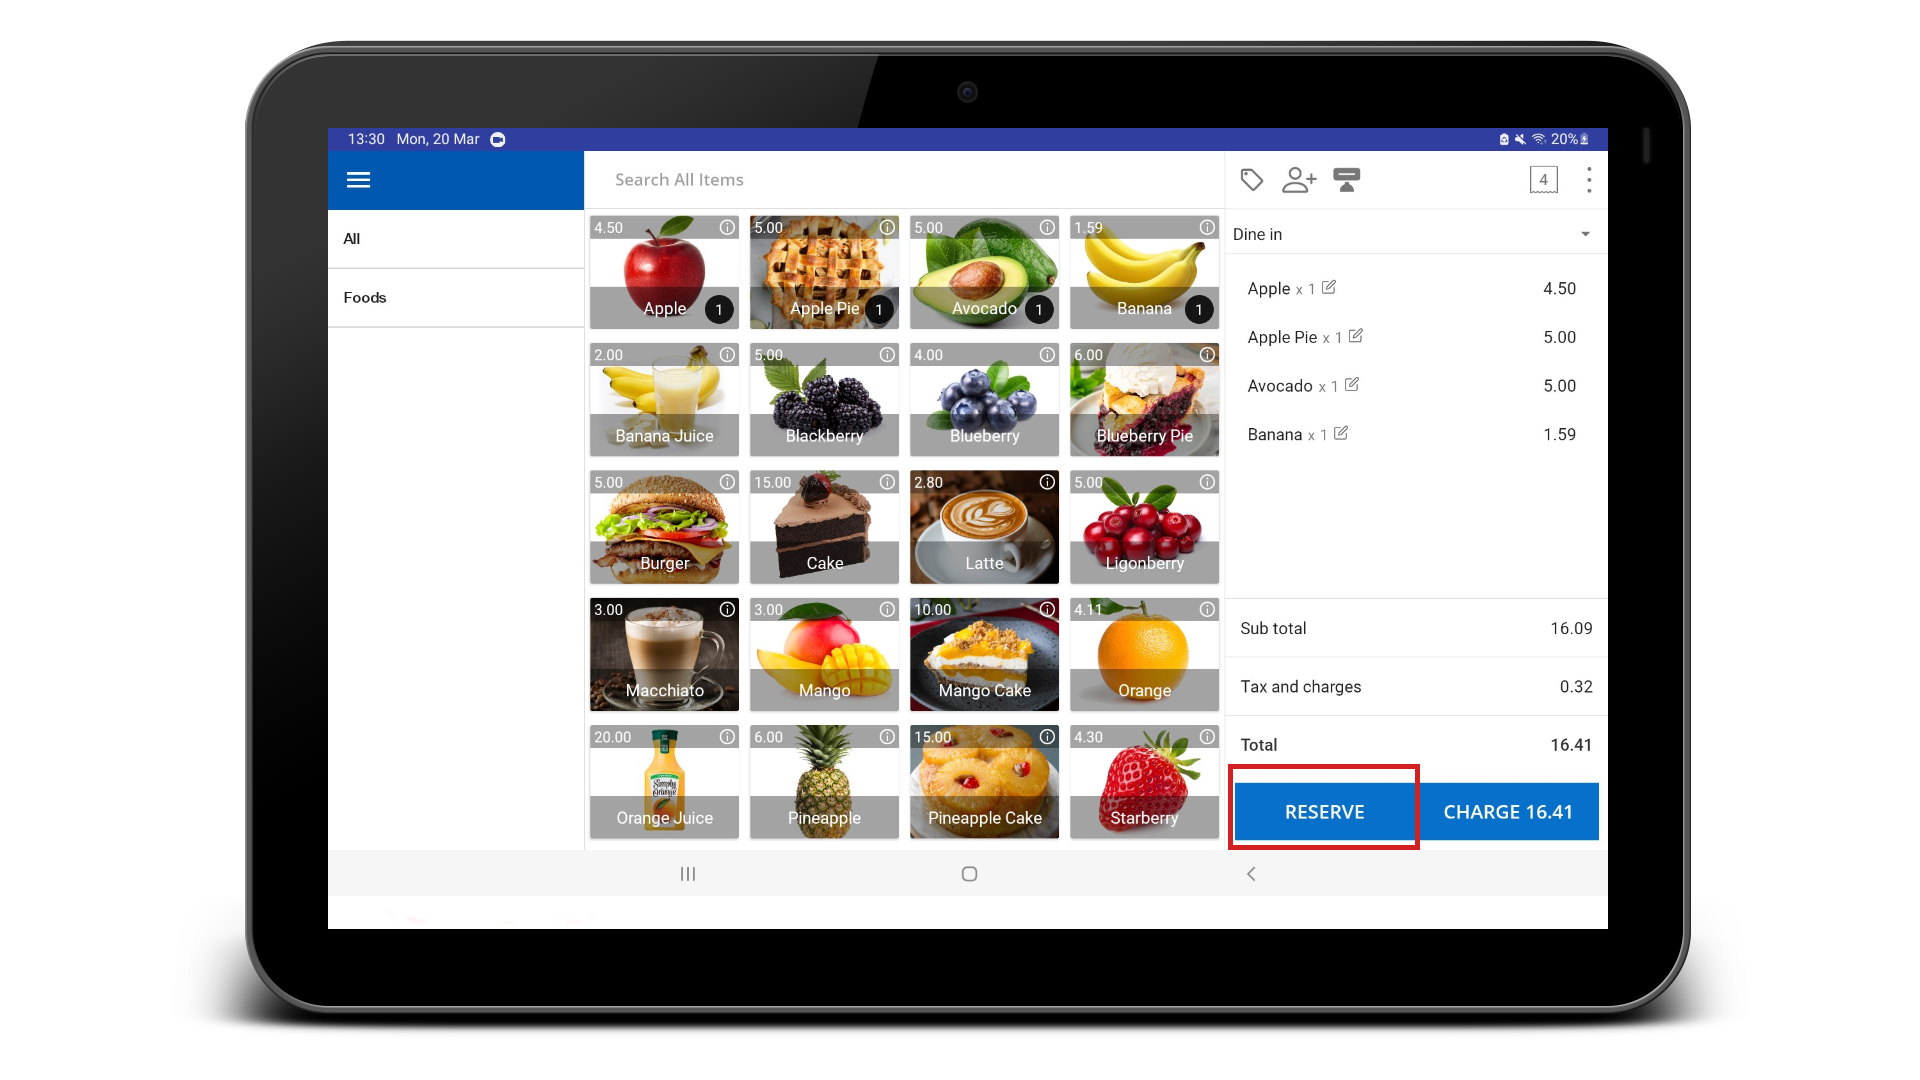
Settle bills by table: When customers are ready to pay their bills, staff can use the Table function to settle the bill for each table individually and can generate a Pre-Bill. 


6. How to Reserve Tables or Rooms & Assign Staff


  • To reserve tables/rooms , First select the product(s) 
  • Then, click the three- dot button in the top right corner.
  • Select 'Table / Room'.

7. How to Reserve Tables or Rooms & Assign Staff


  • Now you will see the available Tables / Rooms. 
  • Select the specific one(s) you need. 
  • Once you select them, the color will be changed to orange. 
  • Save the changes.

8. How to Reserve Tables/ Rooms


  • Click 'Reserve'. 

9. How to Reserve Tables/ Rooms


  • Now you can save the bill, with a description (if needed).


10 . Assign Staff to Tables or Rooms and Update the receipts.


  • To update the receipts (ex: add more products) 
    • Click the three-dot button.
    • Select 'Tables / Rooms'.
    • Select the reserved table in red colorwhich you need to update the details. 

11. Assign Staff to Tables or Rooms

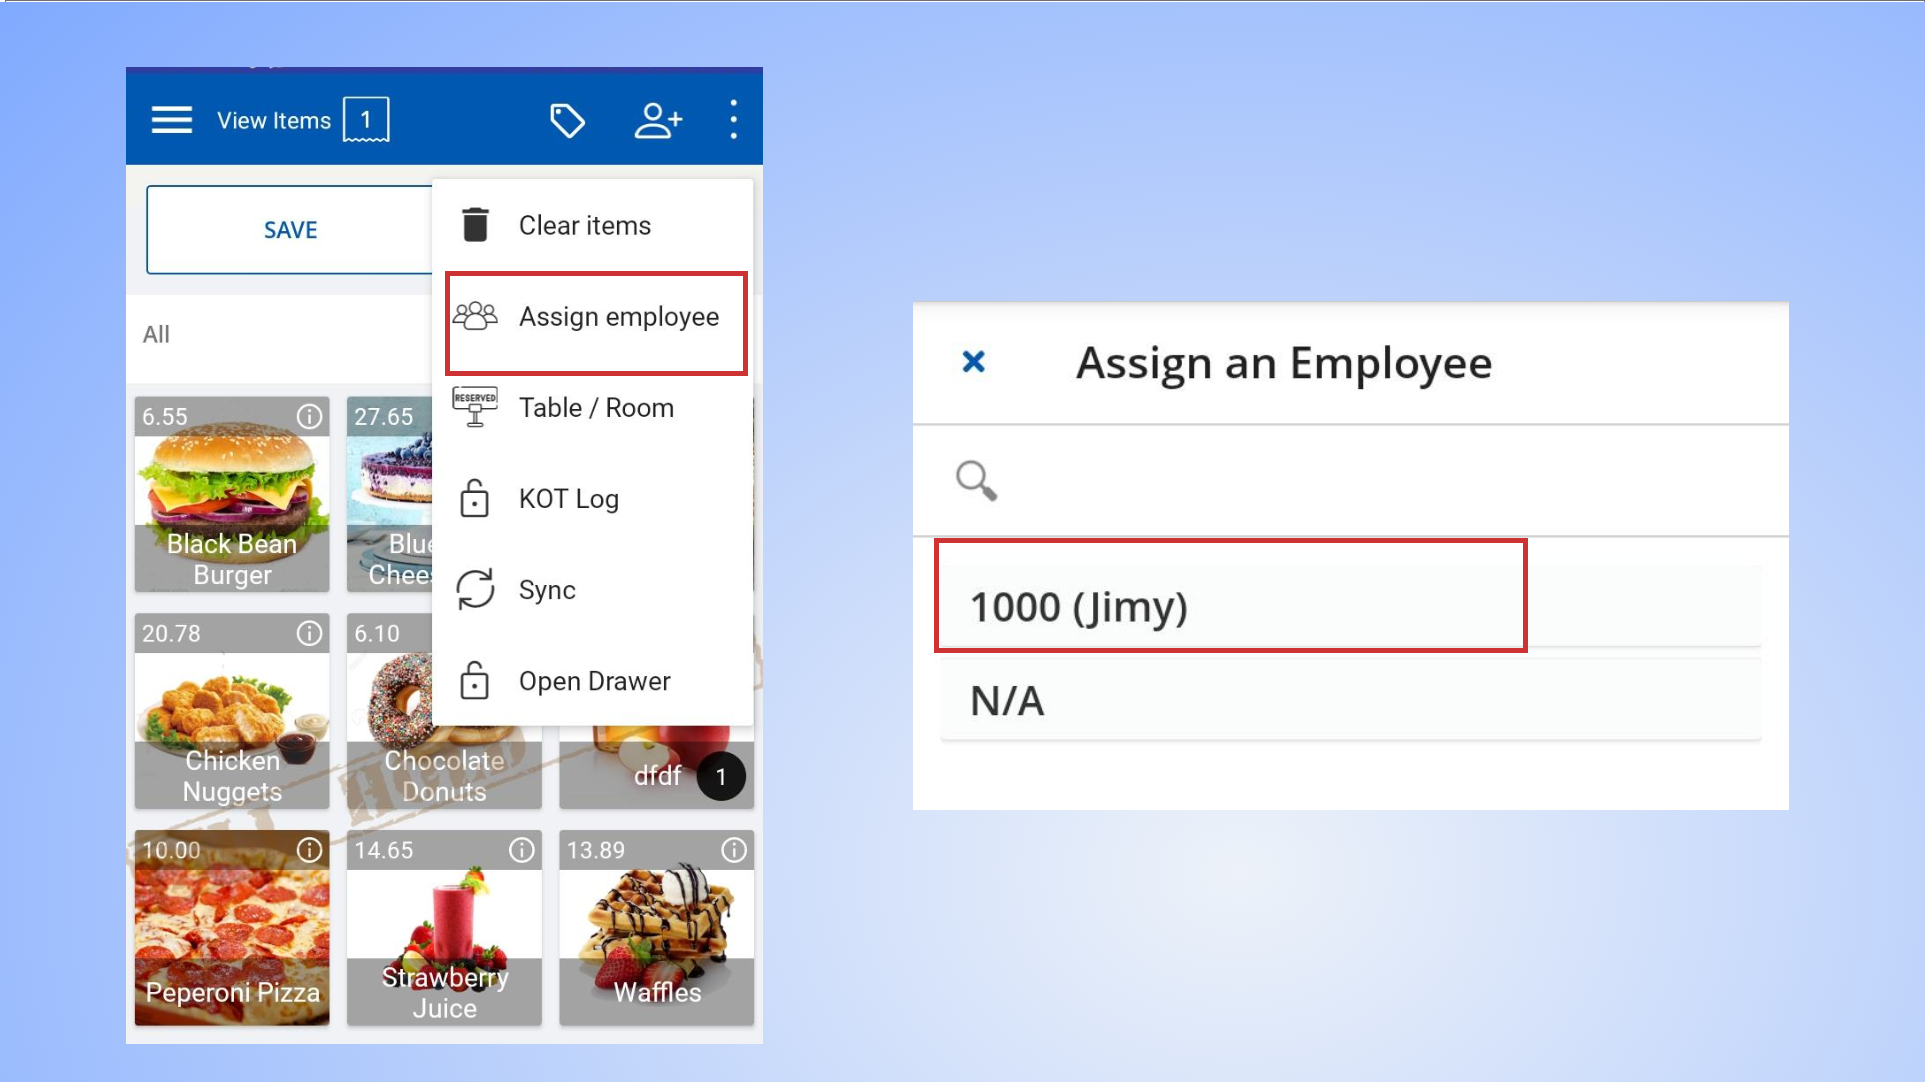
To assign employees,  you should have created 'Other staff' from Back Office.

Please visit: How to Create Other Staff  for the instructions.

  • To assign staff, you can click the three dot button in the top right corner again and select 'Assign employee'.
  • Then, select the name of the employee. 

Was this helpful?