SalesPlay - Help Center
How To Make Sales And View Past Receipts
SalesPlay POS App > 'START NEW SALE'
Was this helpful?
1. As your product list is ready, now let's move to make sales.

- You can simply click on the product to add it to the cart.
- If you need to check the product's information during checkout, tap on the Info icon ( in the top right corner of the product in the 'Grid layout', or in the right corner in 'list layout').
Tips : Find products quickly and easily
- Use 'Categories' in the left to select products.
- Use the search bar and enter the product name.
2. After you add products to the cart, you can change the detalls in the cart before charge.
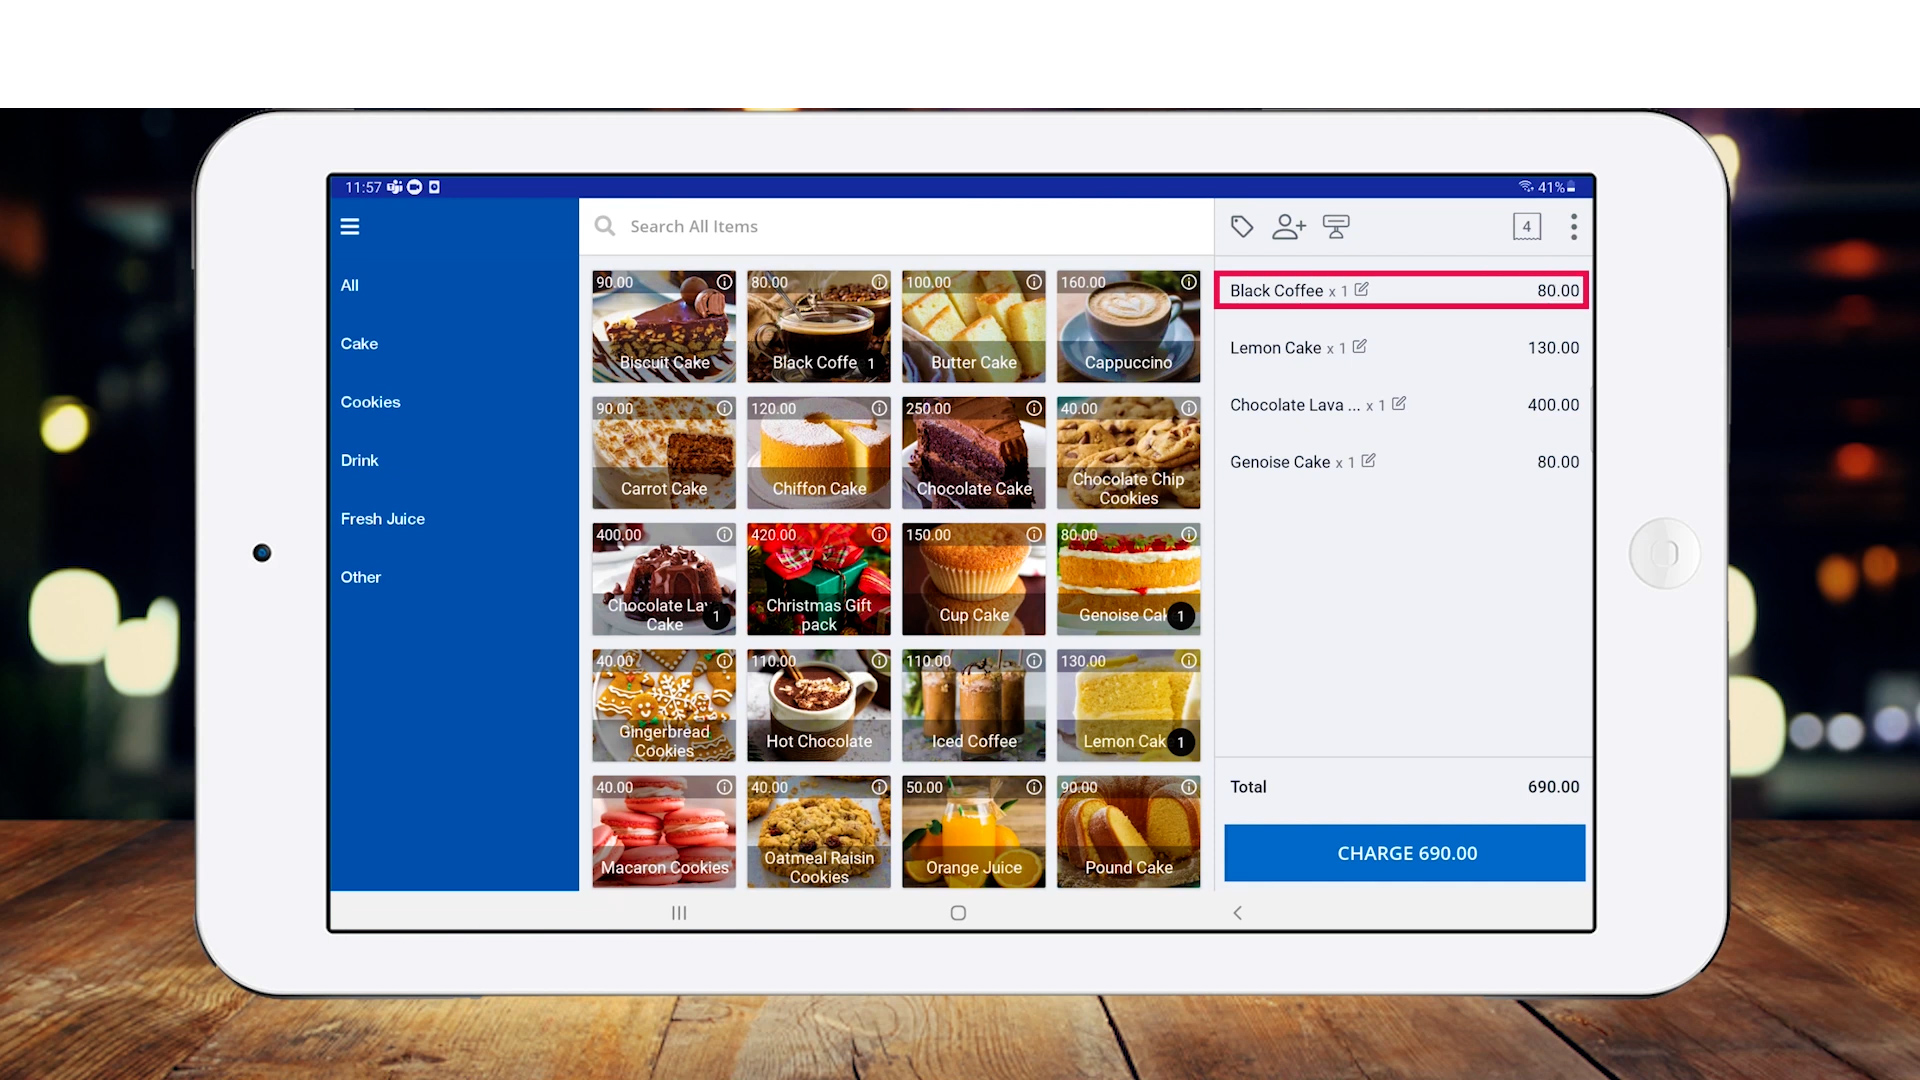
- Simply tap on the product you need to chage the quantity or delete.
3. You can change the quantity of the product by clicking the plus-minus icons or by typing the number.
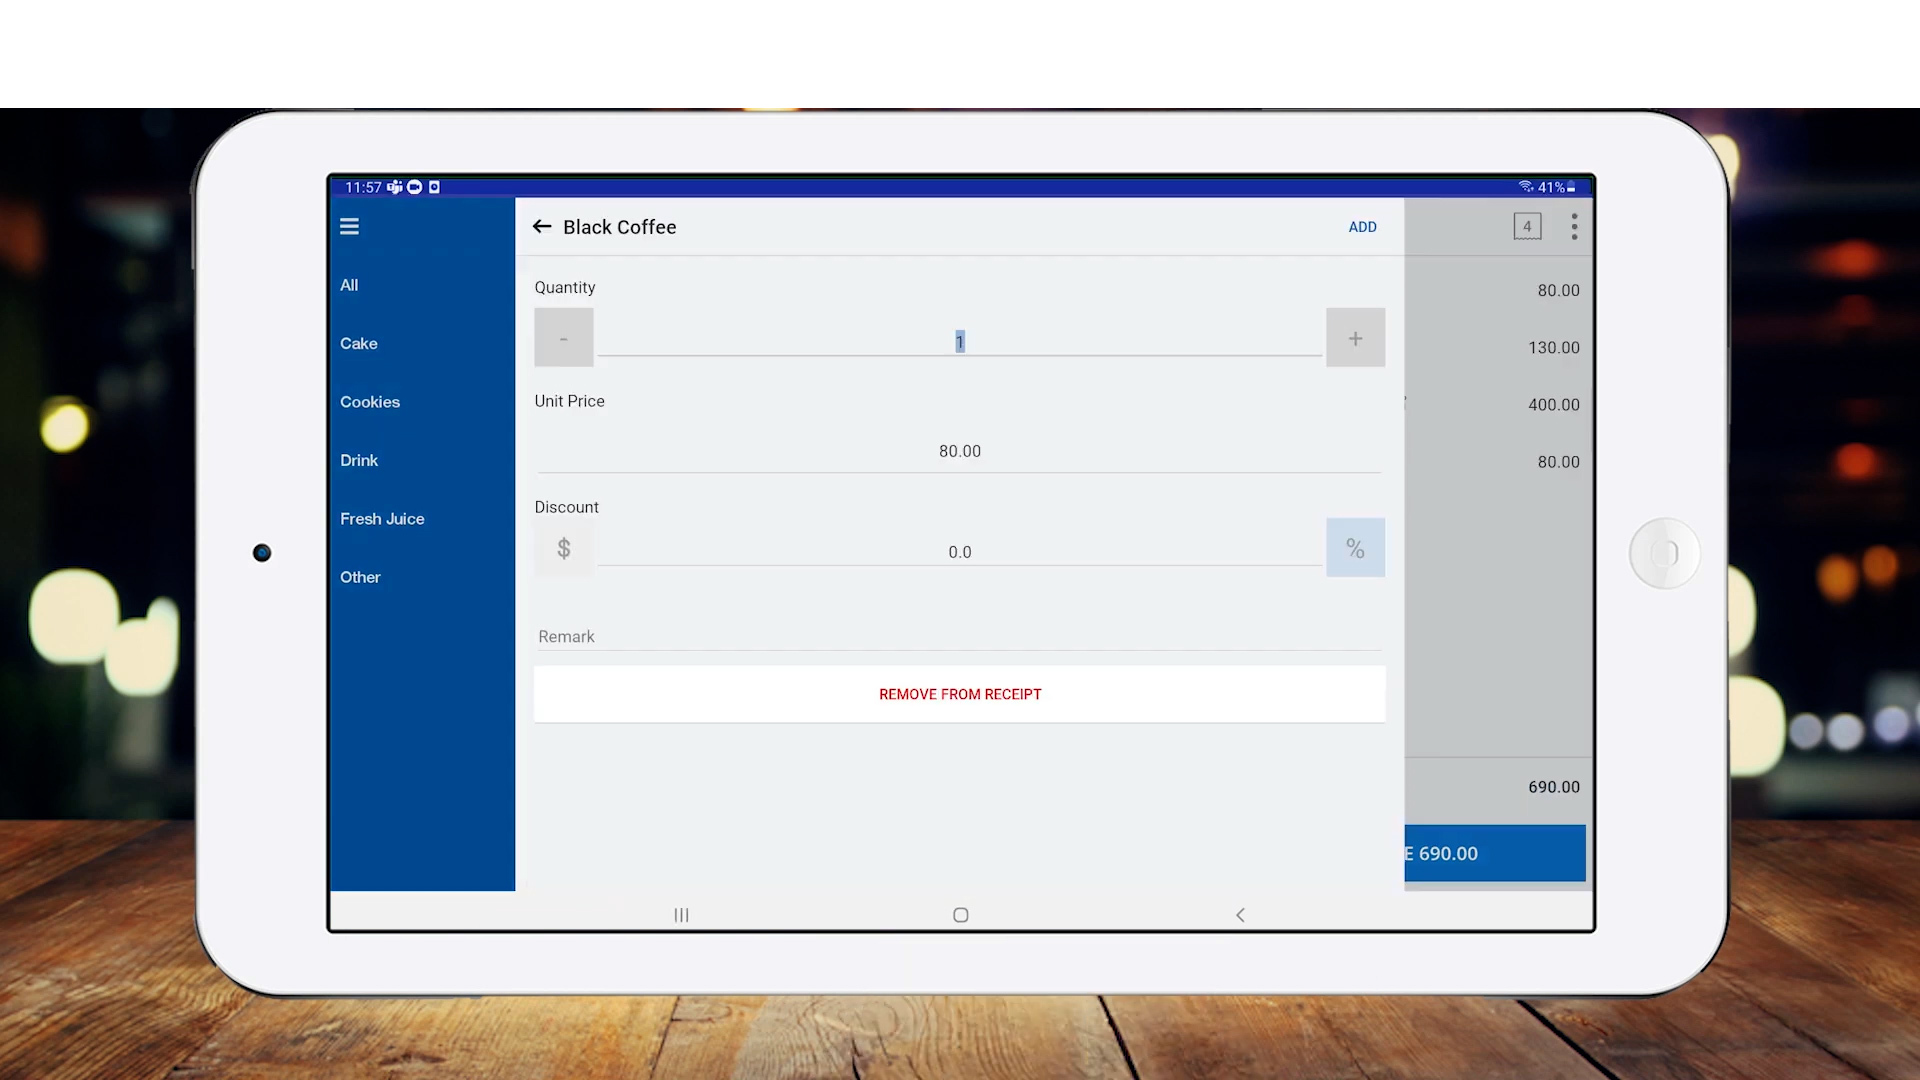
- Enter the amount if there's discount available for the product.
- You can use the Remark feature to add a special note about the product. The 'remark' will be included in the receipt with the product details.
- Click 'REMOVE FROM RECEIPT' to remove the product.
4. If the cart is ready to checkout, click 'CHARGE'

5. SalesPlay allows you to select a type of payment during checkout
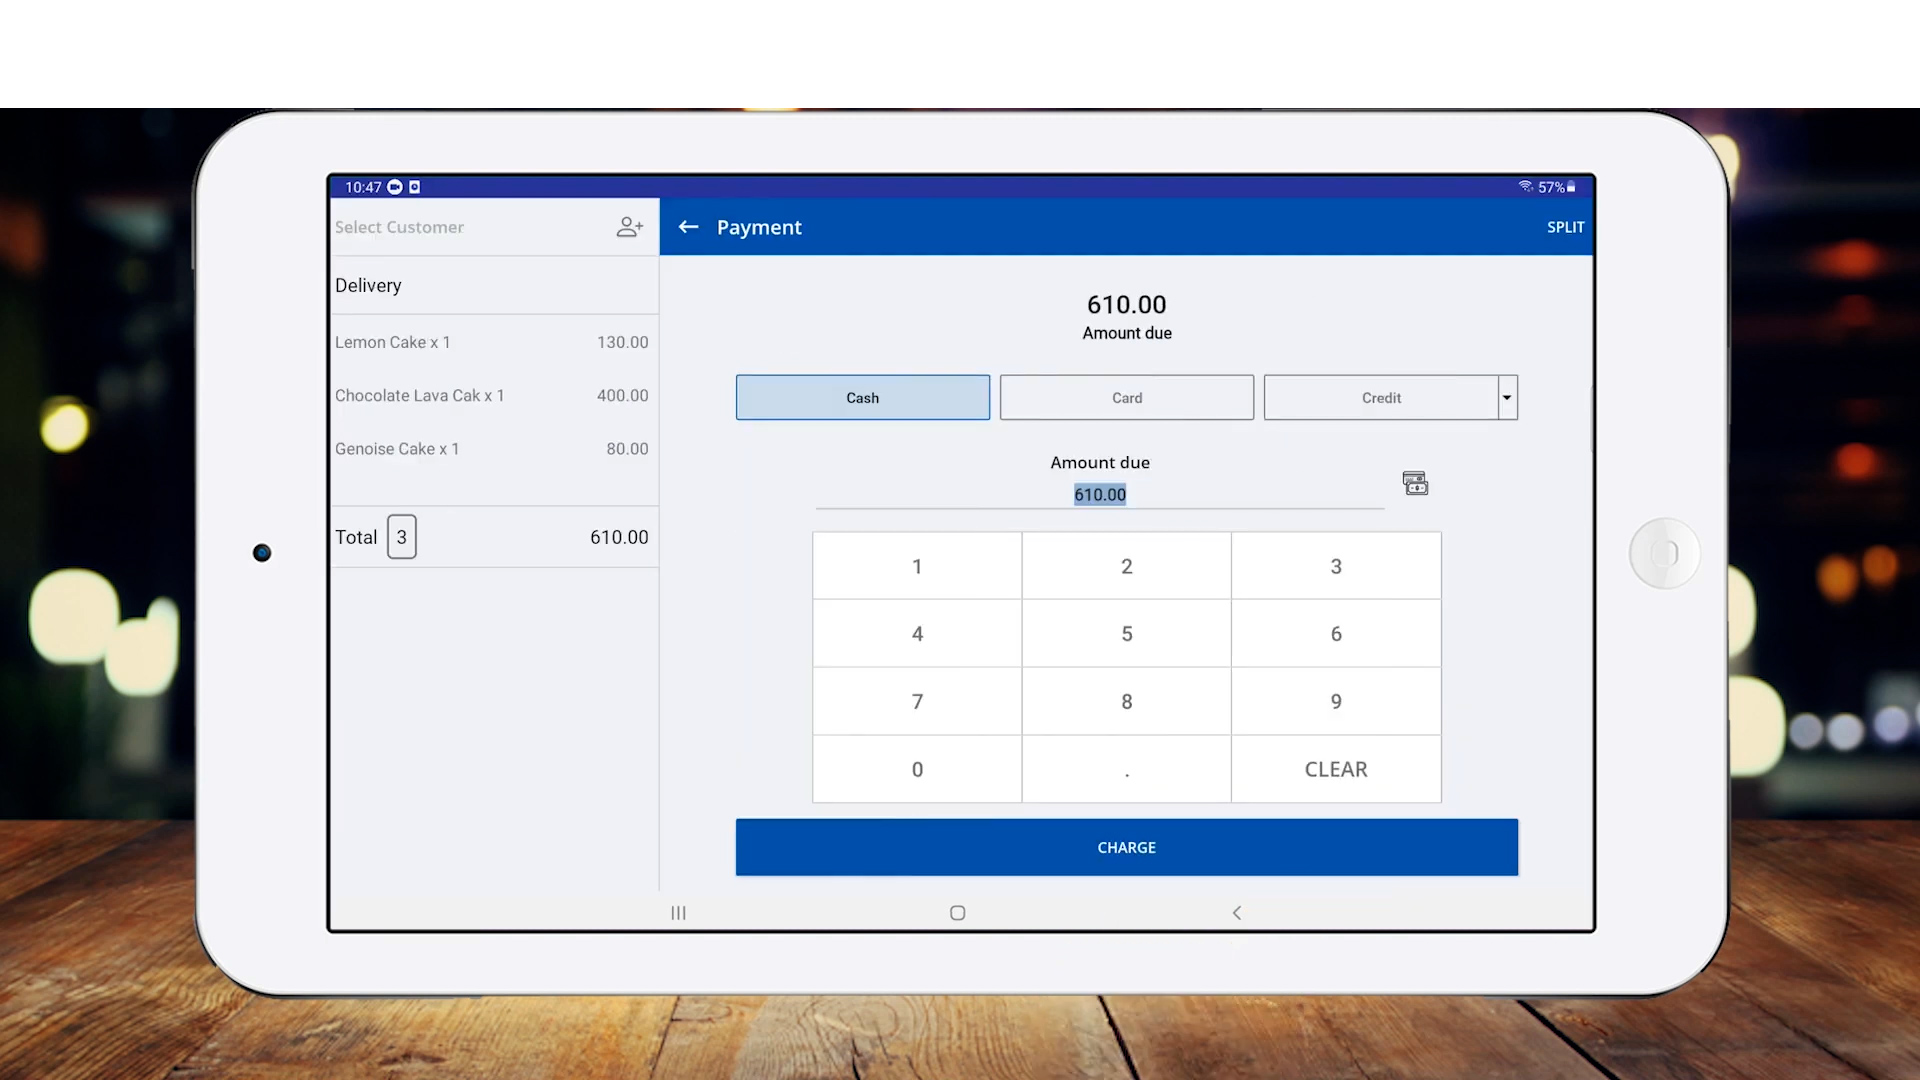
- If the customer pays in cash. you can type the received amount in the given space for 'Amount due'.
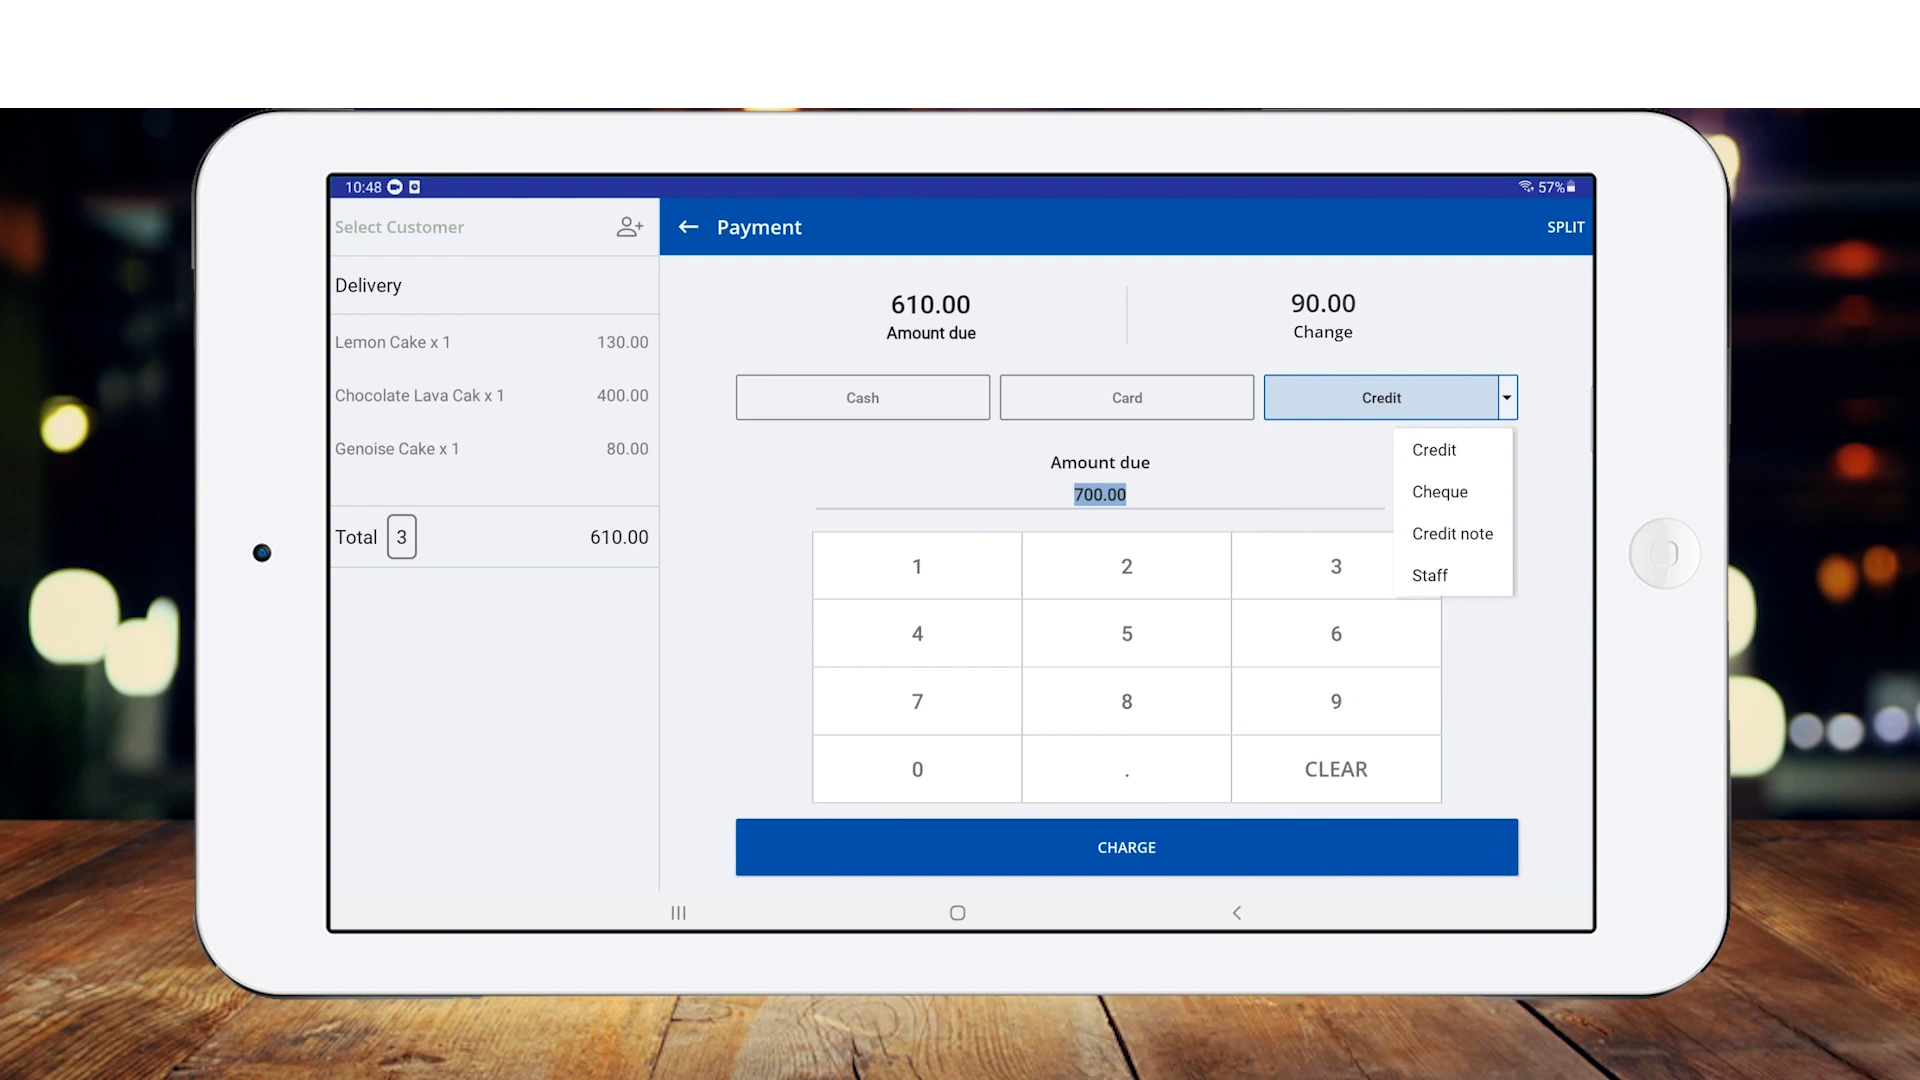
6. To select other payment types select the drop down menu in 'Credit'.
7. You can view past receipts from both SalesPlay POS app and Back Office
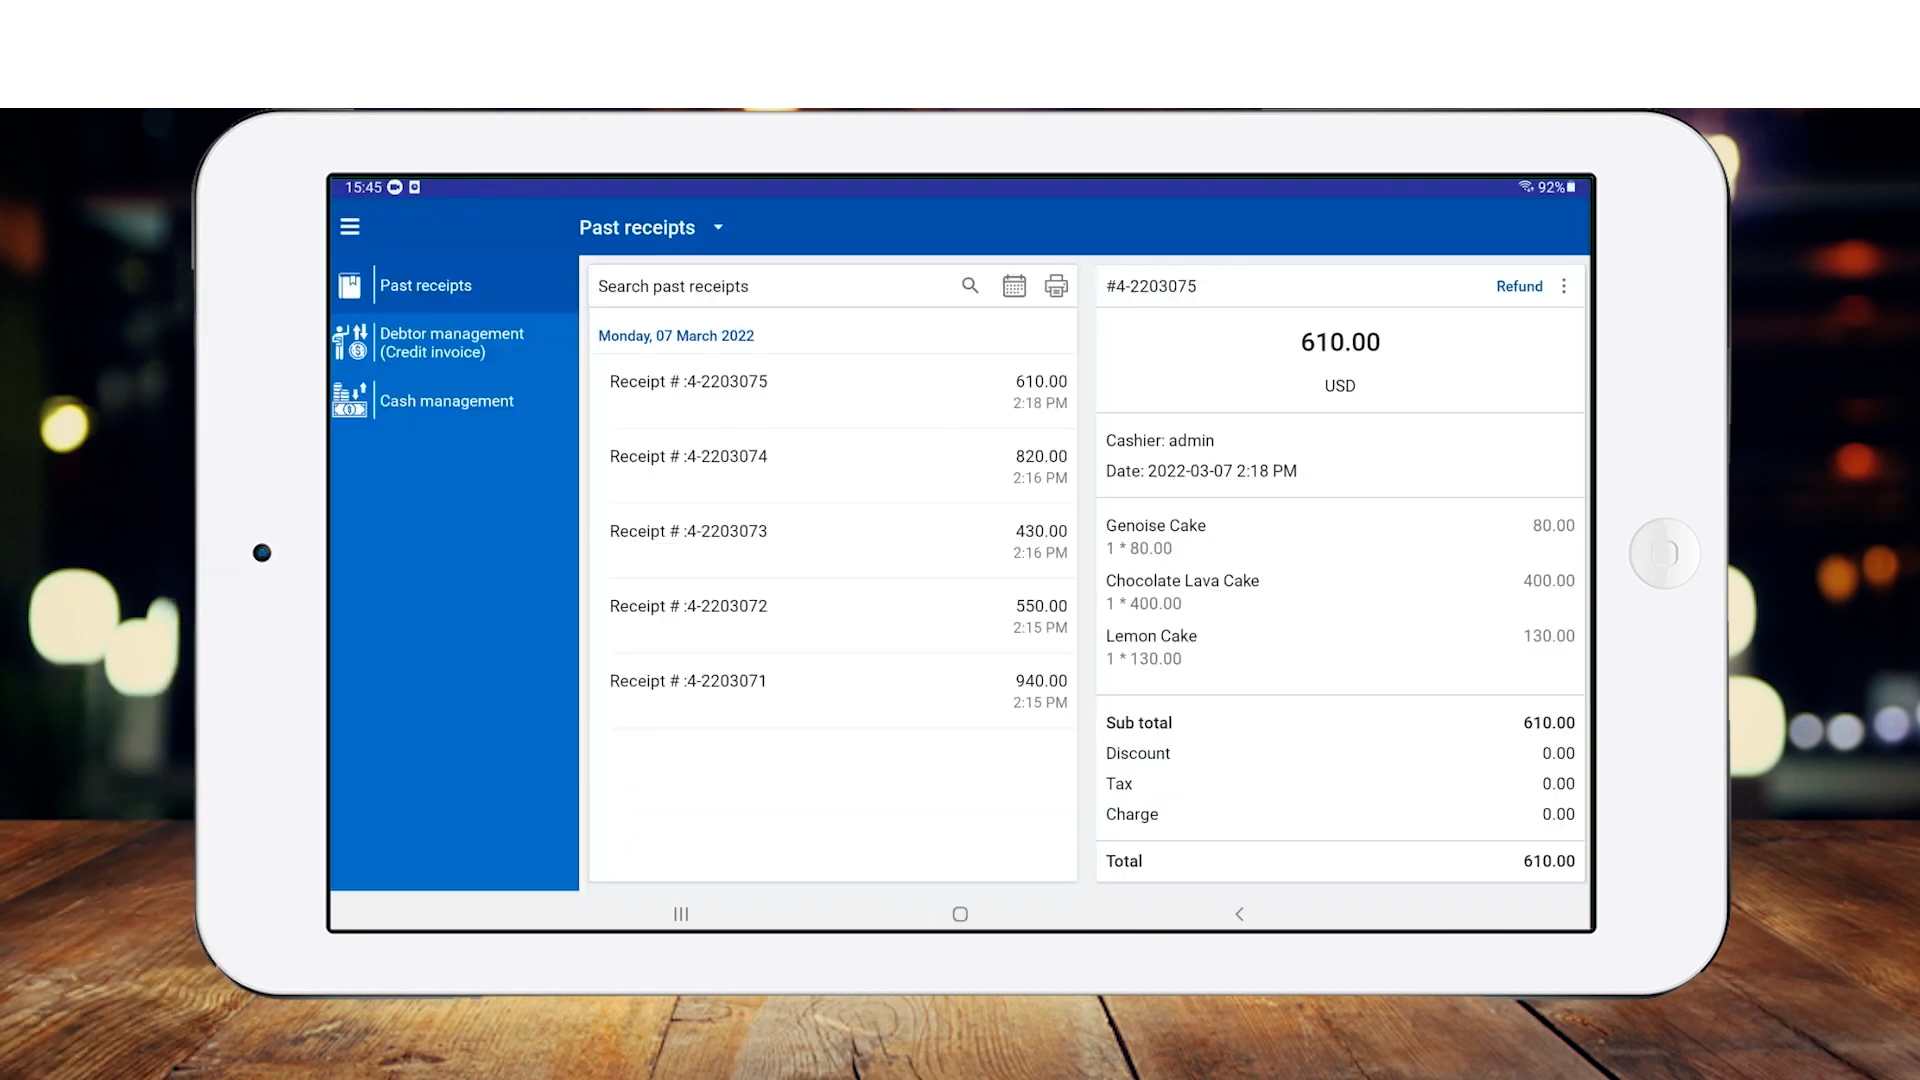
- To view past receipt from POS App, Select the Three line - menu icon, go to 'Manage Sales' and click 'Past receipts'.
- Here you can perform refunds and delete, print or share the receipts.
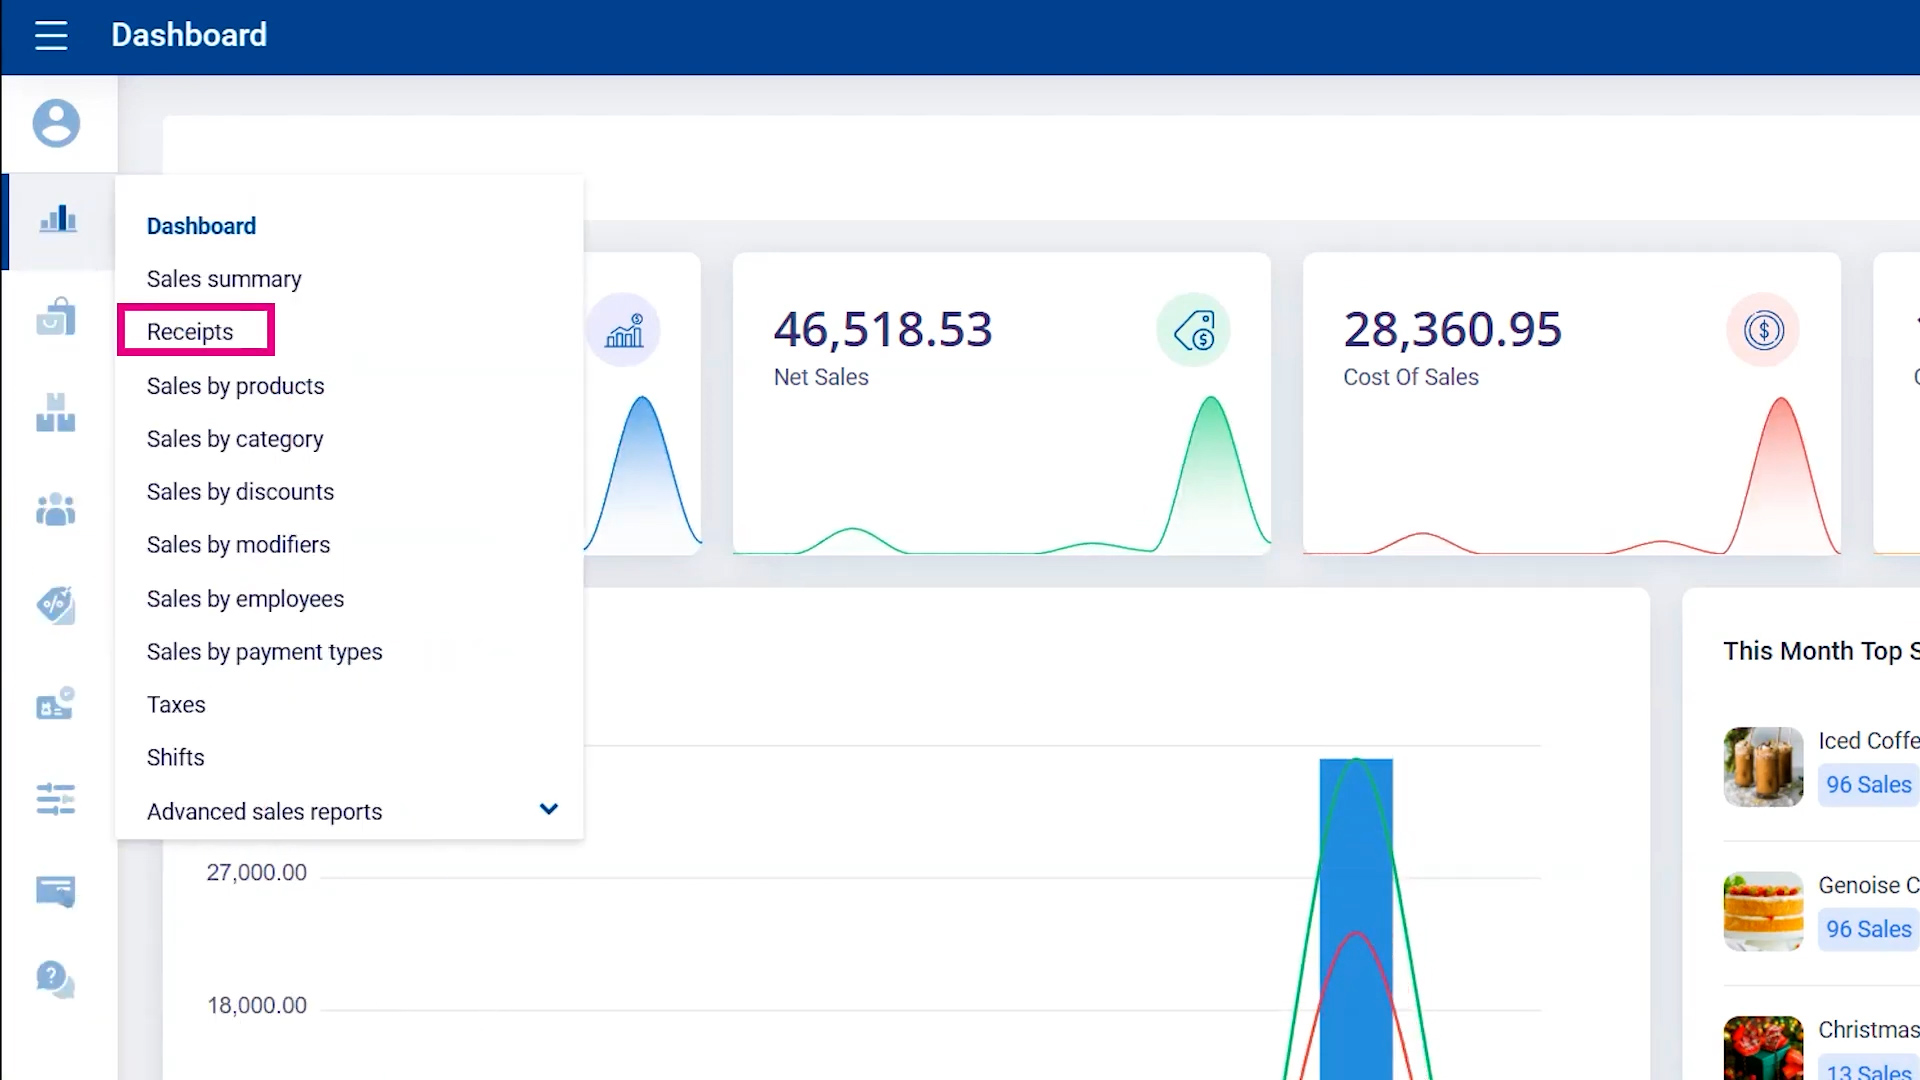
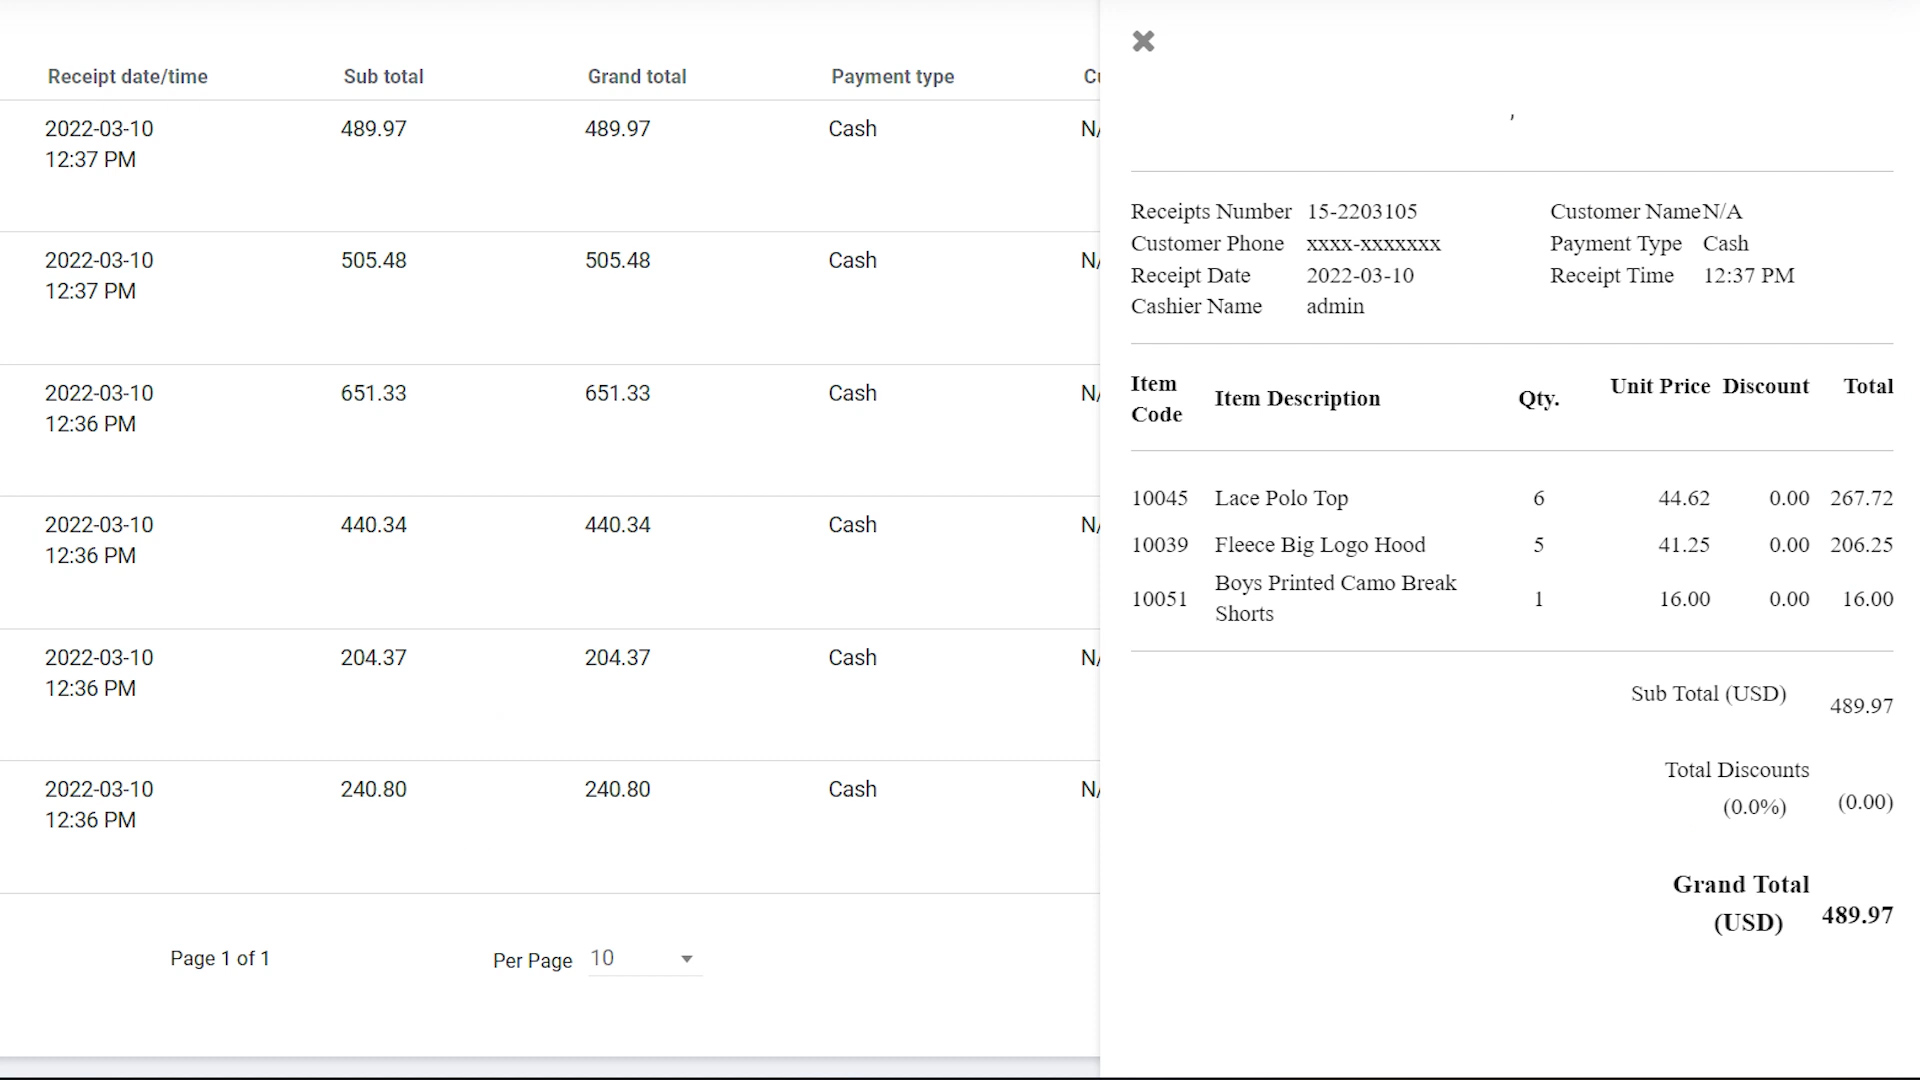
8. To view the past receipts from Back Office, go to SalesPlay Back Office → Dashboard → Receipts.
9. You can have real time access to receipt reports from Back Office and filter them by date (range), shop(s), customer(s) or cashier(s).
Was this helpful?