SalesPlay - Help Center
Top Searches:
Product
Stock
Invoice
Payment
Step By Step
SalesPlay POS system offers seamless integration with QuickBooks accounting and bookkeeping software. This integration enables you to download receipts in CSV format and easily upload them to QuickBooks.
1. Login to POS Back Office Webportal
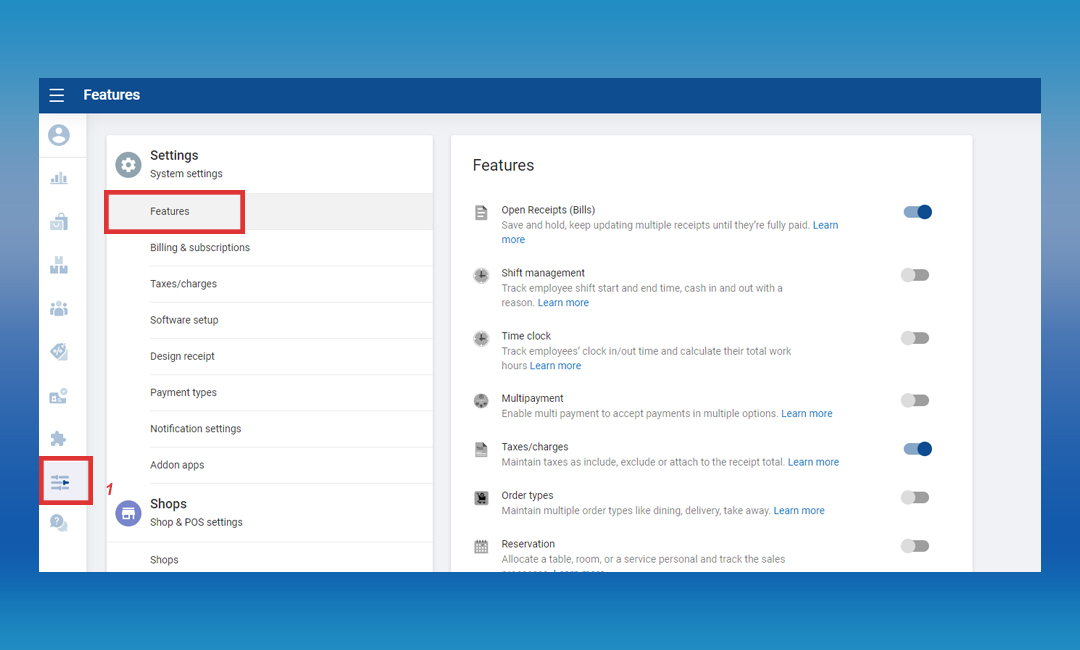
2. Select “Settings” from the main menu
3. Go to the “Feature”
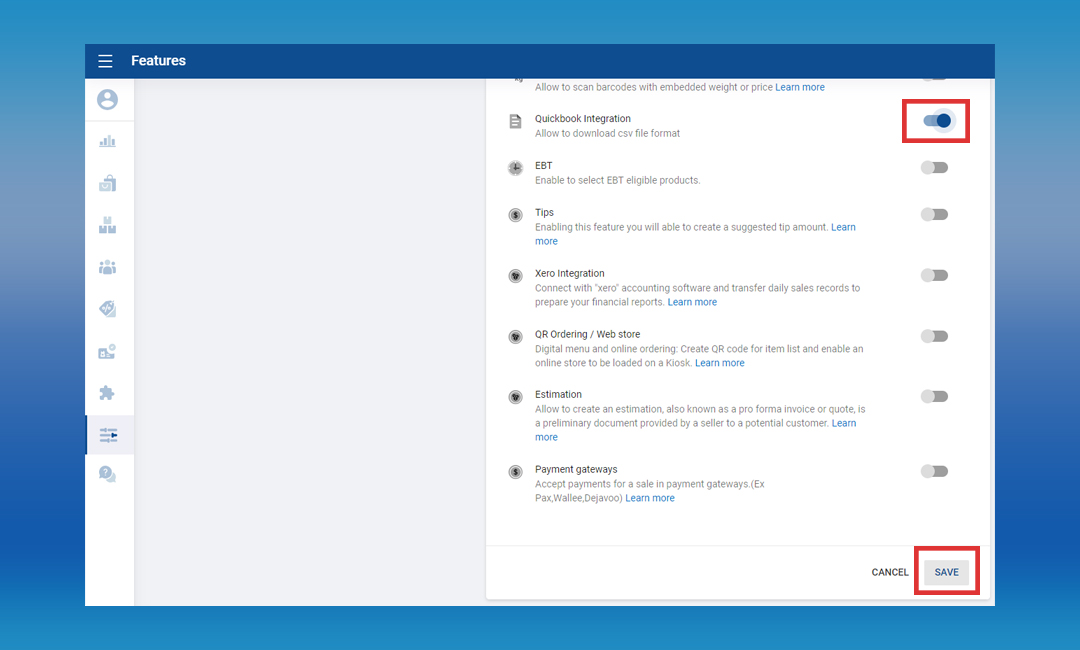
4. Tick ON “Quickbook Integration”
5. Click “Save”
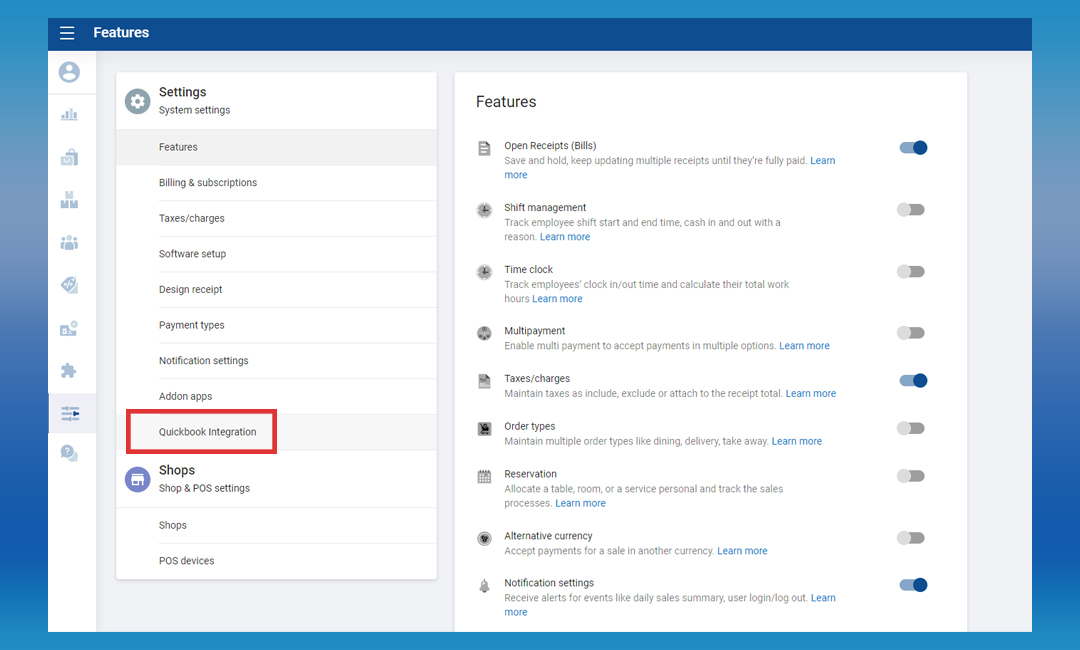
(Once you ON “Quickbook Integration”, it will appear as a sub-menu in the Settings section)
6. Select Quickbook Integration
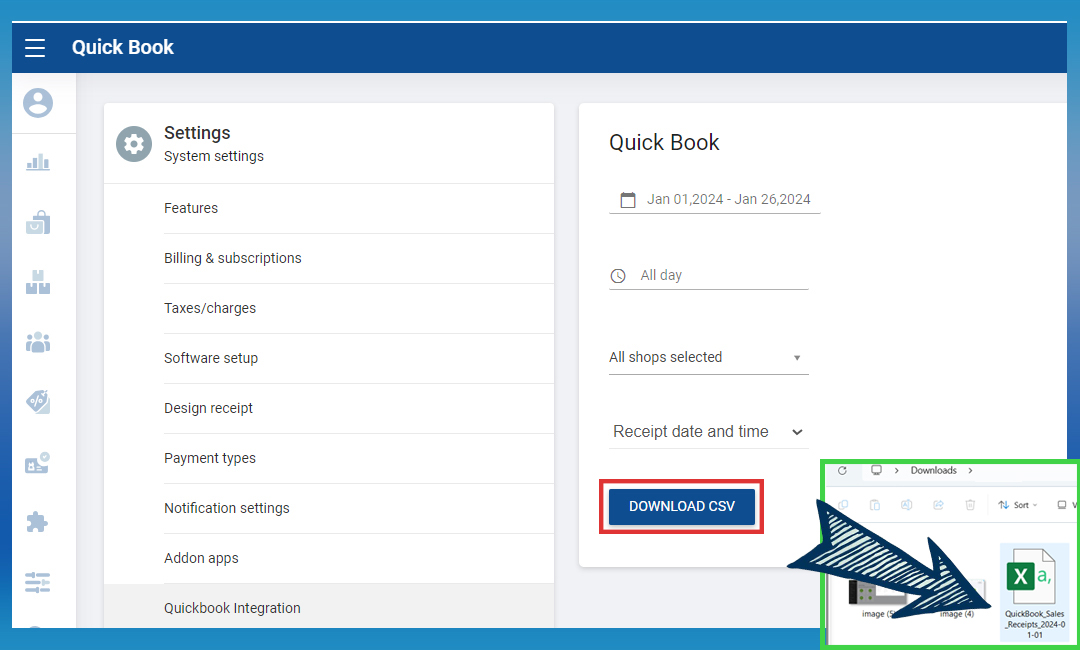
7. Enter a valid date and time range, and select the correct SHOP
8. Click download CSV option
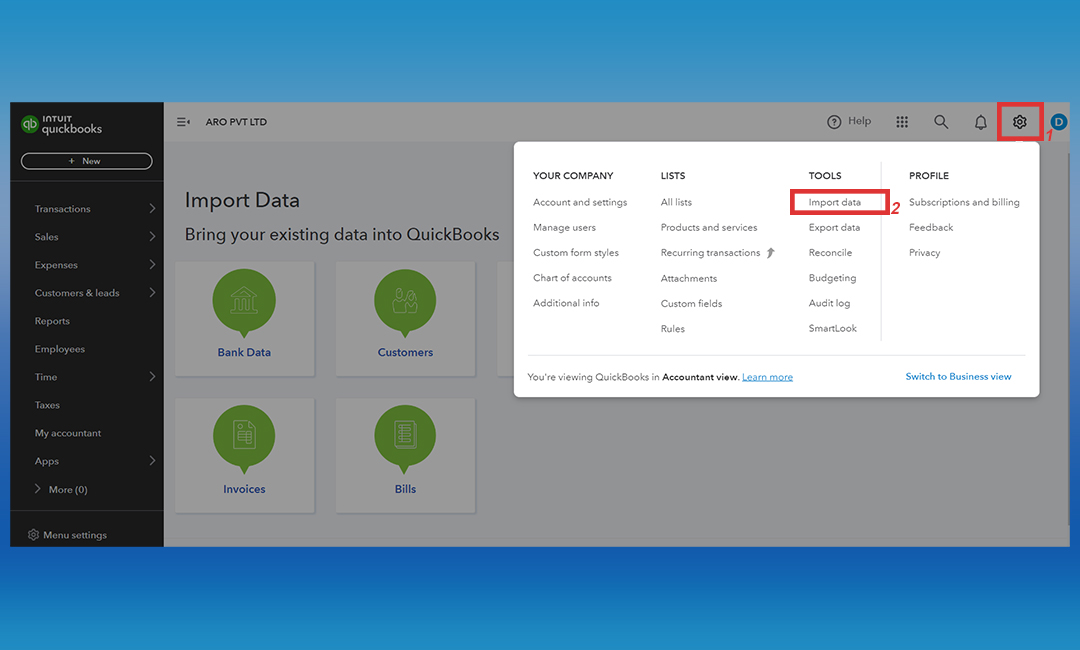
9. Upload the CSV to the Quickbook “import data” section
Was this helpful?