SalesPlay - Help Center
How to Exchange Products and Use Credit Notes
SalesPlay Back Office
Was this helpful?
What Is Credit Notes
In a POS system, a "Credit Note" is a printout generated to record the value of goods returned by a customer. It serves as a credit to the customer's account, allowing them to use the credited amount for future purchases. The purpose of a "Credit Note" is to acknowledge the return of items and facilitate a smooth exchange or refund process.
- When a customer brings an item to the store and asks for an exchange, the sales staff need to perform this task based on business requirements. (In some businesses, they do not accept exchanges).
- In some cases, the customers may request an exchange without the receipt. In this scenario, user need to get other details such as product name, date and customer name etc and find the receipt number.
- When the customer wants to exchange what they brought for another product or the same product in a different size or color, the user first need to create a “Credit Note” and then give the CREDIT NOTE to the customer. After customer comes with the new item you need to bill it and add CREDIT NOTE number as a PAYMENT METHOD.
- (Credit Note option need to activated via Back Office first)
How To Activate 'Credit Note' Option via Back Office
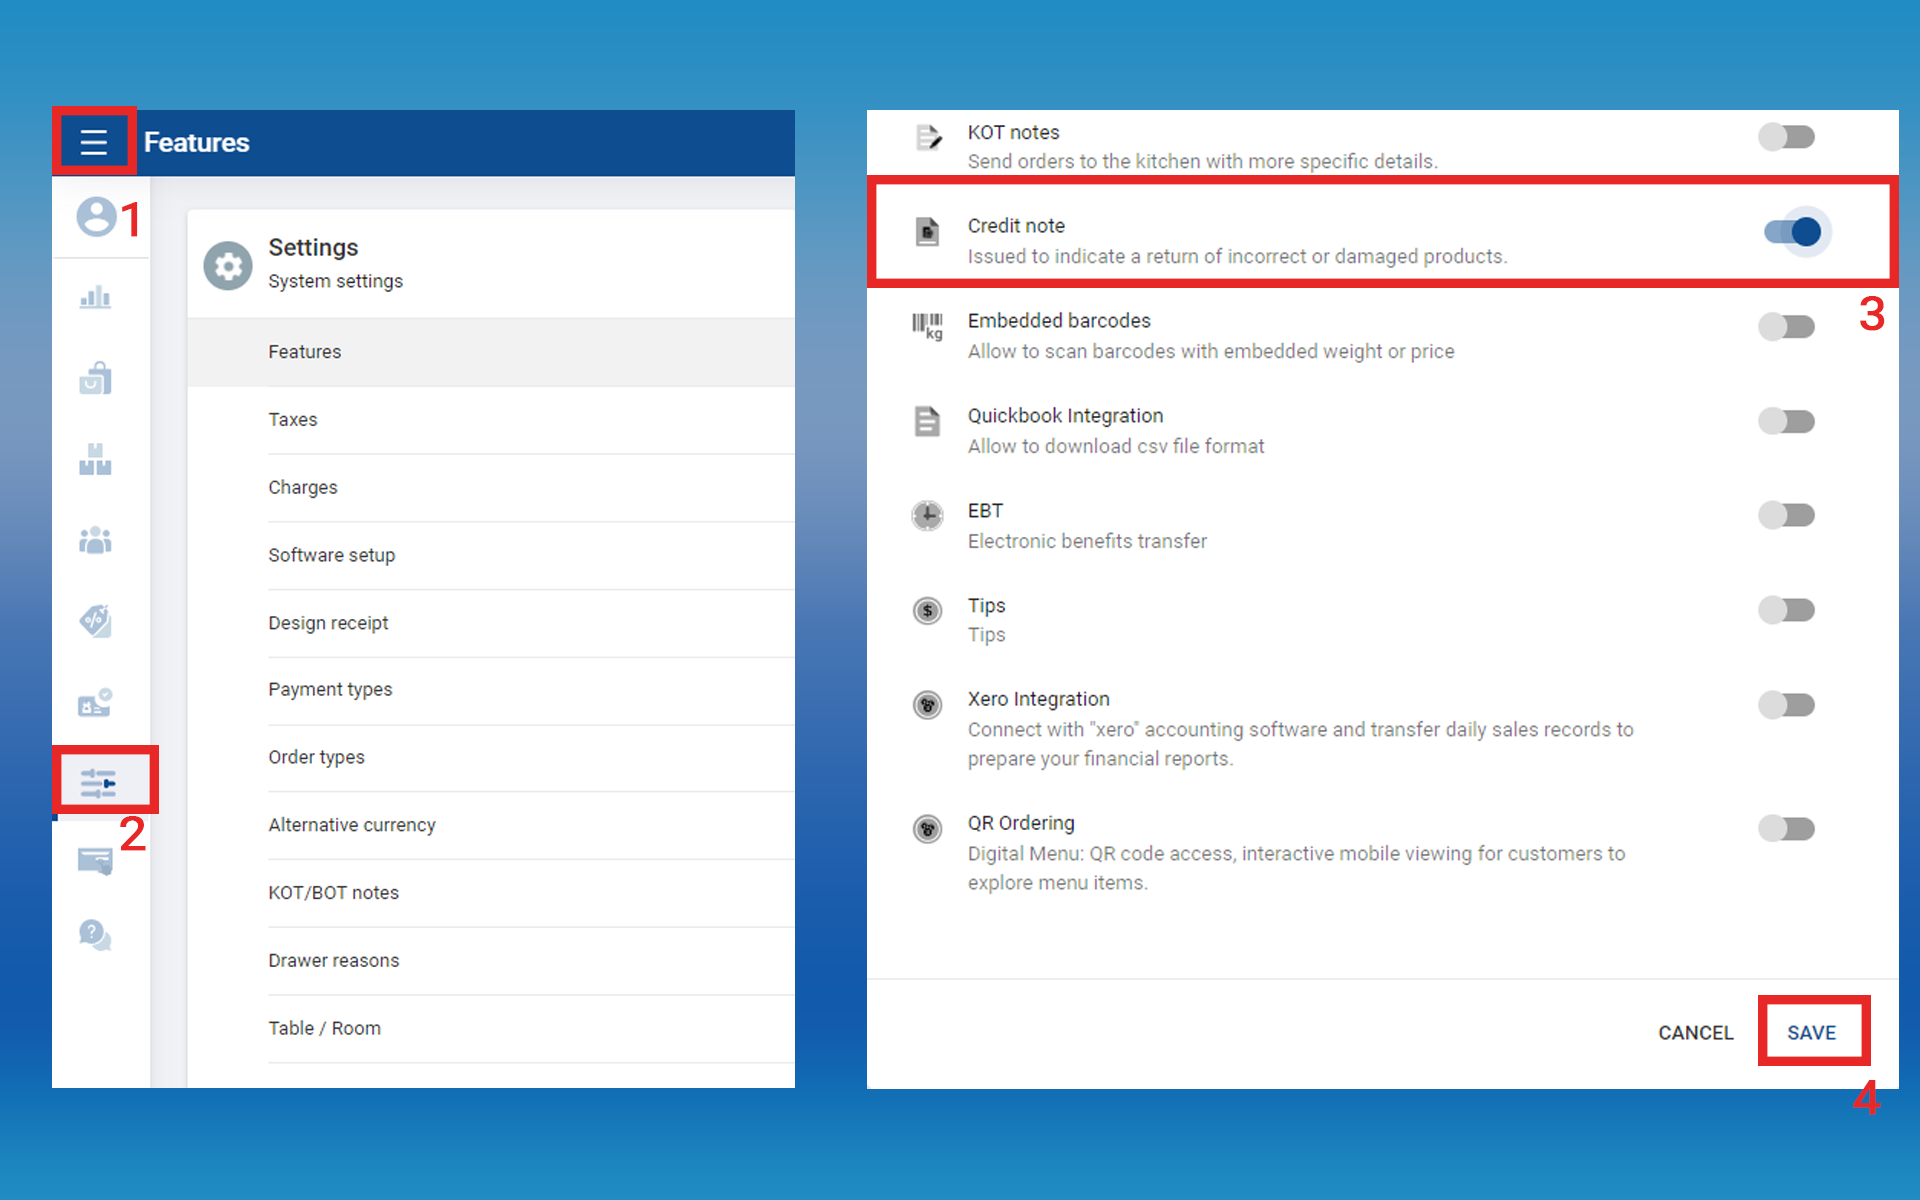
- Login to POS Back Office
- Select “ Settings ” from main menu
- Go to the “ Feature”
- Tick ON “ Credit Note ” button
- Click “ Save”
(Once you ON “Credit Note”, it will apper on the POS App)
Step By Step Process
Example
John, a customer, bought a pair of shoes but needed a different size. When he approached the sales staff for an exchange, they requested product details and the original receipt. Using the POS system, the sales staff created a credit note for the returned shoes, assigning a unique number and providing John with a printed copy. Afterwards, John selected the correct size for the exchange, and the sales staff initiated a new transaction. During the billing process, the POS system prompted the sales staff to choose a payment method, and they selected the "Credit Note" option.
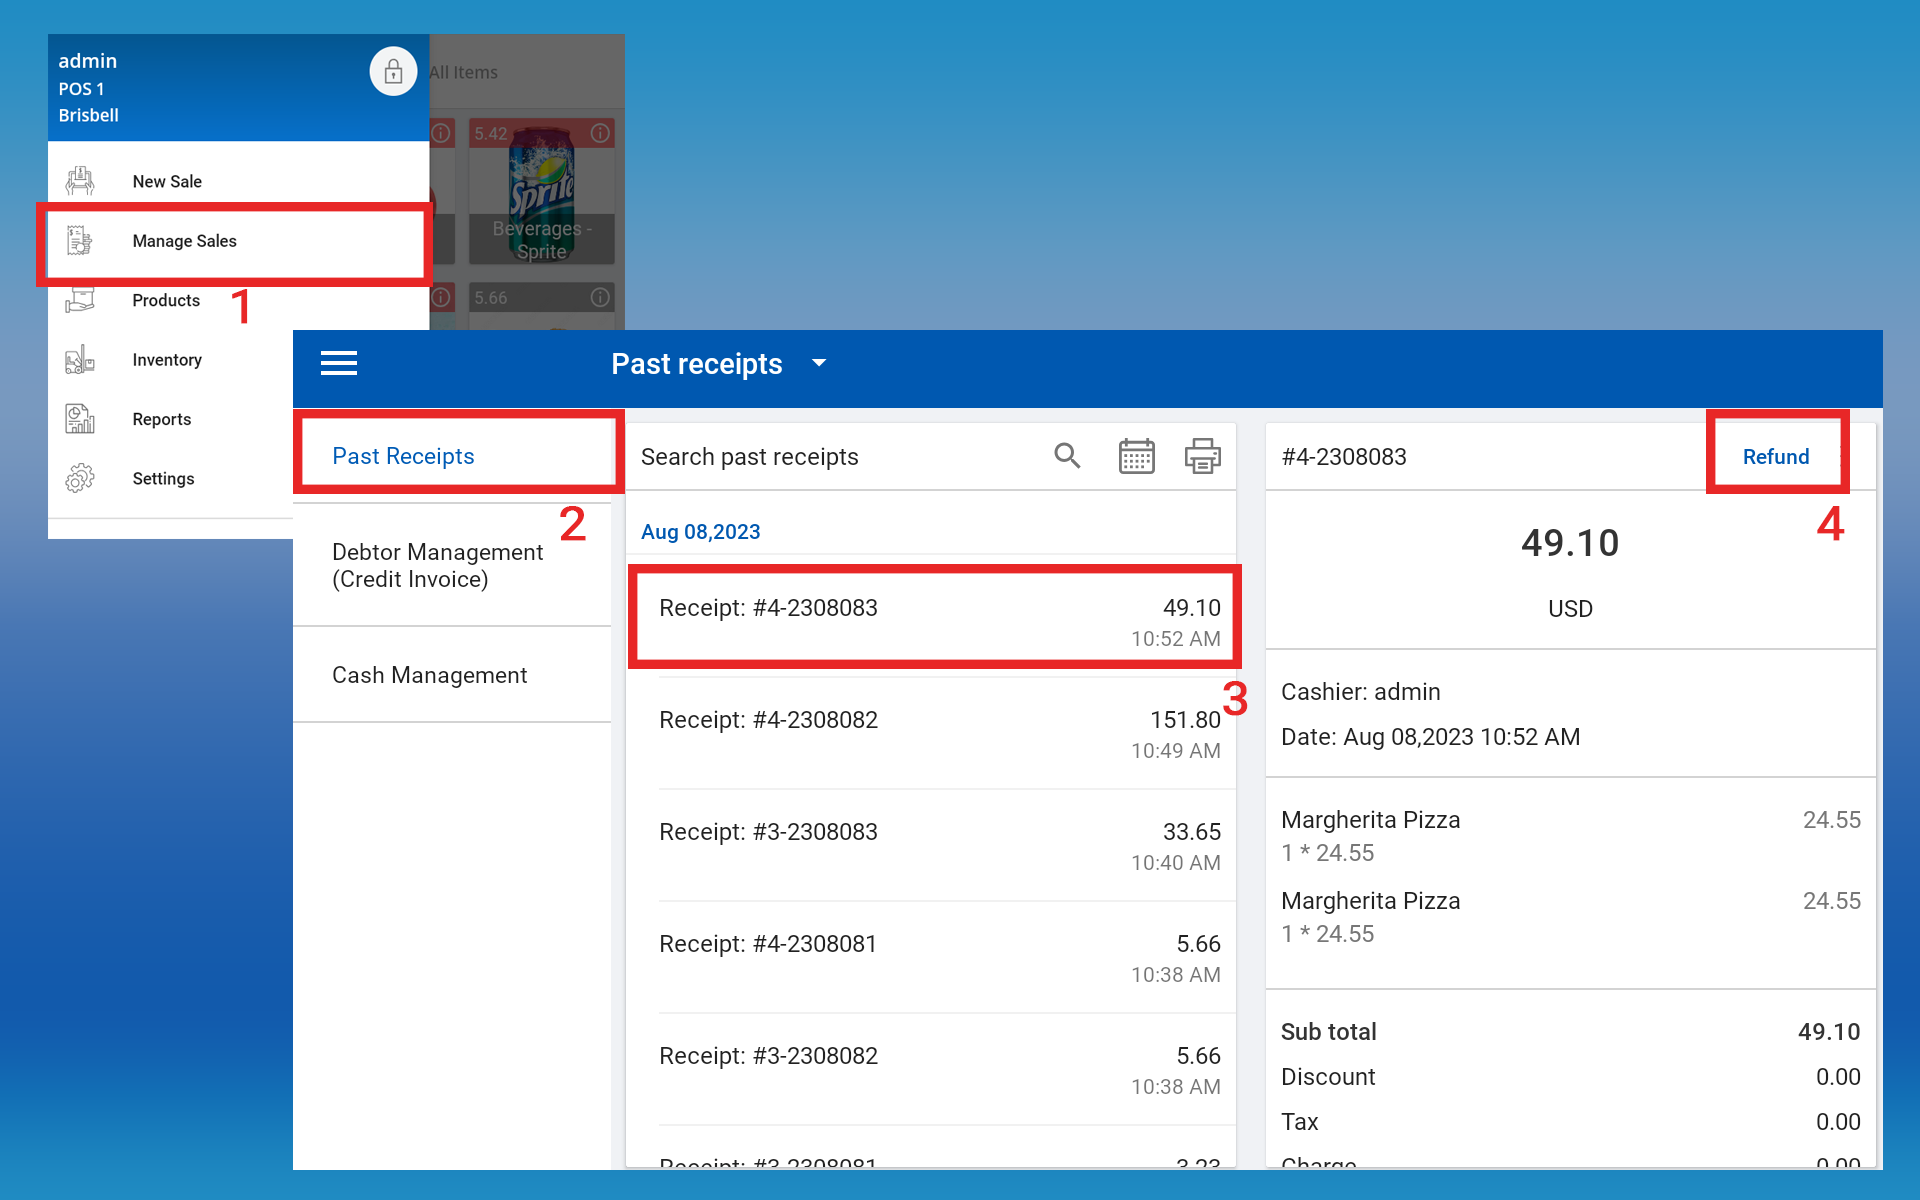
Steps
1. POS App main menu
2. Select “ Manage Sales ”
3. Click “Past Receipts”
4. Select the relevant receipt via calendar or search area
5. Click on the relevant receipt
6. Click the “ Refund” button right-hand upper corner
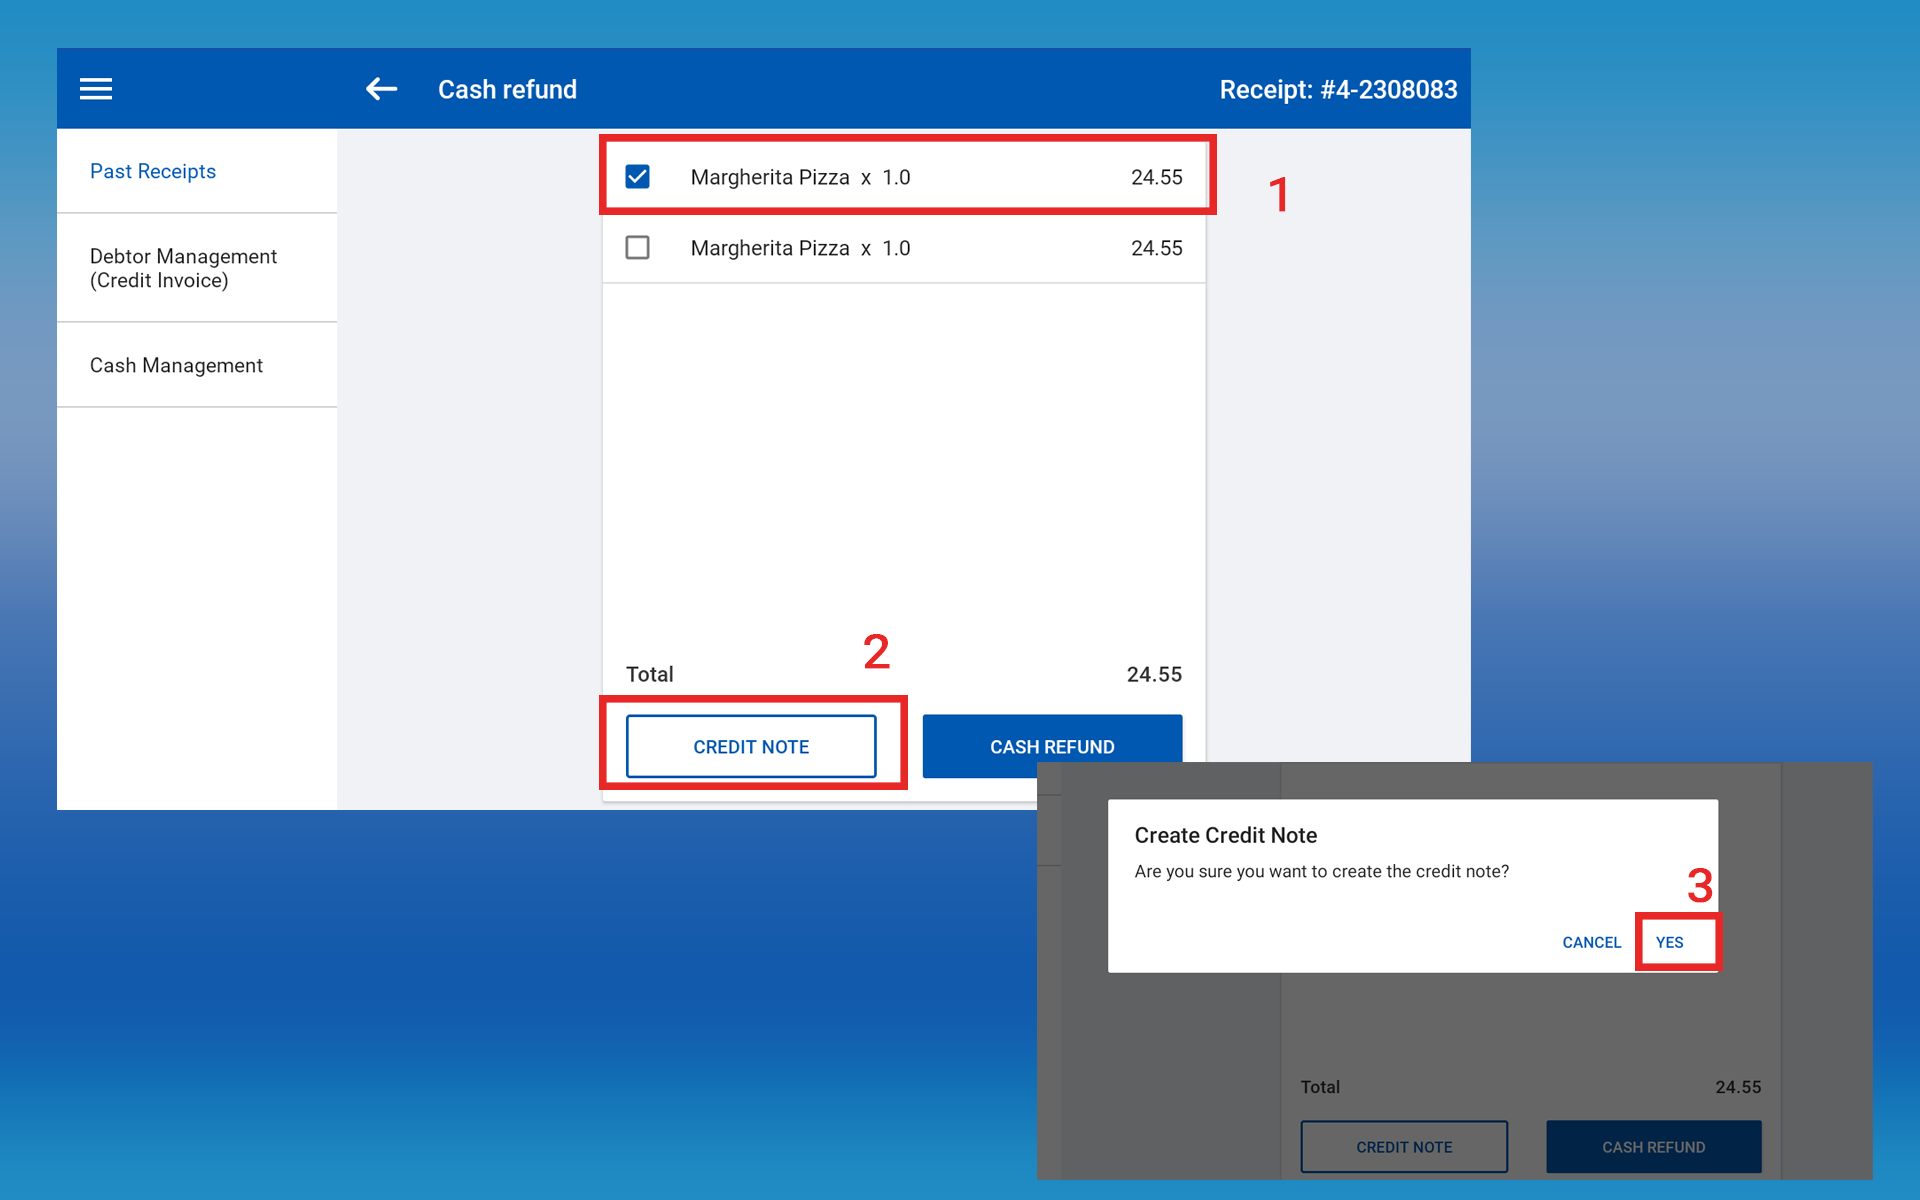
7. Tick On or Click on the item you need to exchange
8. Click the “CREDIT NOTE” button
(Once you click, a Credit Note will be printed and a Credit Note ID will be created)
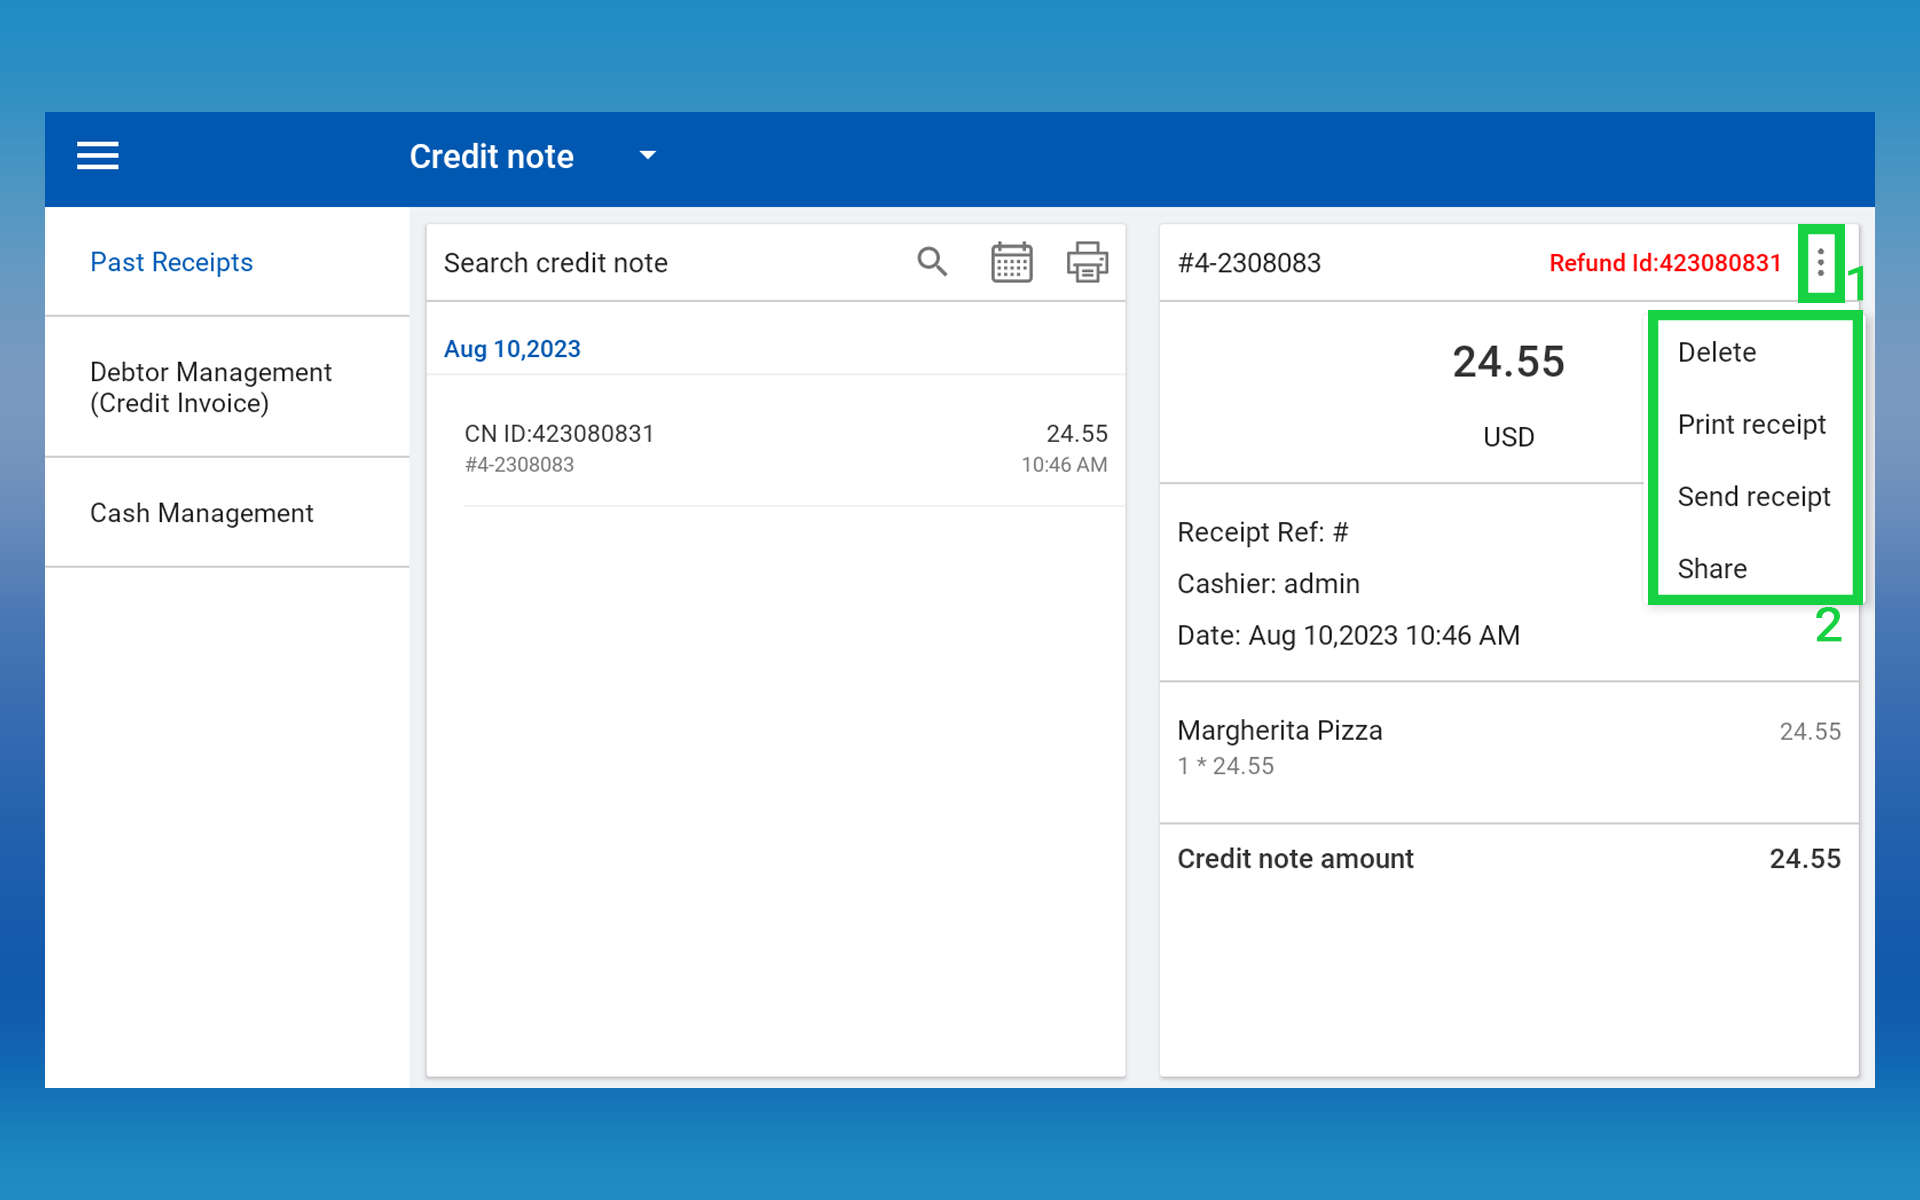
Step By Step Process Cont...
Print, send or share the Credit Note, so then then the customer can present it at the billing counter
Proceed with the new sale.
The user/ cachier creates a new transaction for the exchange, adding the new items to the bill.
During the billing process, the POS system prompts the user to choose a payment method as "Credit Note" option.
1. POS App main menu
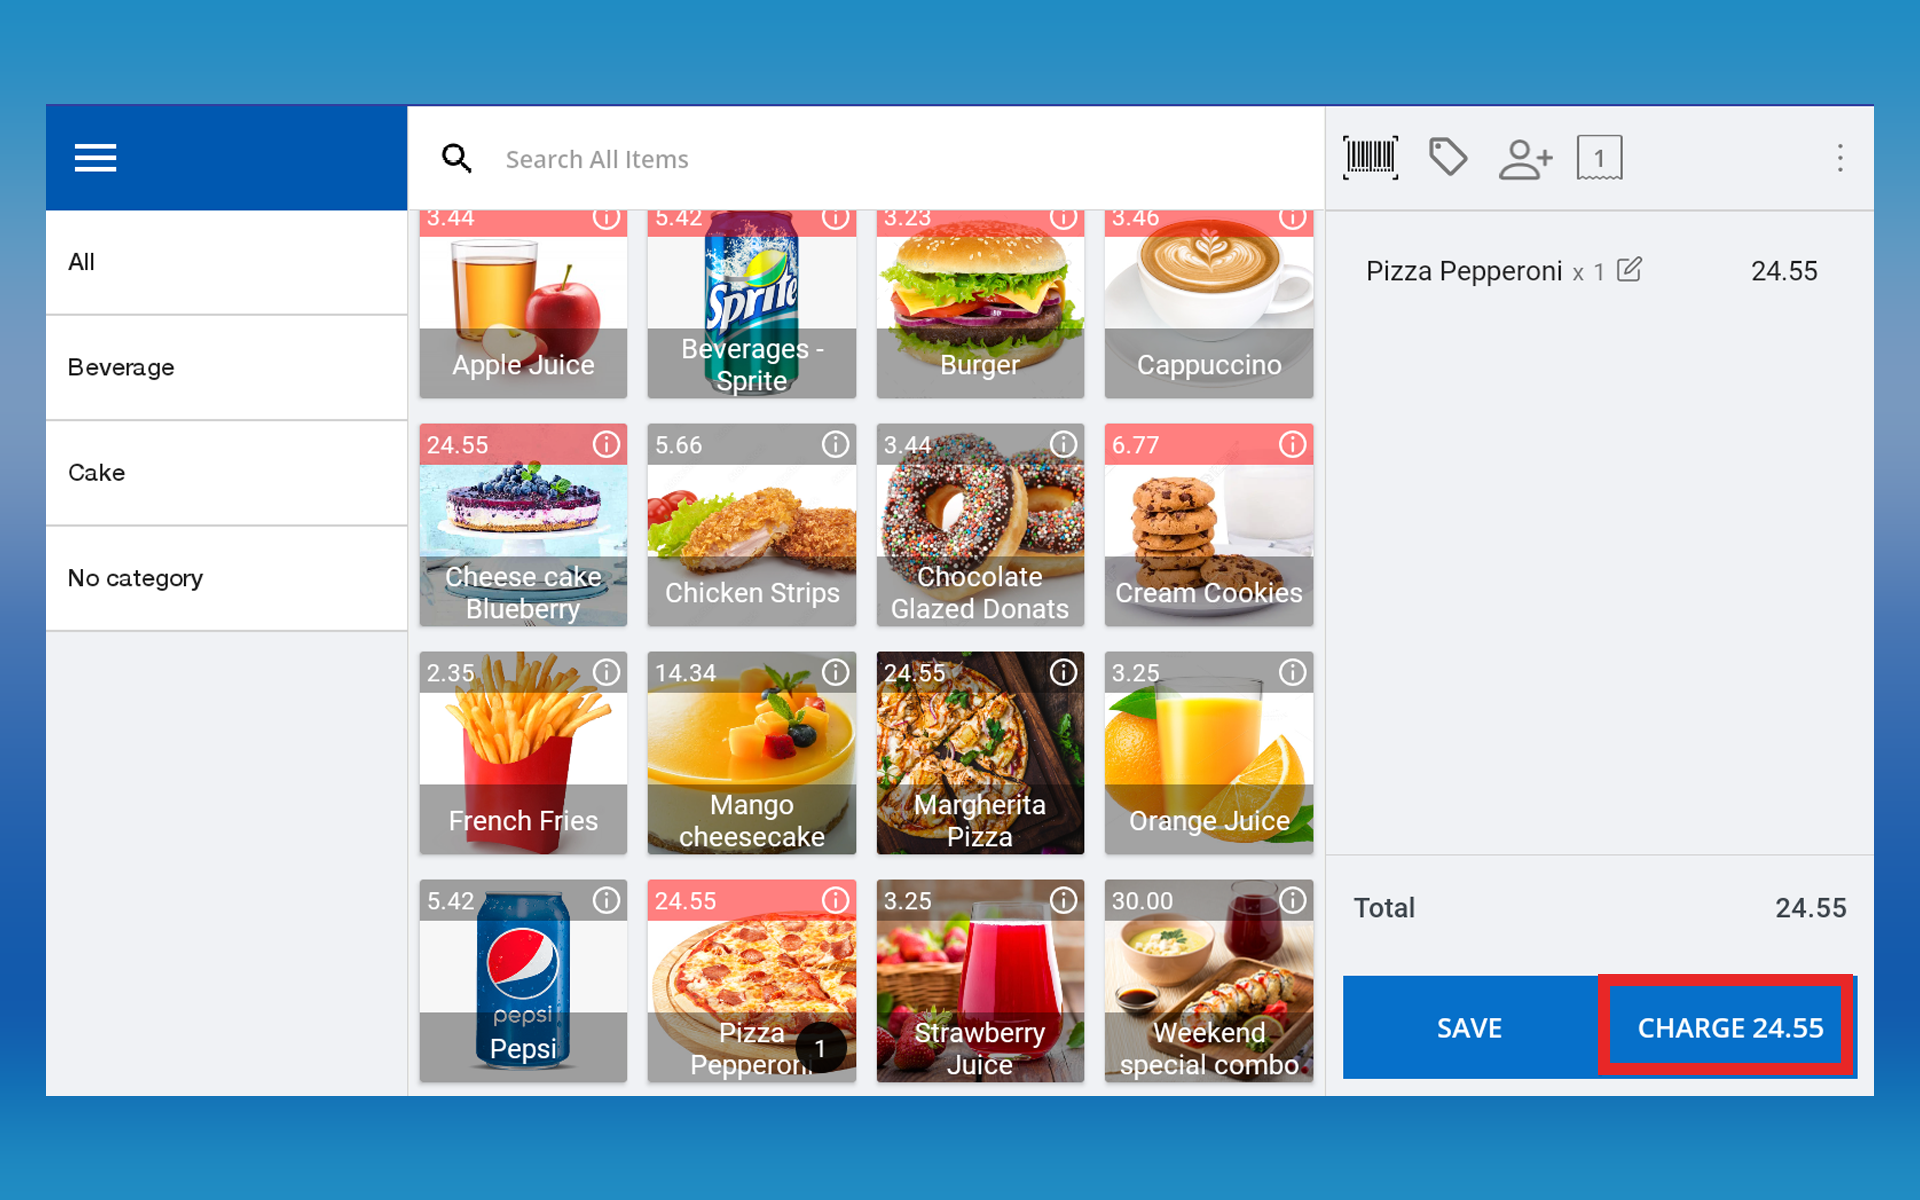
2. Select “ New Sale ”
3. Select the item and click the “Charge” button
4. Once you click the “ Charge” button in the Payment Interface, you will see payment types
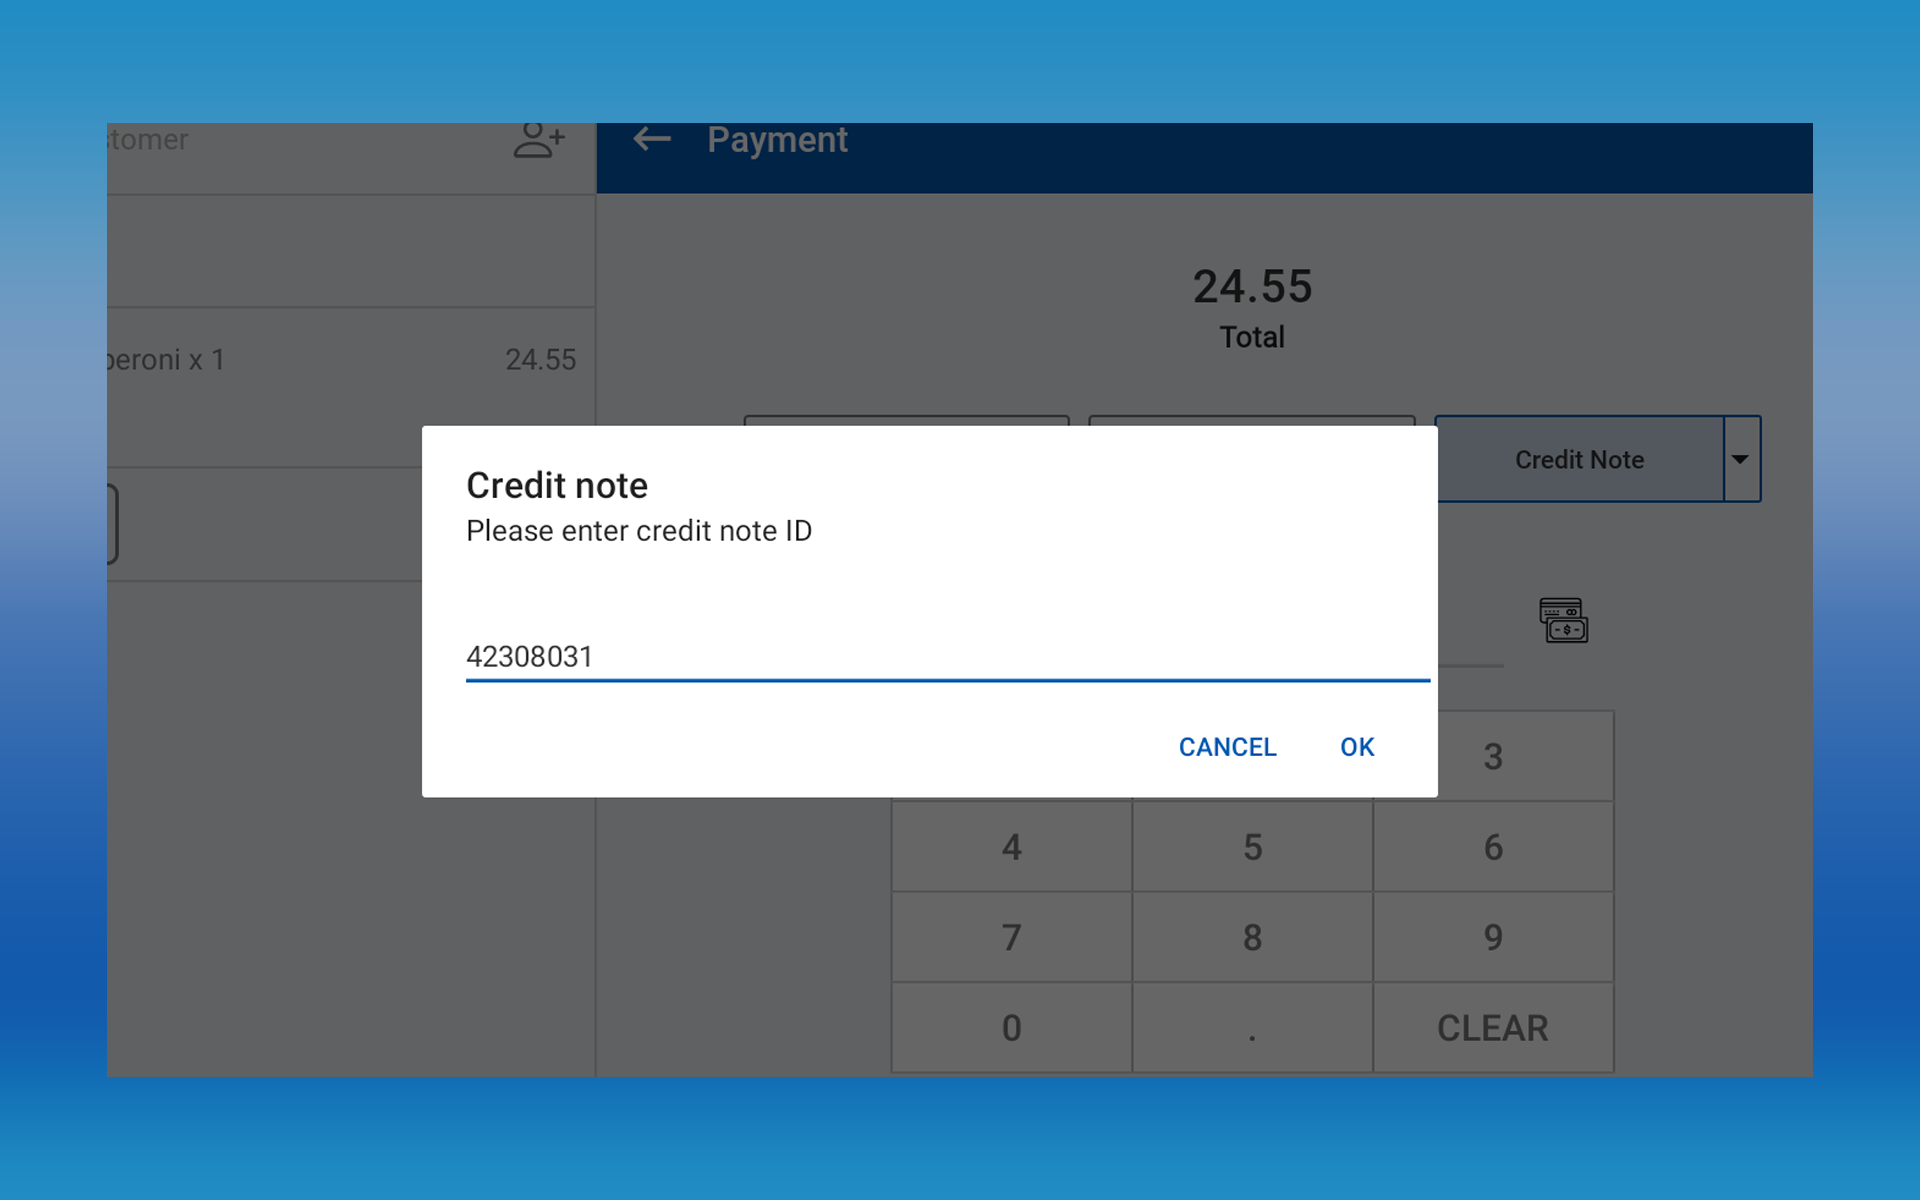
5. Select the payment type “ Credit Note” from drop-down menu
6. Enter Credit Note ID correctly (This can be found via Credit Note receipt)
7. Click OK and Charge
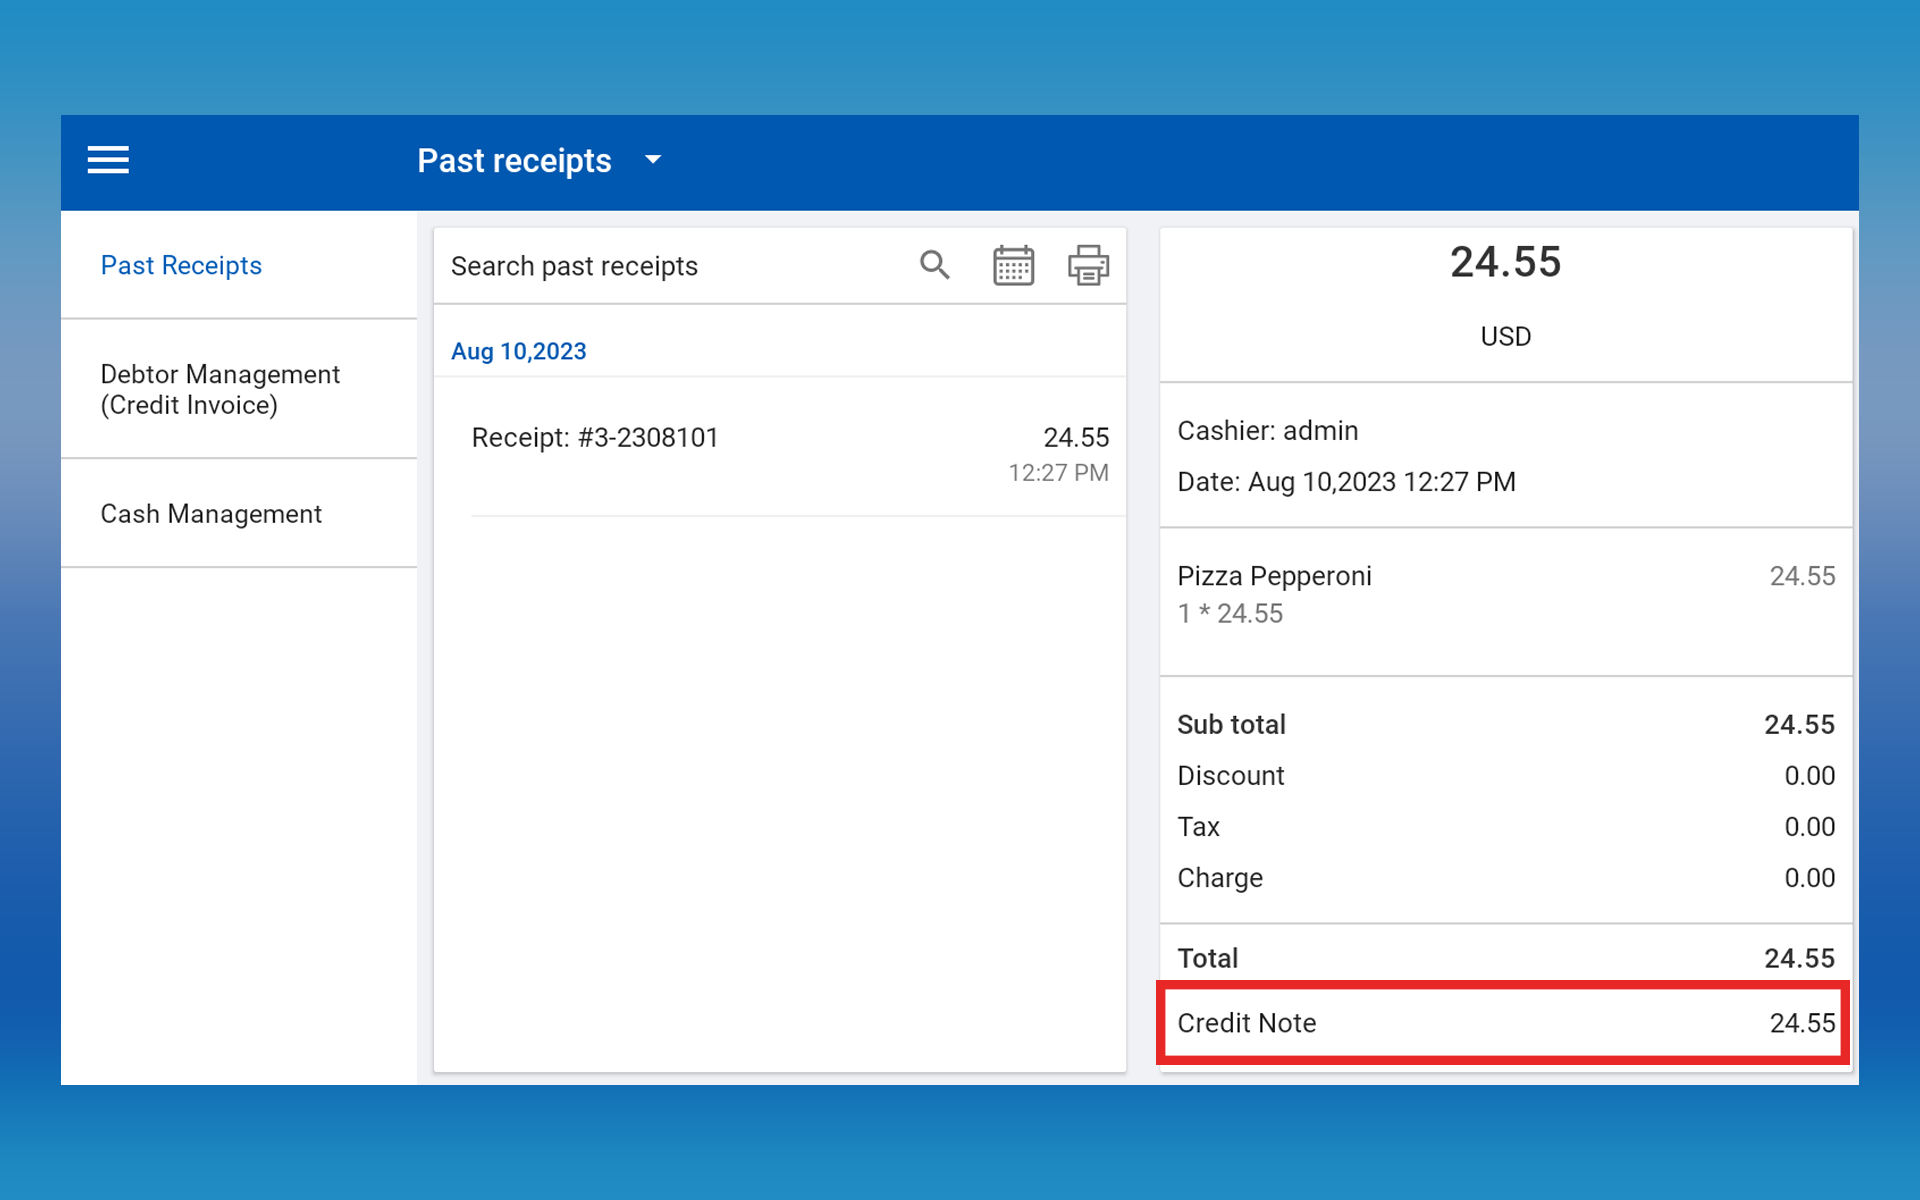
Proceed with the new sale.
Proceed with the new sale.
Related Articles
Was this helpful?