Help | SalesPlay Help Center
How to Create Graphical Table Layout

SalesPlay Back Office


Special Note

  • This option is available with Android at the moment, operates in landscape mode on screens exceeding 10 inches for a better user experience, and an internet connection is required to operate.
  • You can't use both the standard and graphical layout simultaneously. If you change the layout option and have QR ordering activated, please choose the tables and generate the QR code again.

About SalesPlay Graphical Table Layout


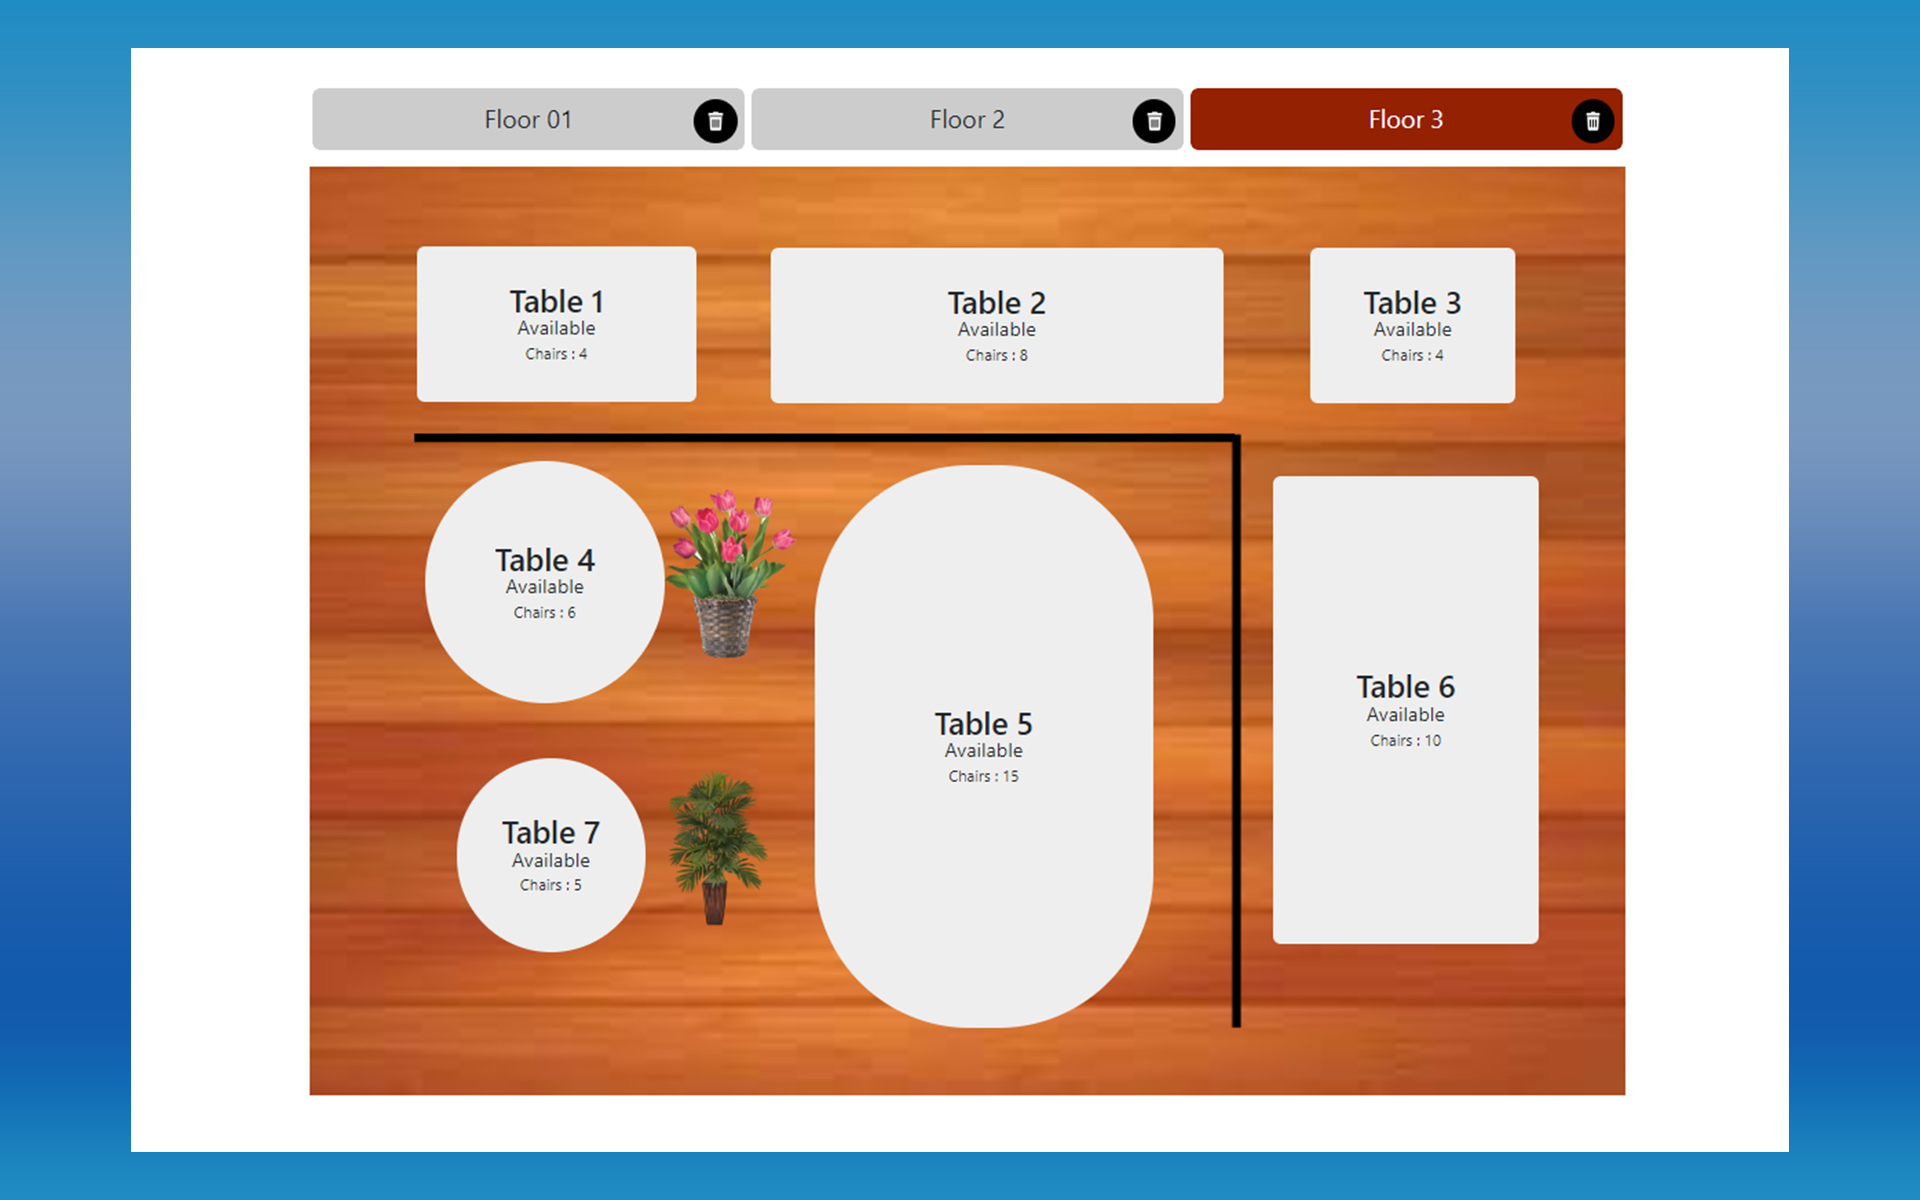
SalesPlay POS has introduced a feature called "Graphical Table Layout," providing users with a graphical interface that empowers them to organize floor layouts with advanced customization features.  

  • Example: Consider a restaurant with multiple floors and dynamic seating arrangements. Using the Advanced Table Layout, the restaurant manager can efficiently design and manage the layout.  


Activation of Graphical Table Layout 

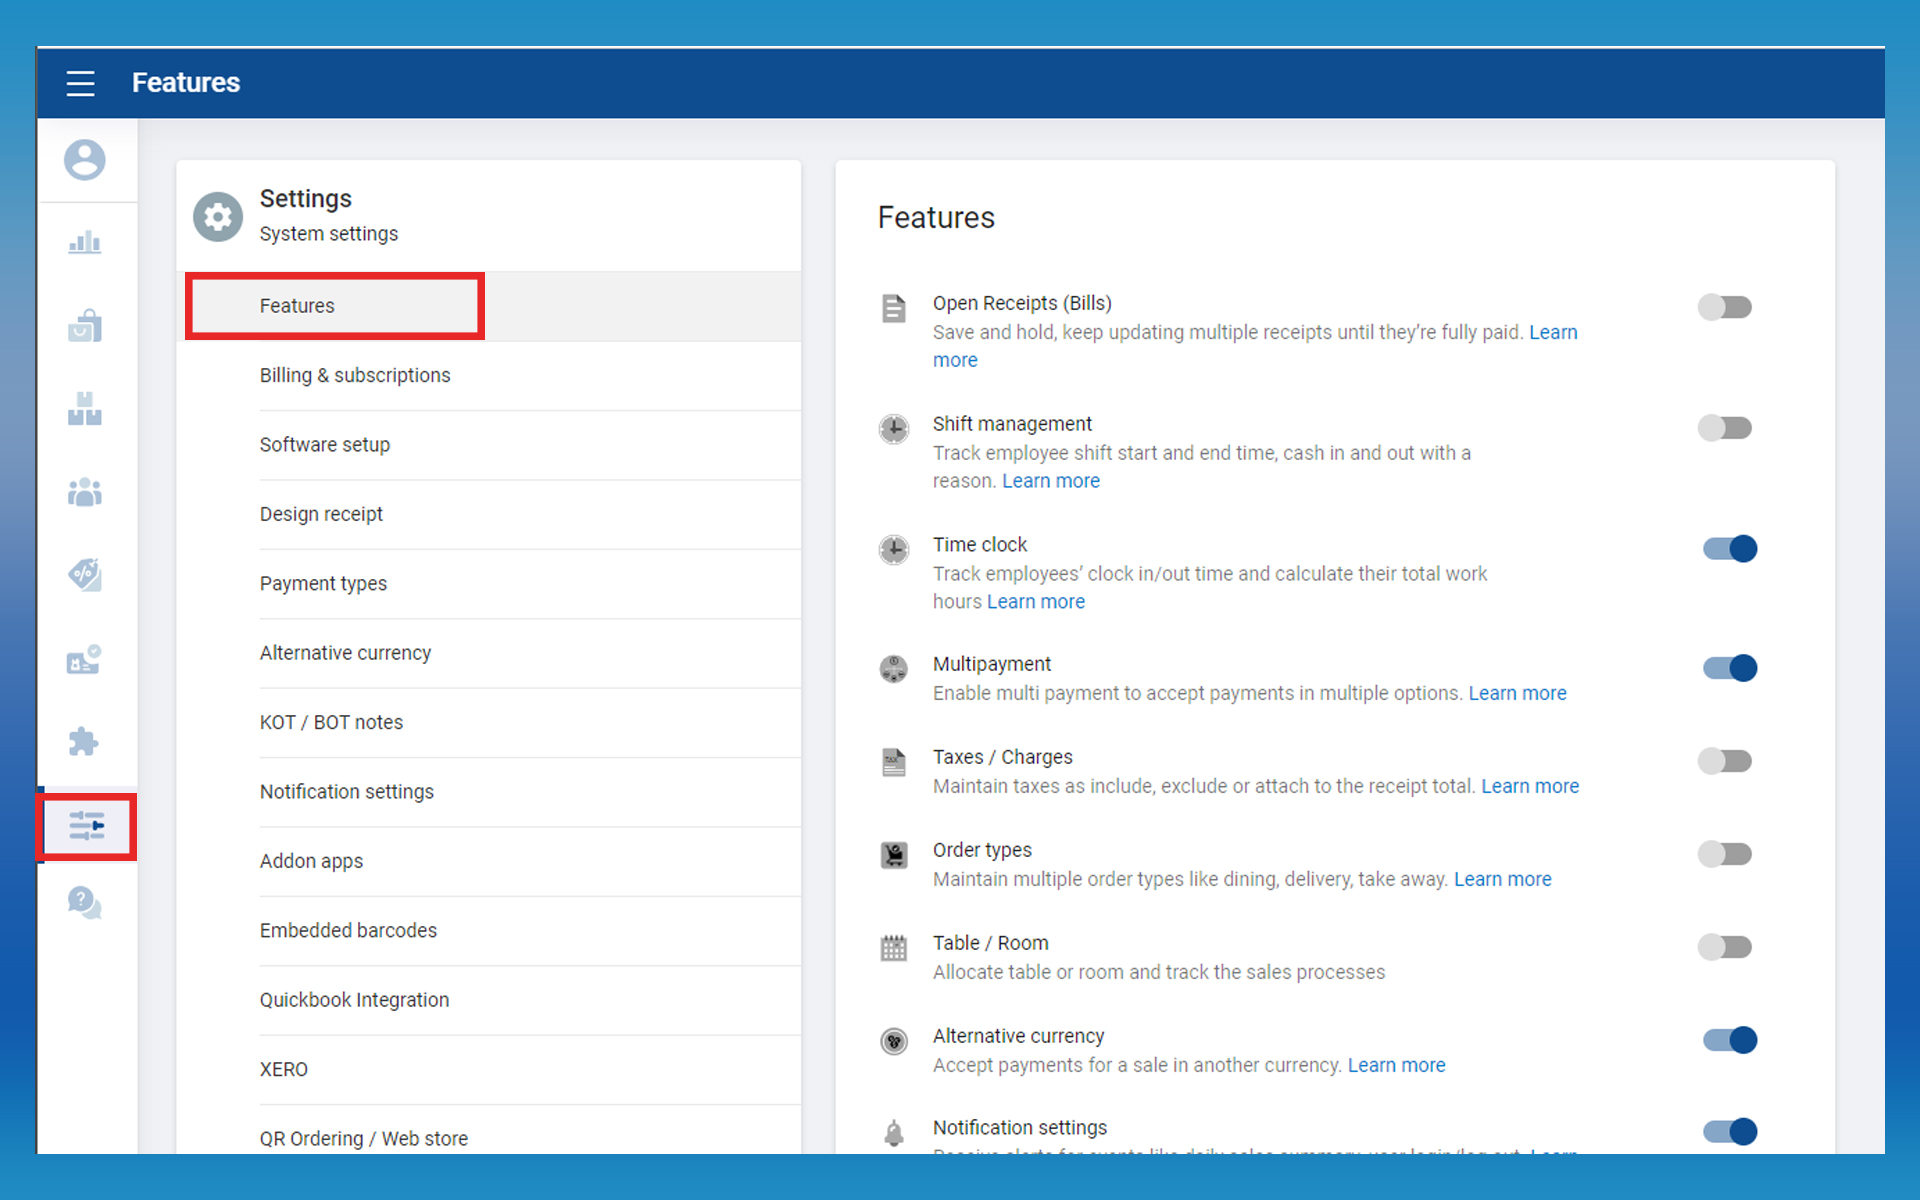
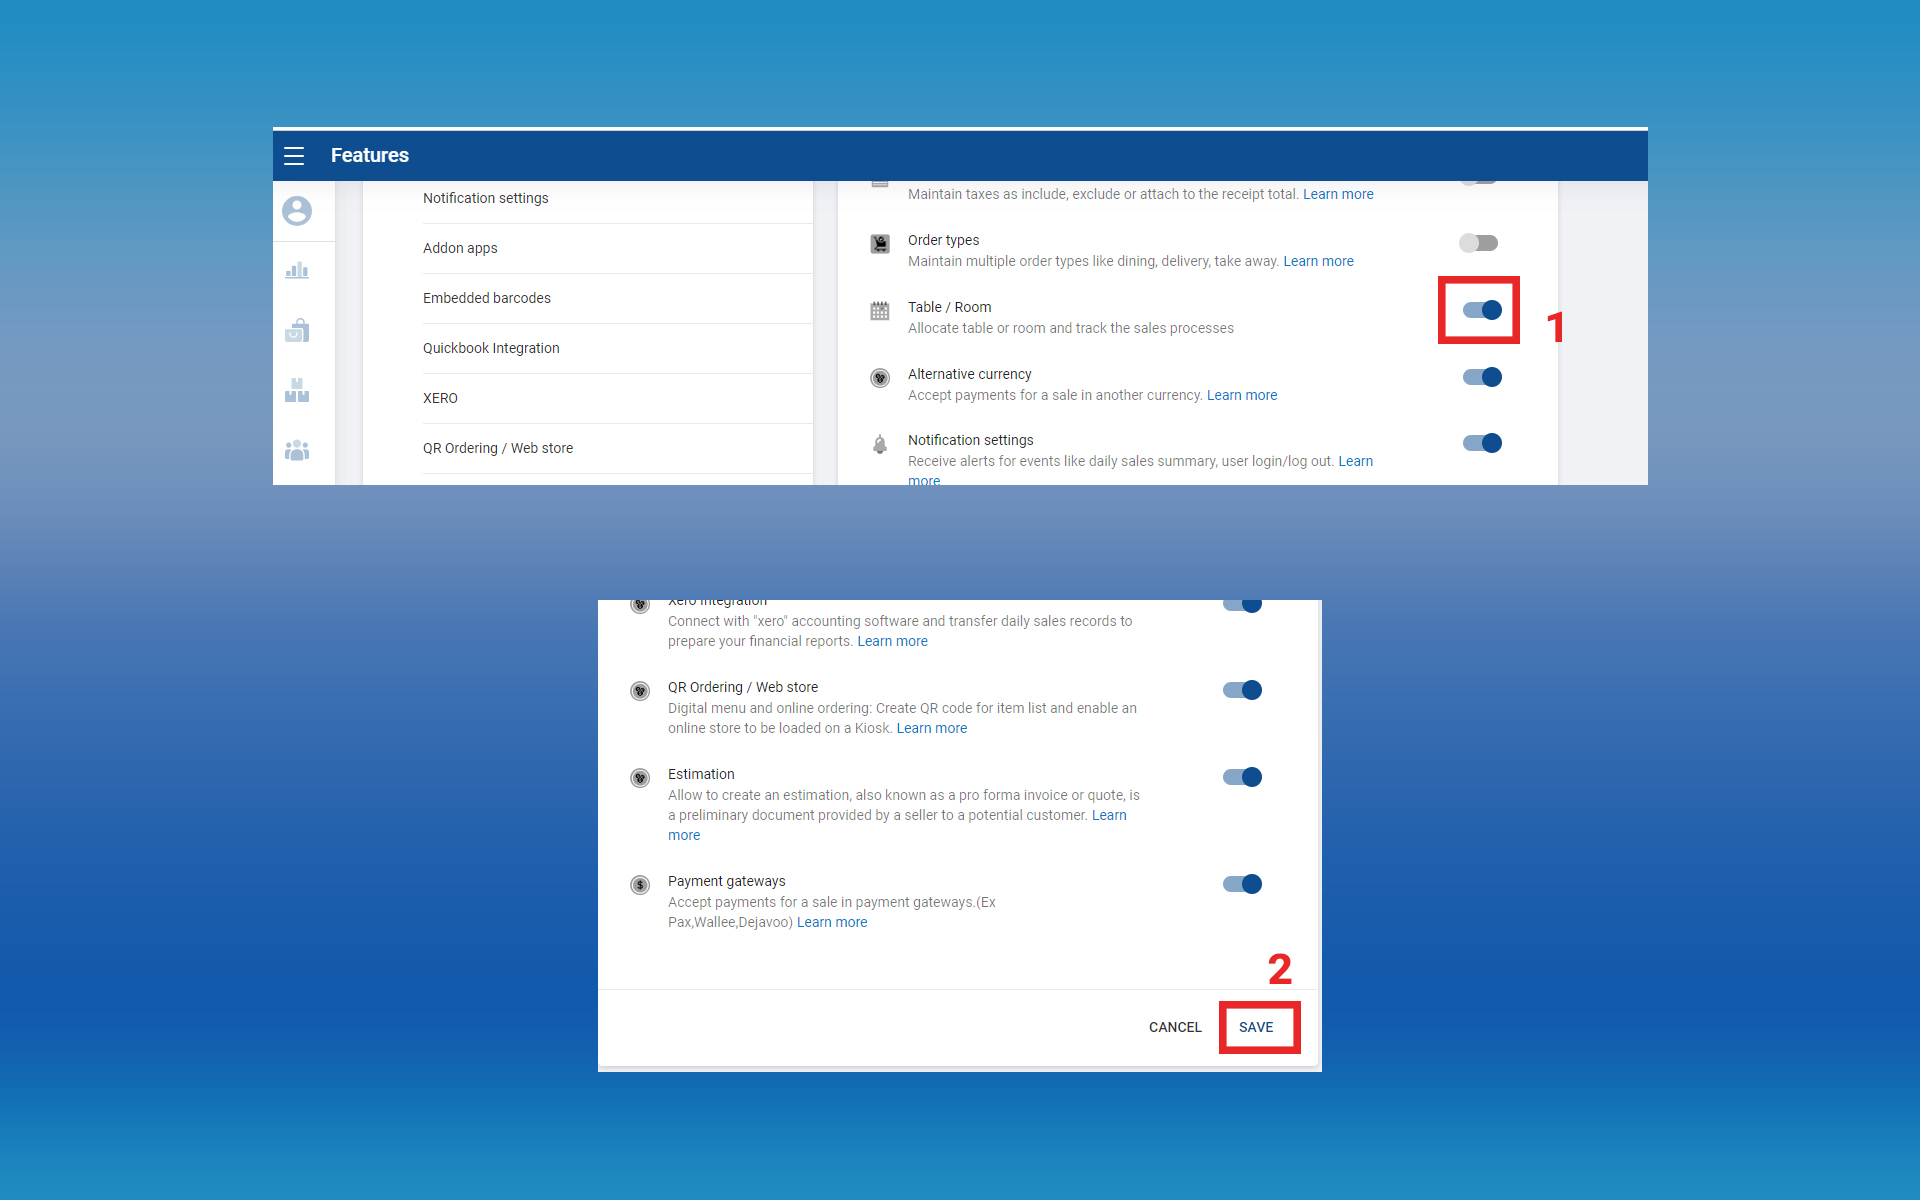
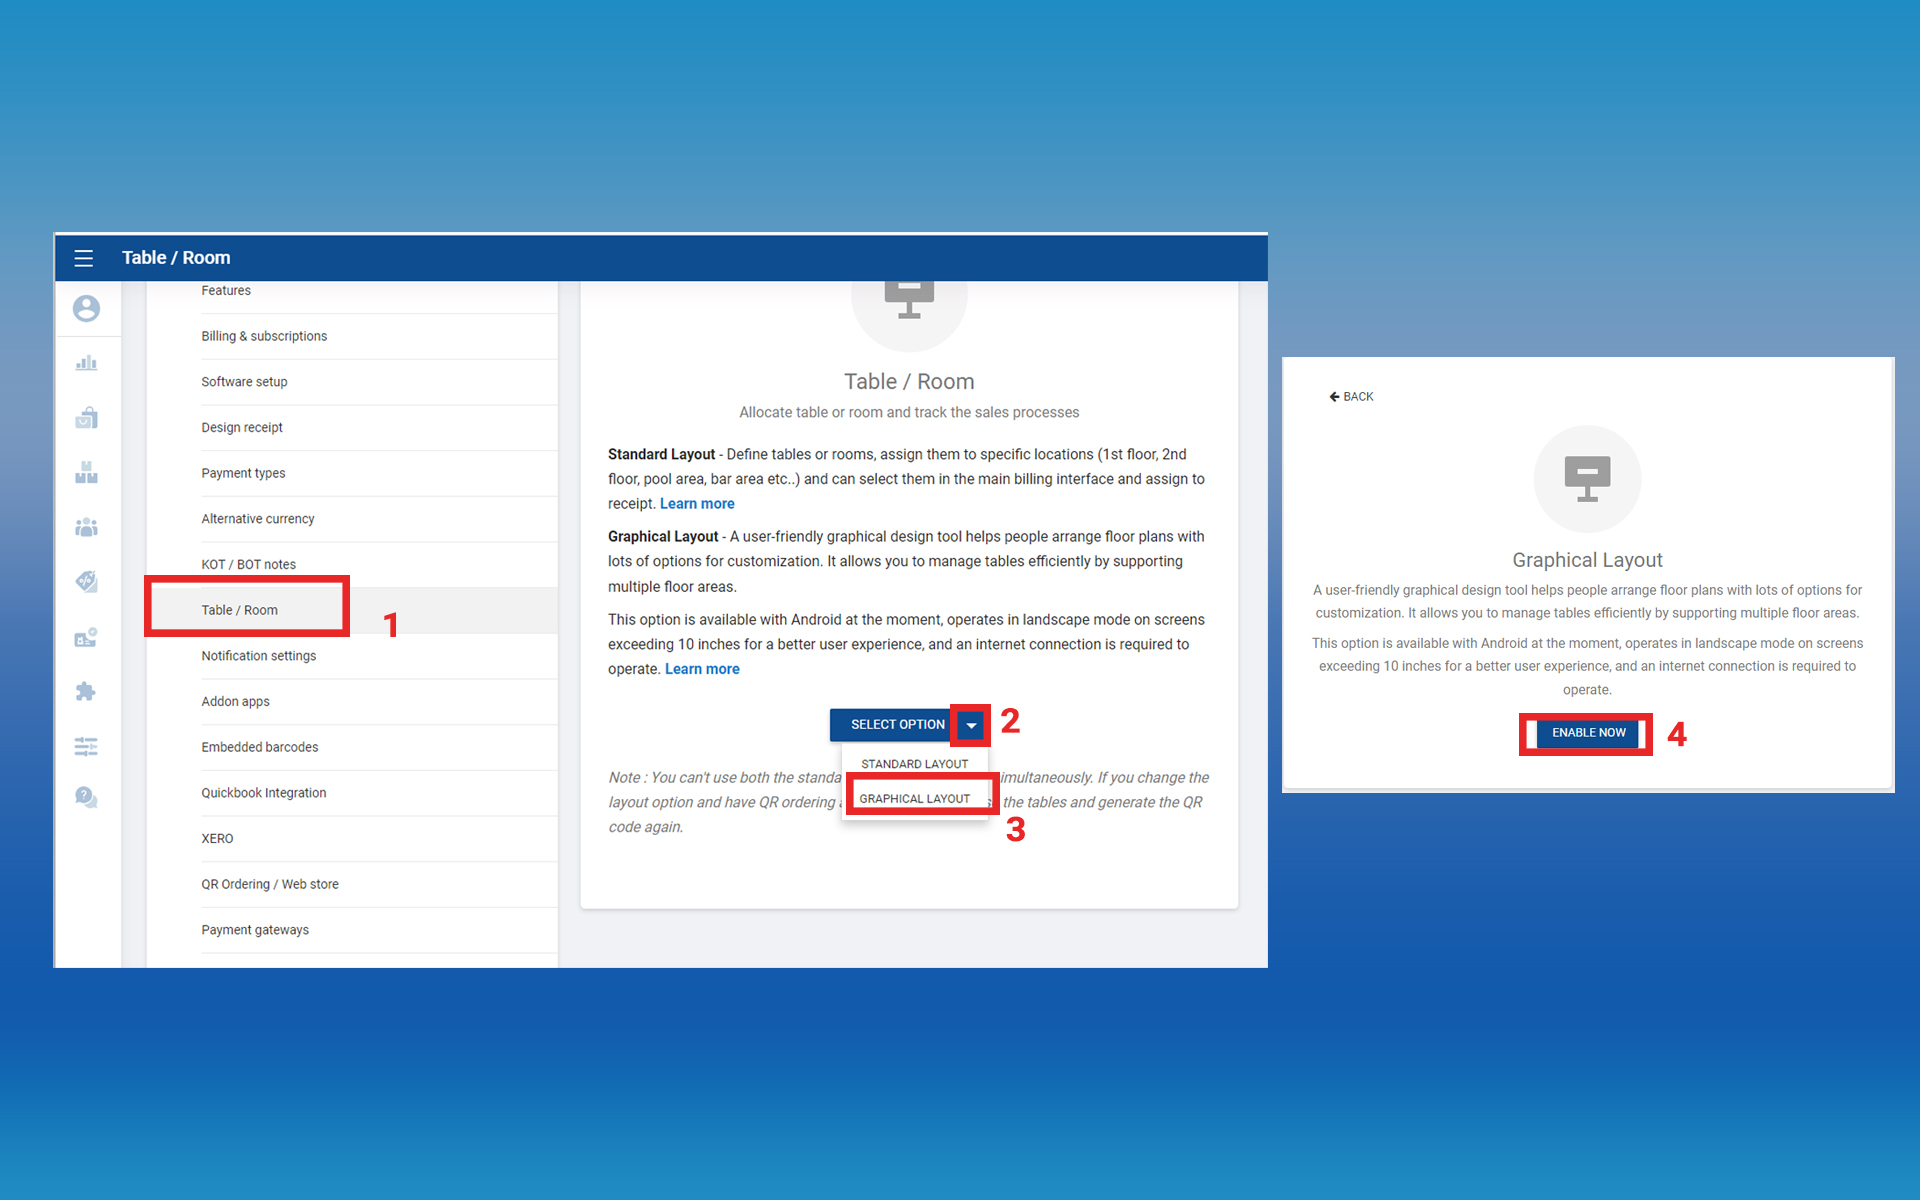
To activate the Graphical Table Layout feature, users can navigate to the "Reservation" section on the Backoffice web portal under the Settings Feature section. Once activated, users will find the Advanced Table Layout available in the POS app's main billing interface by clicking on the table icon. 


Exploring the Graphical Table Layout Interface 

Upon entering the Advanced Table Layout, users will encounter the "EDIT" button, unlocking a range of powerful customization options through the following action buttons: 

  • Floor: Create and manage different floors within your restaurant, allowing for efficient organization in multi-level establishments. 
  • Table: Design and arrange tables, selecting shapes (square or round) and specifying the number of chairs for each. Tables can be easily dragged, dropped, resized, and rotated for precise positioning. 
  • Decoration: Enhance your layout with decorative elements. Users can choose separator icons to add a touch of creativity to the overall design. 
  • Rotate: Perfectly align tables or decorations by using the rotate feature, ensuring everything fits seamlessly into your desired layout. 
  • Delete: Easily remove any unwanted table or decoration with the delete function, maintaining a clutter-free and organized layout. 
  • SAVE: Save your layout changes to ensure they are applied consistently across the POS system. 
  • Preview: Visualize your table layout before finalizing changes. If adjustments are needed, users can return to the editing mode with a simple click of the "EDIT" button. 


Creating Tables and Floors - A Step-by-Step Guide 

  • Create Floors: Begin by setting up different floors within your restaurant, accommodating the number of levels your establishment possesses. 
  • Design Tables: Once floors are established, create tables by choosing shapes and specifying chair quantities. Tables can be freely moved, resized, and rotated to suit your preferences. 
  • Decoration and Additional Elements: Add creative flair with decorative elements, using separators to enhance the aesthetic appeal of your layout. 
  • Fine-Tuning: Perfect your layout by using the rotate and delete functions to ensure precision and remove any unnecessary elements. 
  • Save and Preview: Save your changes and preview the layout to confirm that it aligns with your vision. If adjustments are necessary, return to the editing mode. 


The color-coded status indicators in the Graphical Table Layout of SalesPlay POS provide an intuitive and visual way for users to quickly assess the status of each table.  


  • White - Available: 
    • Tables displayed in white signify that they are available and unoccupied.  
  • Red - Occupied: 
    • Red-colored tables indicate that they are currently occupied by customers.  
  • Yellow - Table Select: 
    • Yellow is designated to tables that are selected or highlighted for specific actions.  

1. Login to POS Back Office > Select “ Settings ” from main menu > Go to the “ Feature”


2. Tick ON “Reservation” button > Click “ Save”


  • Once you ON “Reservation”, it will appear as a sub-menu in the Settings section as “Table / Room”

3. Click on “Table/ Room” feature > Select “Graphical Layout” from dropdown > Click the “Enable Now” button


  • Once you enable “Graphical Layout”, it will appear on the POS APP as a Table Icon top right-hand section of the main billing interface.

4. POS App main menu > Select “ New Sale ” > Click on the “Table” Icon right-hand upper section


Steps cont..

5. Click “Edit” button > Click the “Floor” action button and create floors

6. Click the “Table” action button and create tables 

7. Click the “Decoration” action button and create decorations

8. Click the ‘Save” button and save the changes made to the layout. 


How to Add a Table to a Receipt 

  • Creating table receipts in the POS App with the Graphical Table Layout is a straightforward process that enhances the efficiency of managing customer orders.  
  • Follow these simple steps to ensure a seamless experience for both staff and customers: 

Steps

  1. POS App main menu > Select “ New Sale ” > Click on the “Table” Icon right-hand upper section
  2. Click on an available table number (White Color)
  3. Select items the customer ordered > Click on ‘Save” button
  4. To add more items to the table, click “Open Bills”
  5. Select the correct table number and click on the Edit icon
  6. Select the newly ordered item and click on the “Update” button
  7. To finish the receipt, click on “Open Bills”  
  8. Select the correct table number and click on the Charge icon

Was this helpful?