SalesPlay - Help Center
Top Searches:
Product
Stock
Invoice
Payment
SalesPlay 'Back Office' > Main Menu > Products
Was this helpful?
⚠️ Important Guidelines Before Uploading
To avoid errors and ensure a smooth upload, please follow these rules:

(Once the bulk upload completed, those products will be shown in Back Office products list section)
Step 1: Log in to Backoffice
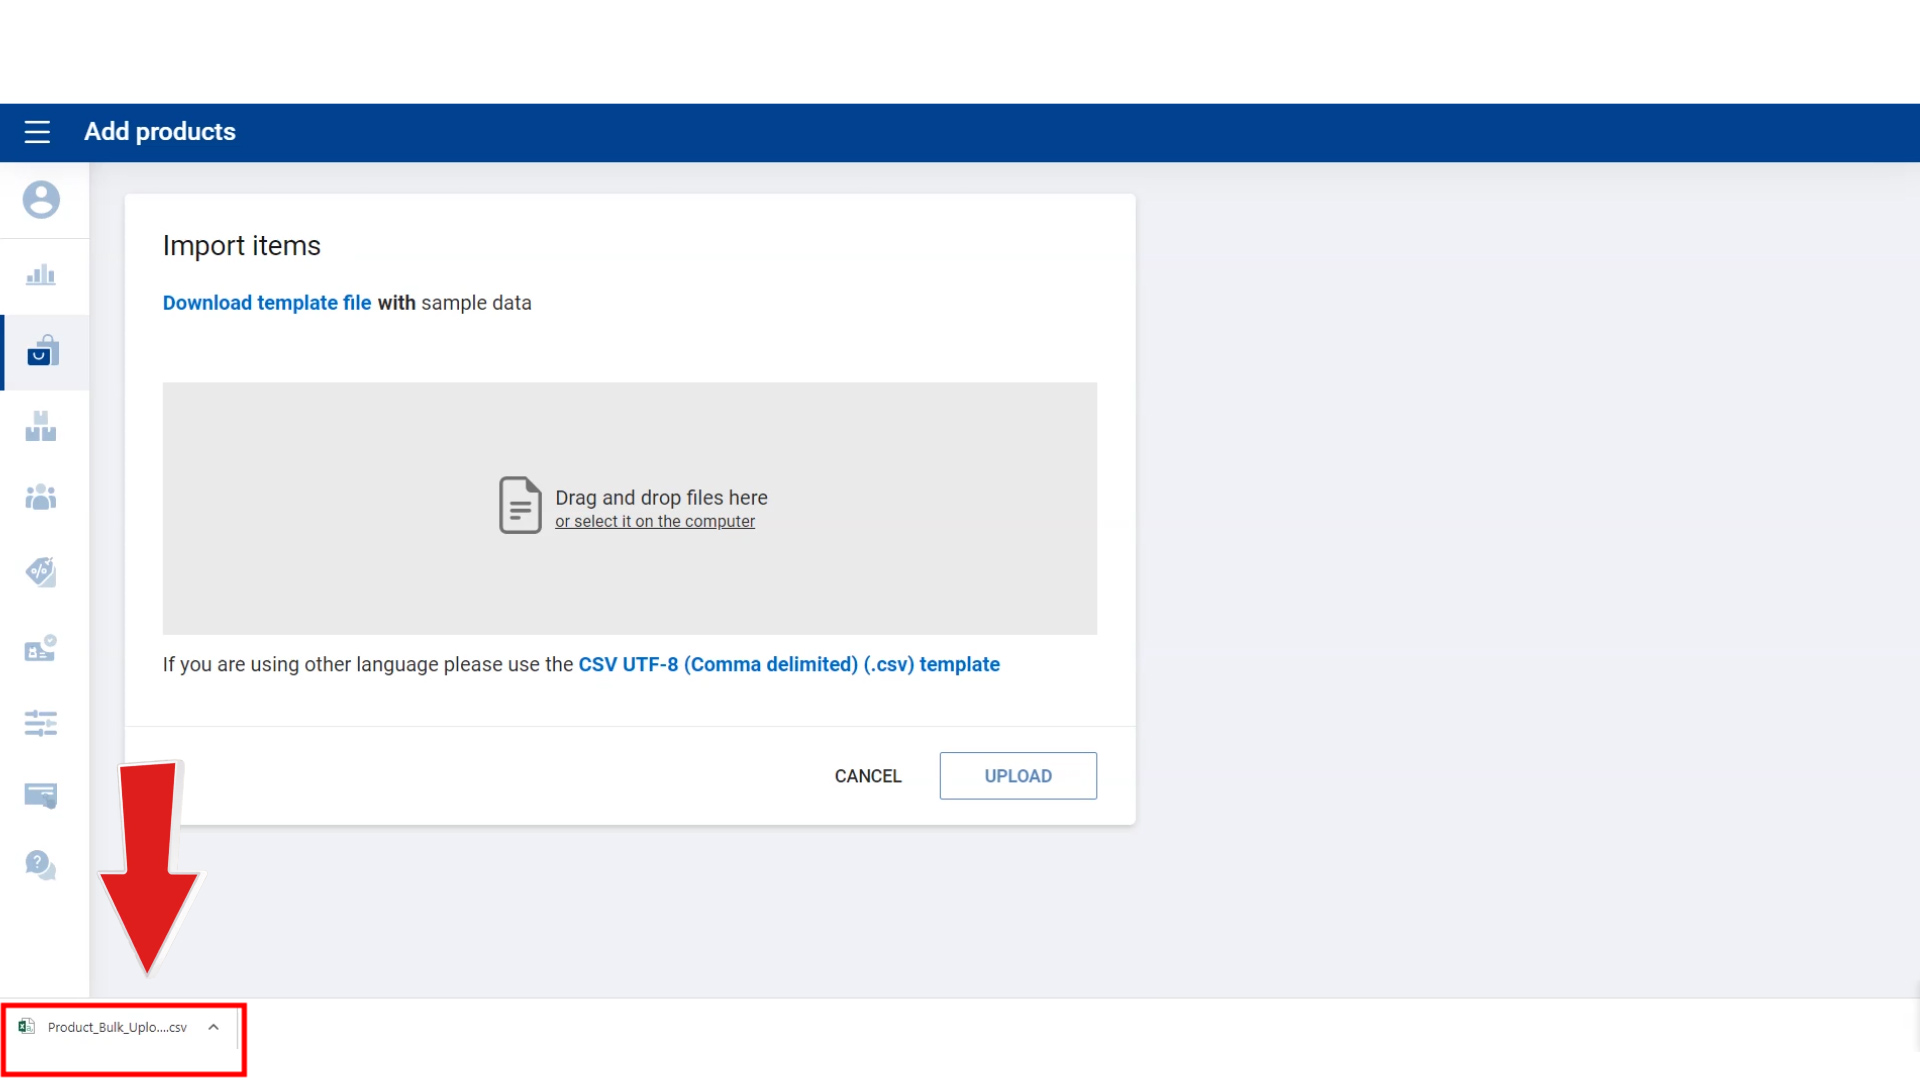
Step 2: Go to Product Section
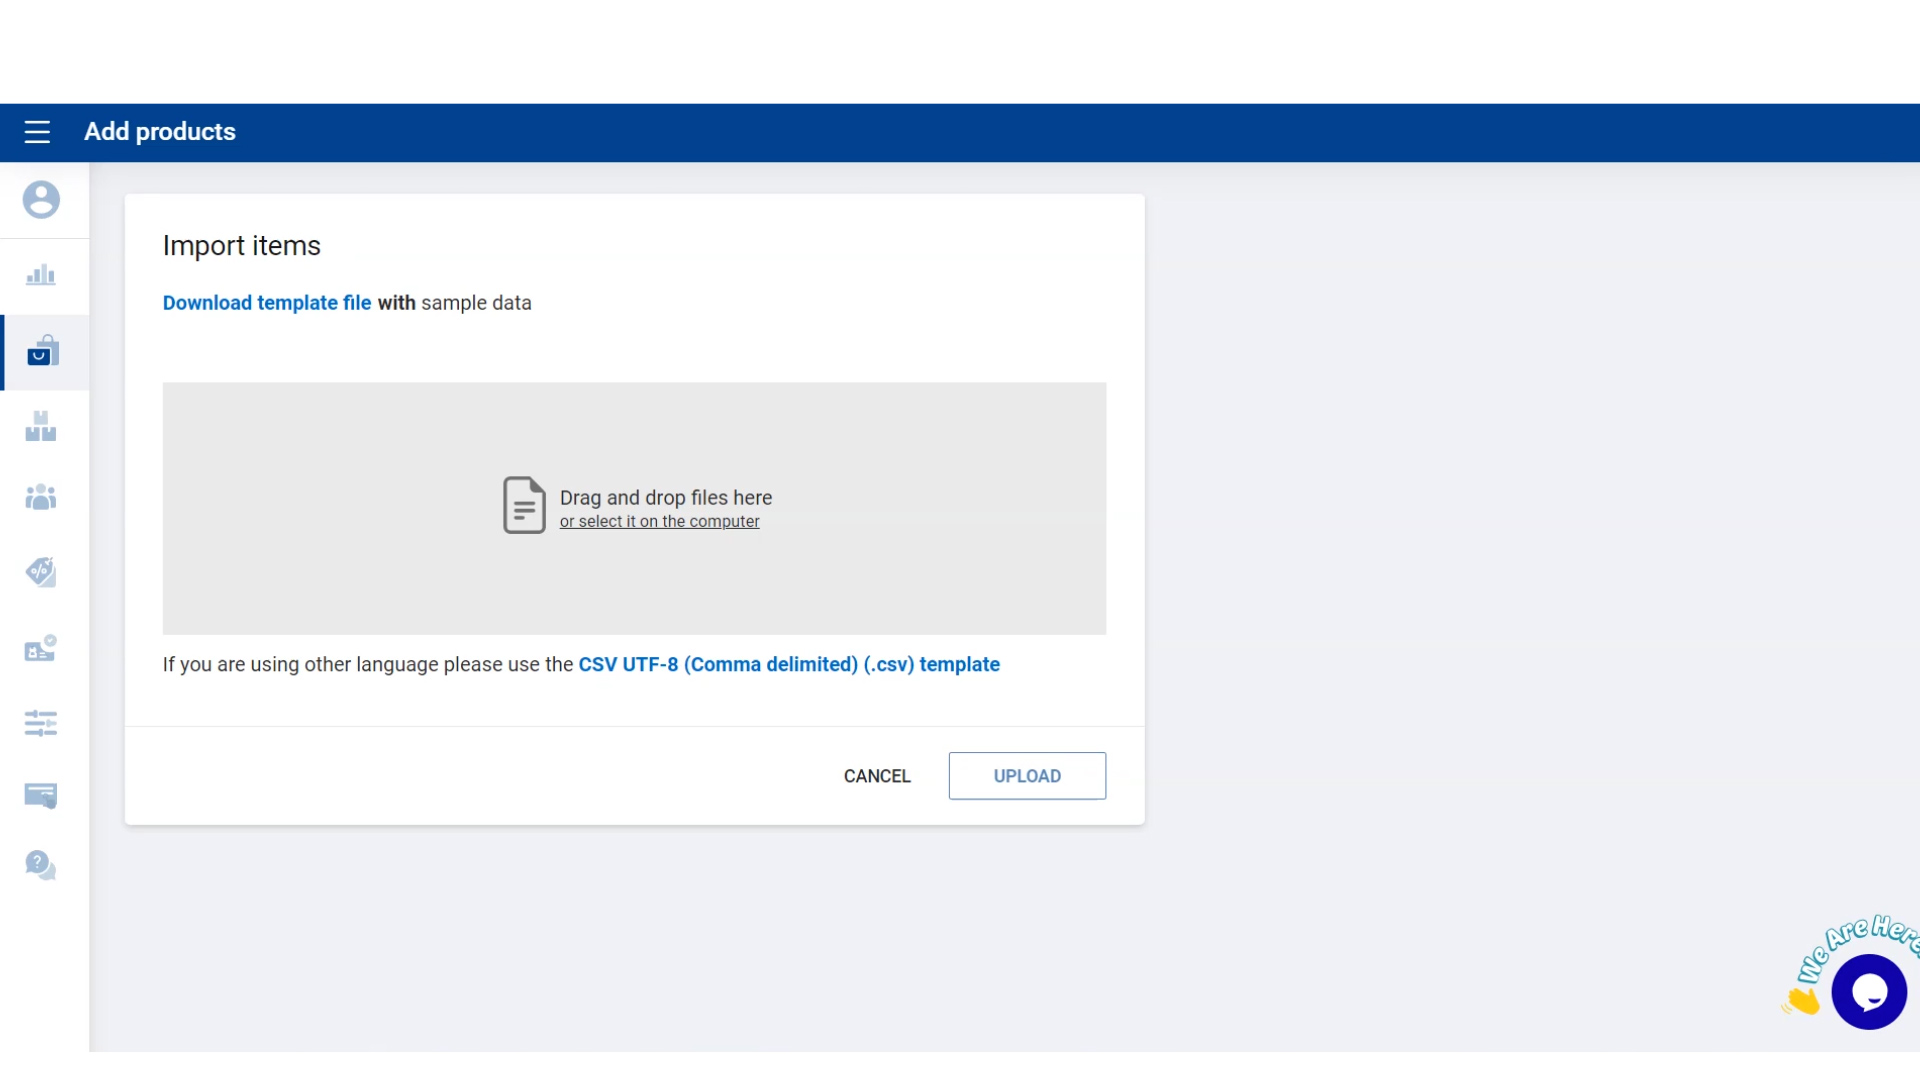
Step 3: Download and Fill the Template
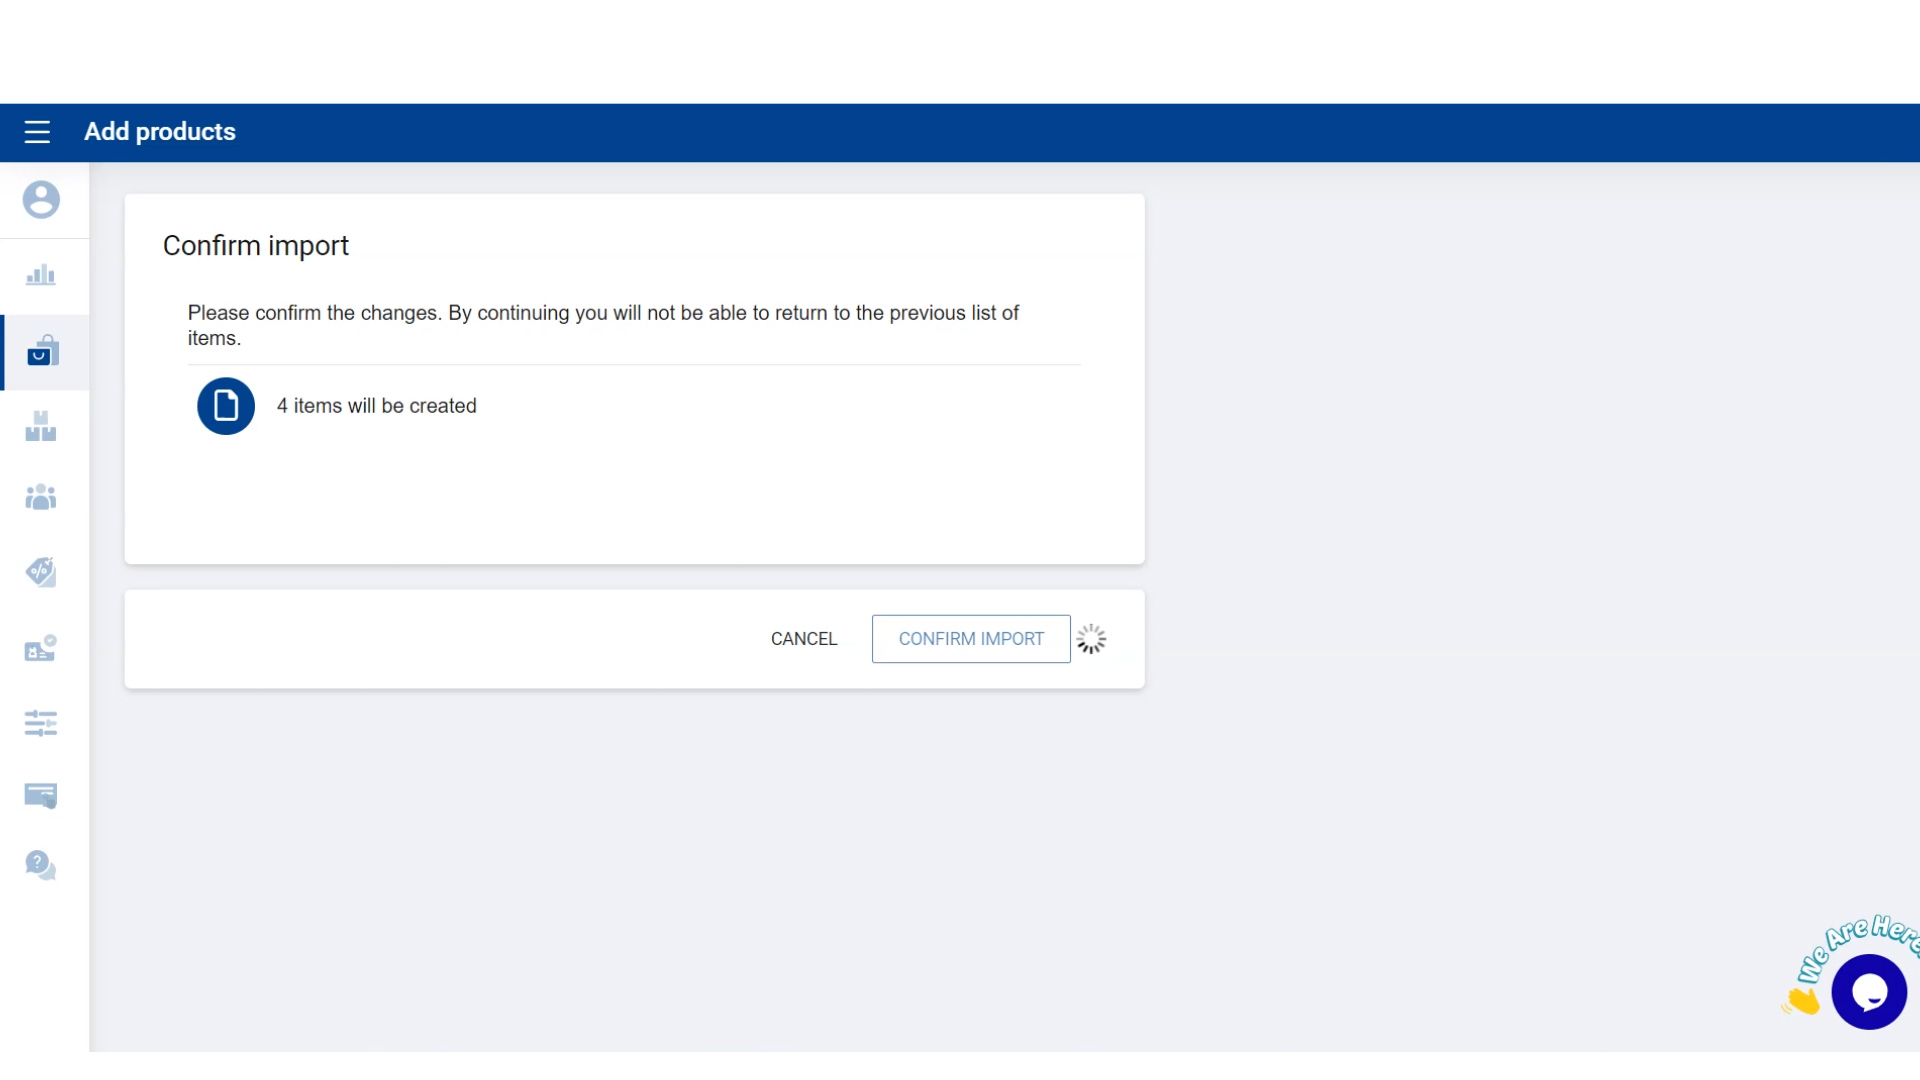
Step 4: Upload the CSV File
Once uploaded successfully, your products will appear in both the Backoffice and POS App.
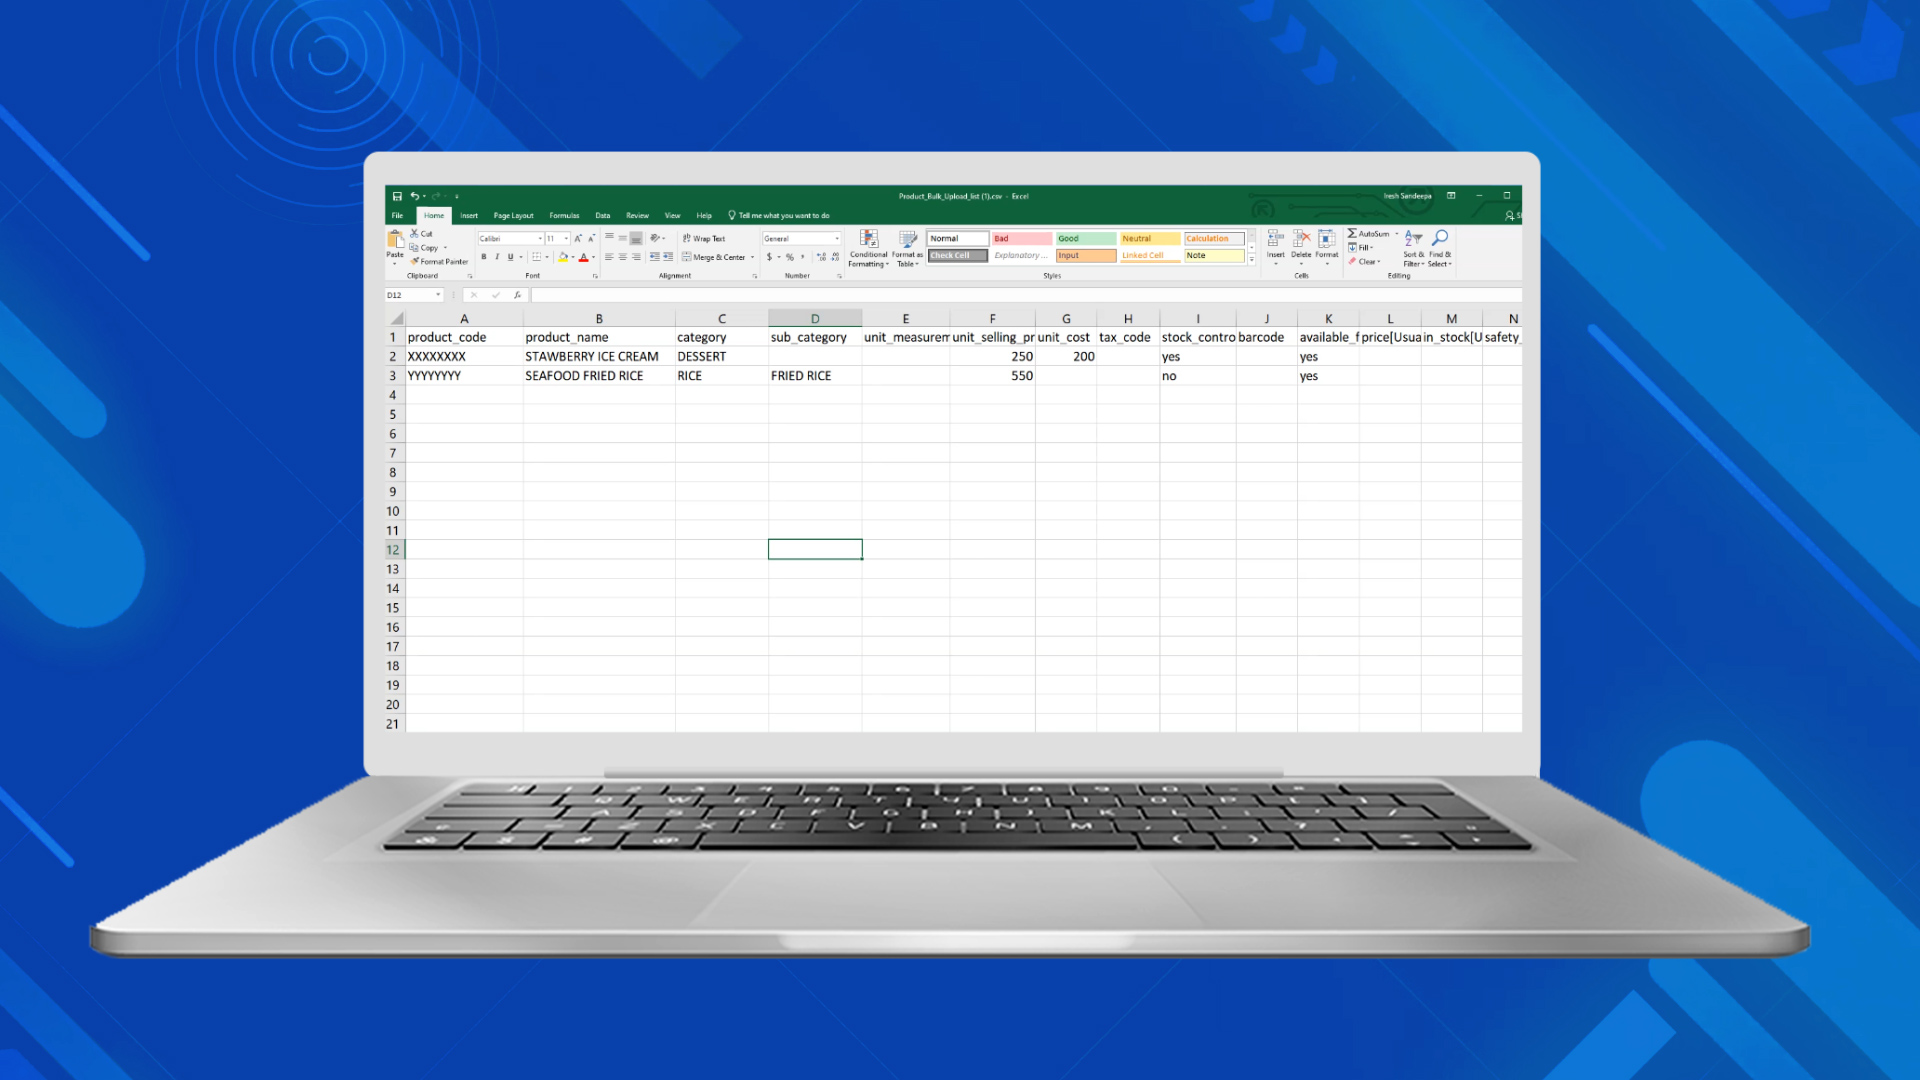
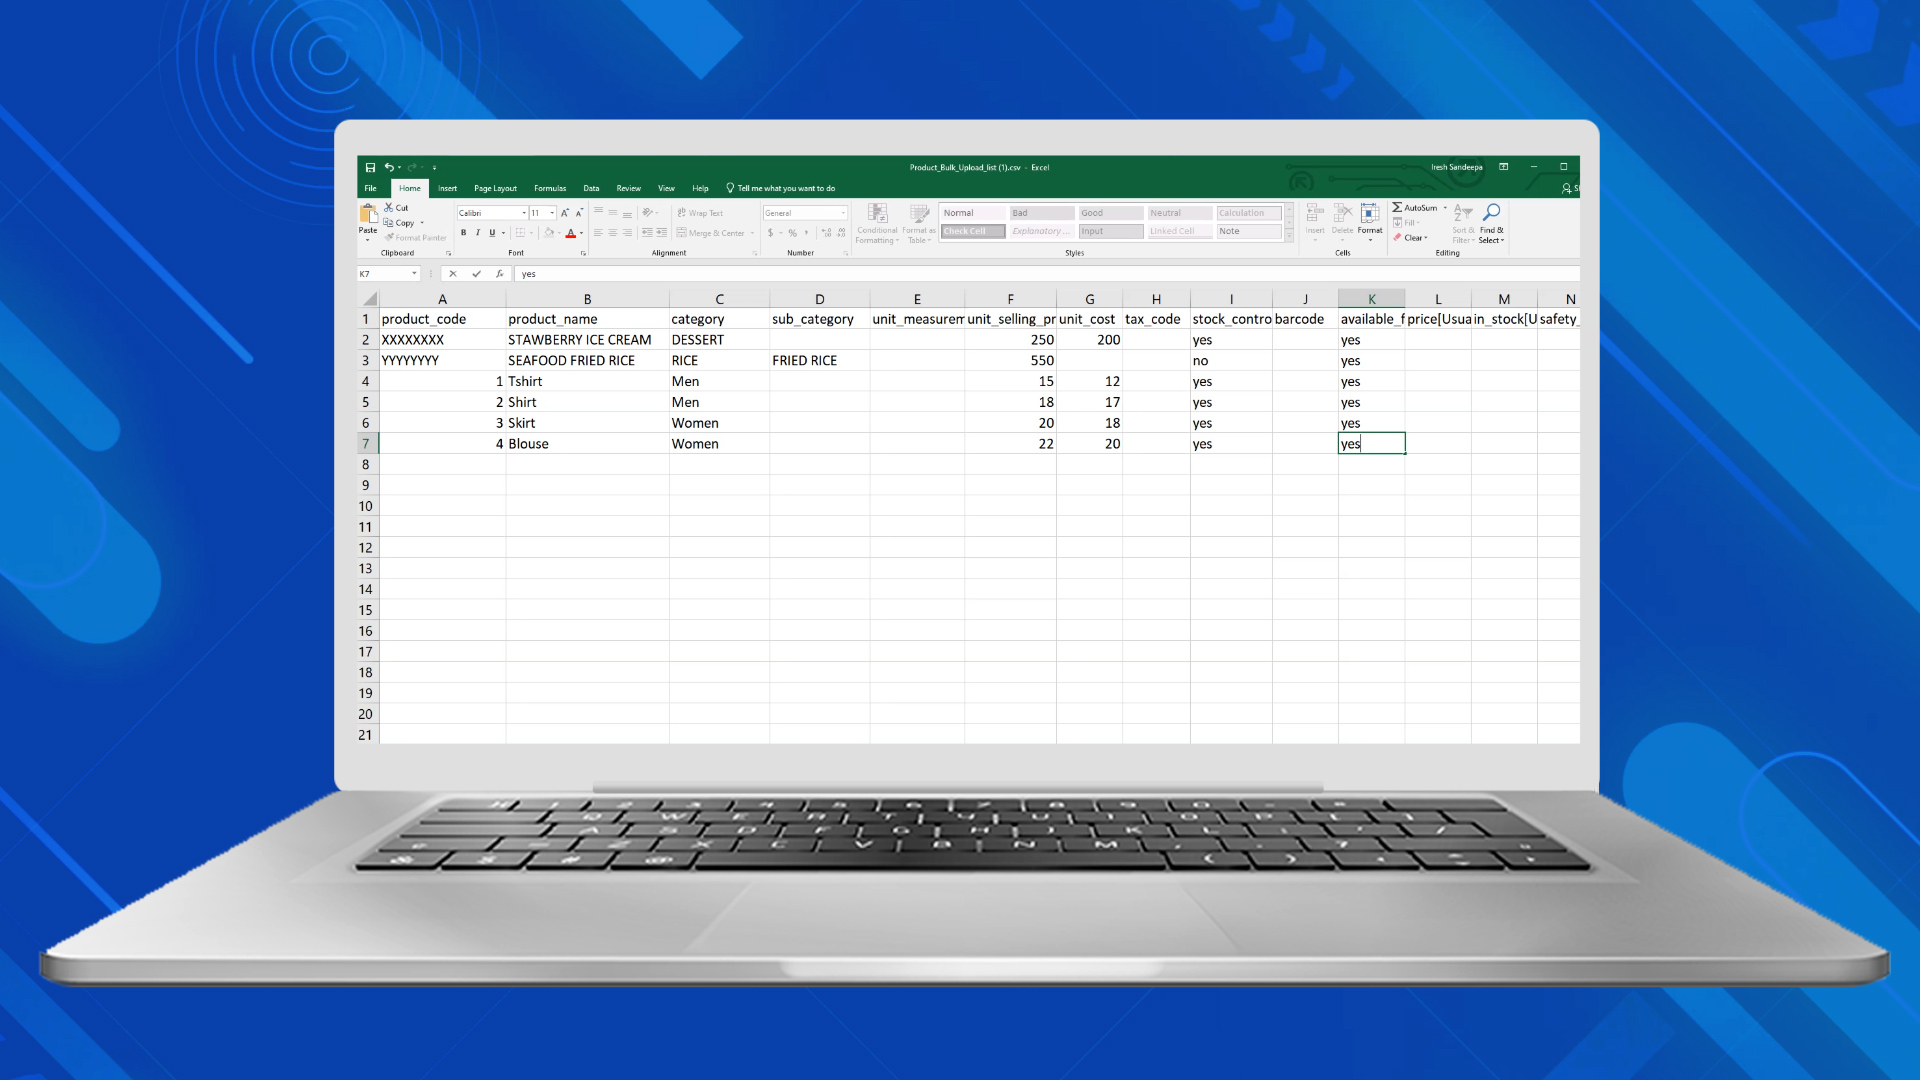
Basic Upload: Just Fill 5 Columns
For a quick and simple upload, you only need to fill 5 columns in the CSV file:
The product upload CSV file contains 30 fixed columns.
➡️ Do not rename, delete, or move any columns — this will cause an error during upload.
Below is a clear explanation of what each column means and how to fill it:
product_code – A unique product code (SKU). Can have up to 16 letters and numbers. No spaces allowed.
product_name – Name shown to customers and printed on receipts. Max 128 characters. Do not use emojis or special characters.
category – Product category (visible in POS App, not on receipt). Max 32 characters. Must match an existing category. If left blank, the product will appear under "no category".
sub_category – Optional. A sub-category shown in the POS App. Max 32 characters.
variant_product – If the product has variants (like size or color), enter "yes". Leave blank or type "no" if not.
handle – Optional. Used for referencing or linking variant products.
option_1_name – Name of the first variant type (e.g., Size).
option_1_value – Value of the first variant (e.g., Small).
option_2_name – Name of the second variant type.
option_2_value – Value of the second variant.
option_3_name – Name of the third variant type.
option_3_value – Value of the third variant.
unit_measurement – Unit of measurement (e.g., “g”, “kg”). Max 3 characters. Leave blank for “each”.
unit_selling_price – Price shown to customers during billing. If left blank, the product will show as 0 and be treated as a variable price.
mrp_enable – Enable MRP? Enter "1" for yes, "0" for no. Blank = no.
mrp_price – Maximum Retail Price (only if MRP is enabled).
unit_cost – The cost price of the product (not shown to customers).
stock_control – Should the system manage stock for this product? Enter "yes" or "no". Leave blank = no.
barcode – Product barcode. Max 50 characters.
product_code_of_included_item – For combo products, enter the SKU of the included item.
quantity_of_included_item – Quantity of the included item.
price_change – Can the cashier change the price during billing? Enter "yes" or "no".
quantity_change – Can the cashier change the quantity during billing? Enter "yes" or "no".
expiry_mode – Does the product have an expiry date? Enter "yes" or leave blank. If yes, expiry date must be added during stock entry (GRN).
ingredient_item – Is this a raw material or ingredient (not sold directly)? If "yes", it won't show in the POS App, only in the Backoffice.
description – Optional description or product details.
available_for_sale[SHOP NAME] – Should the product appear in the POS App? Enter "yes" to make it visible. If left blank or "no", the product will only appear in the Backoffice.
price[SHOP NAME] – Shop-specific selling price.
in_stock[SHOP NAME] – Current stock quantity available in this shop.
safety_stock[SHOP NAME] – Minimum stock level. When stock goes below this, a low stock alert will be shown.
Was this helpful?