Help | SalesPlay Help Center
How to Add a Payment Gateway

SalesPlay Back Office


1. Login to POS Back Office > Select “ Settings ” from main menu > Go to the “ Payment Types”


  • Click on “Add Payment Type” and create a new payment type
  • Tick On “Payment gateway enable”
  • Select PAX or Wallee Gateway from dropdown
  • Click the “Update” button


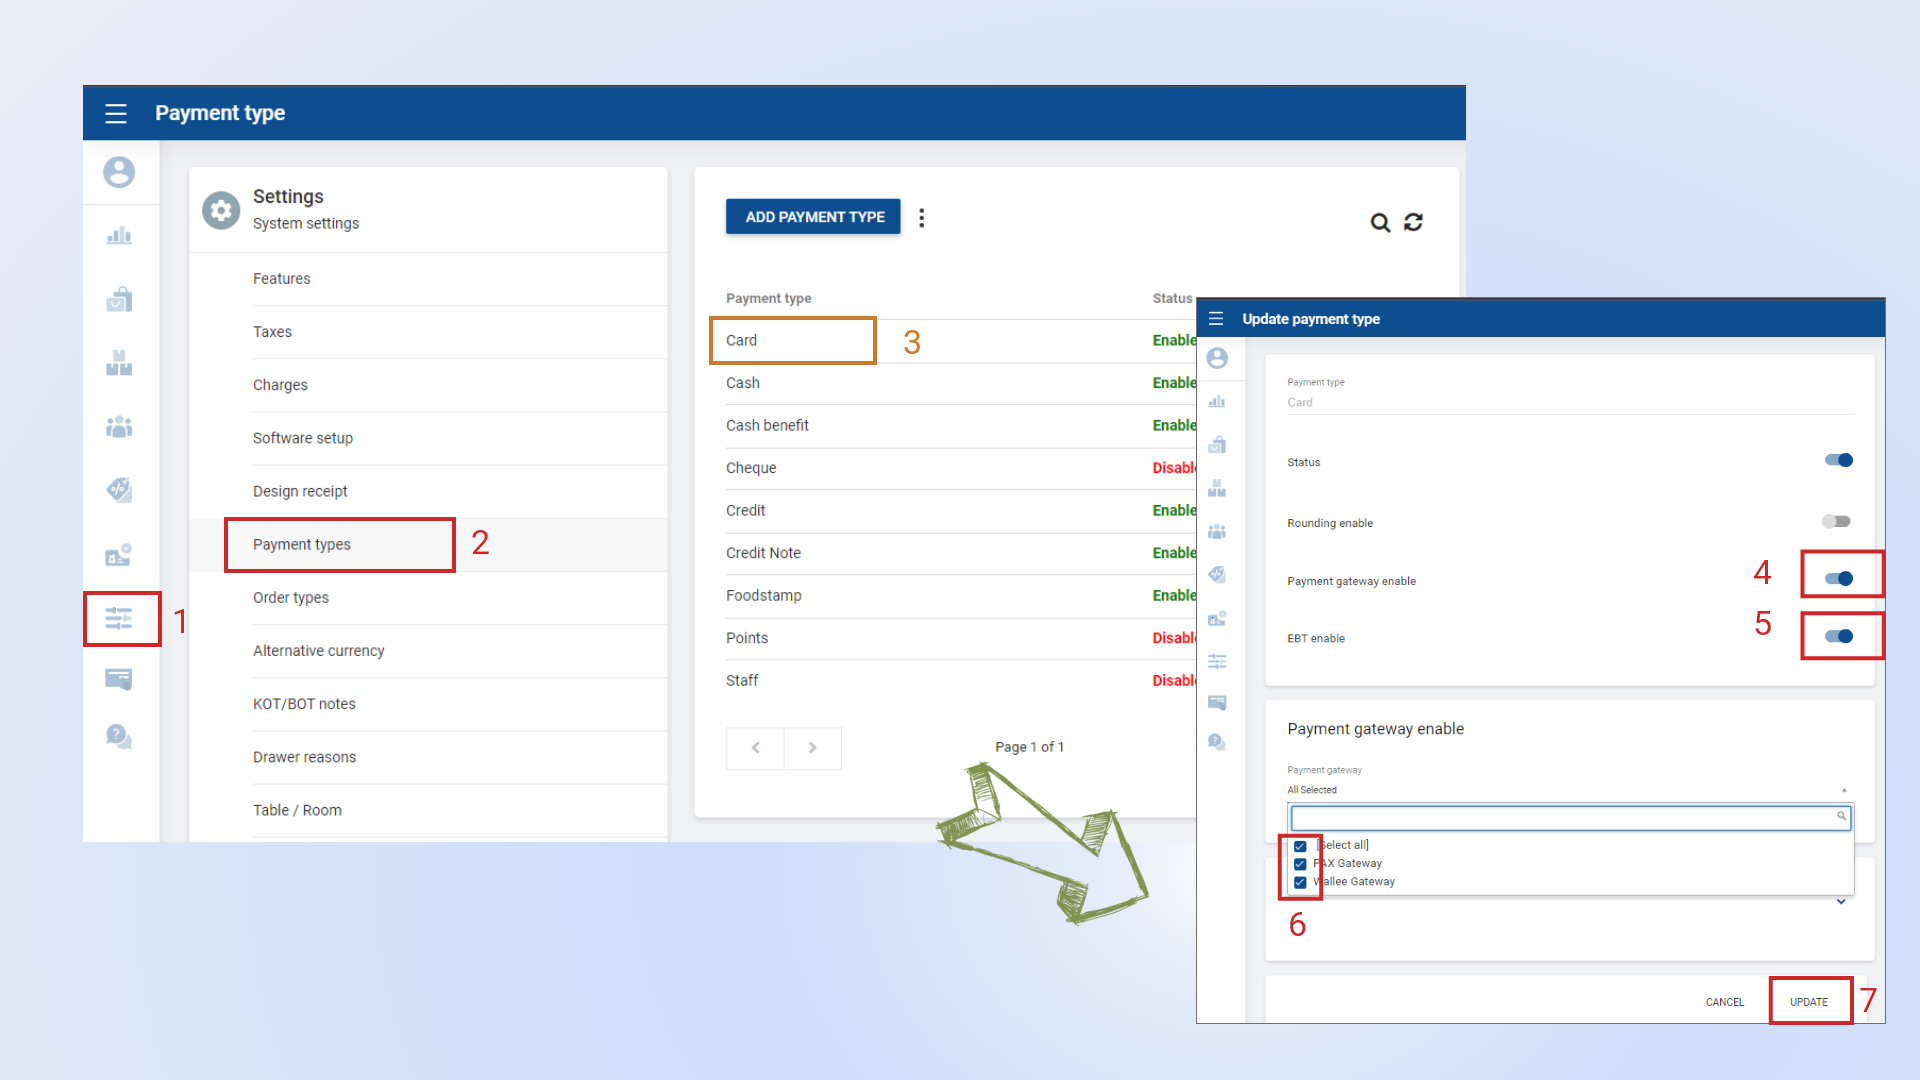
( PAX or Wallee devices should connected to the same Wi-Fi network which connected the POS Device)


2.1 Open the Sierra app on your A920, look for the Function tab and tap it. It will prompt for a password, go into System settings and scroll near the bottom, locate ECR-Terminal Integration Mode and change it from Internal POS/Standalone to External POS.


  • Then navigate to Wi-Fi settings for the terminal and enter the password pax9876@@ to get into settings. Go into Wi-Fi, click the Wi-Fi setting, click Wi-Fi network, and locate the IP address of the terminal. 
  • Navigation flow 
  • (Setting app -> add password - > select wifi connection -> add IP address in POS side) 
  • Once setup is complete go to TYTS application for payment process otherwise operation will not work. 

2. 2 Link POS App and PAX / Wallee Device


  • POS App main menu
  • Select “ Settings ”
  • Select “Payment Gateway”
  • Enter Payment Device’s IP Address and Port
  • Keep ON the status
  • Click ‘Save” button

3. How to Do a Transaction


POS App Side

  1. POS App main menu
  2. Select “ New Sale ”
  3. Select item and click “Charge” button
  4. Once you click “ Charge” button in Payment Interface, you will see payment types
  5. Click on the correct Payment type from dropdown menu
  6. Click “Charge” button
  7. Tick the correct gateway and click OK
  8. (At this moment customer card should be Tap / Swipe or Enter through the Card Machine)

Was this helpful?